

Hello everyone! At the invitation of 

After much thought I wanted to make a flower that, in addition to decorate can be useful in my daily work. So I present to you the tutorial on how to make a pincushion in the shape of a flower.
Hola a todos! Atendiendo la invitación de
Después de pensarlo mucho quise hacer una flor que, además de decorar pueda ser útil en mis labores diarias. Por lo que les presento el tutorial de como hacer un alfiletero en forma de flor.
🧵Thread and needle
🧵Fabric scraps
🧵Cardboard molds
🧵Scissors
🧵Cotton filling
🧵A magnet
🧵Felt
🧵Hilo y aguja
🧵Retazos de tela
🧵Moldes de cartón
🧵Tijera
🧵Relleno de algodón
🧵Un imán
🧵Fieltro

Tutorial
-The first thing to do is to cut the cardboard molds, we need a leaf-shaped mold, 2 circles, one large and one smaller.
-Lo primero que debemos hacer es cortar los moldes en cartón, necesitamos un molde en forma de hoja, 2 círculos uno grande y uno mas pequeño.

-We transfer the molds to the fabric. We need 6 small circles of the same color fabric.
-Transferimos los moldes a la tela. Necesitamos 6 círculos pequeños del mismo color de tela.


-When we have the pieces cut on the fabric, we will pass a seam along the edge of each circle like this:
-Cuando tenemos las piezas cortadas en la tela, vamos a pasar una costura por el borde de cada círculo asi:


-We proceed to stuffing, trying to tighten the seam so that we have a small ball.
-Procedemos a rellenar, tratando de ir apretando la costura para que nos quede una pequeña pelotita.


-We continue arming the 6 pellets.
-Seguimos armando las 6 pelotitas.


-Cut the largest circle in a piece of fabric of a different color than the 6 we made before. We do the same procedure to make a bigger ball.We join the 6 little balls around the biggest one, like this:
-Cortamos el círculo más grande en un trozo de tela de color diferente a los 6 que hicimos antes. Hacemos el mismo procedimiento para que quede una pelotita más grande.Unimos las 6 pelotitas alrededor de la más grande, así:


-Once we have the flower assembled, we are going to cut the leaf in a piece of fabric, preferably green. We cut 2 pieces and join them on the reverse side, flip and fill the leaf, together with the filling we introduce the magnet.
-Una vez que tenemos la flor armada, vamos a cortar la hoja en un trozo de tela preferiblemente color verde. Cortamos 2 piezas y unimos por el revés, volteamos y rellenamos la hoja, junto con el relleno introducimos el imán.


-We join the leaf to the flower we have assembled.
-Unimos la hoja a la flor que tenemos armada.


-We make an oval with the felt and we are going to join it with a double seam to the flower, so that it is resistant. It will be the base of the pincushion.
-Hacemos un ovalo con el fieltro y lo vamos a unir con una costura doble a la flor, para que quede resistente. Será la base del alfiletero.


-So how is our beautiful spring flower pincushion, to decorate our sewing corner.
-Así que cómo queda nuestro bello alfiletero de flor primaveral, para adornar nuestro rincón de costura.


On the flower leaf, we can stick needles, safety pins or any other material thanks to the magnet.
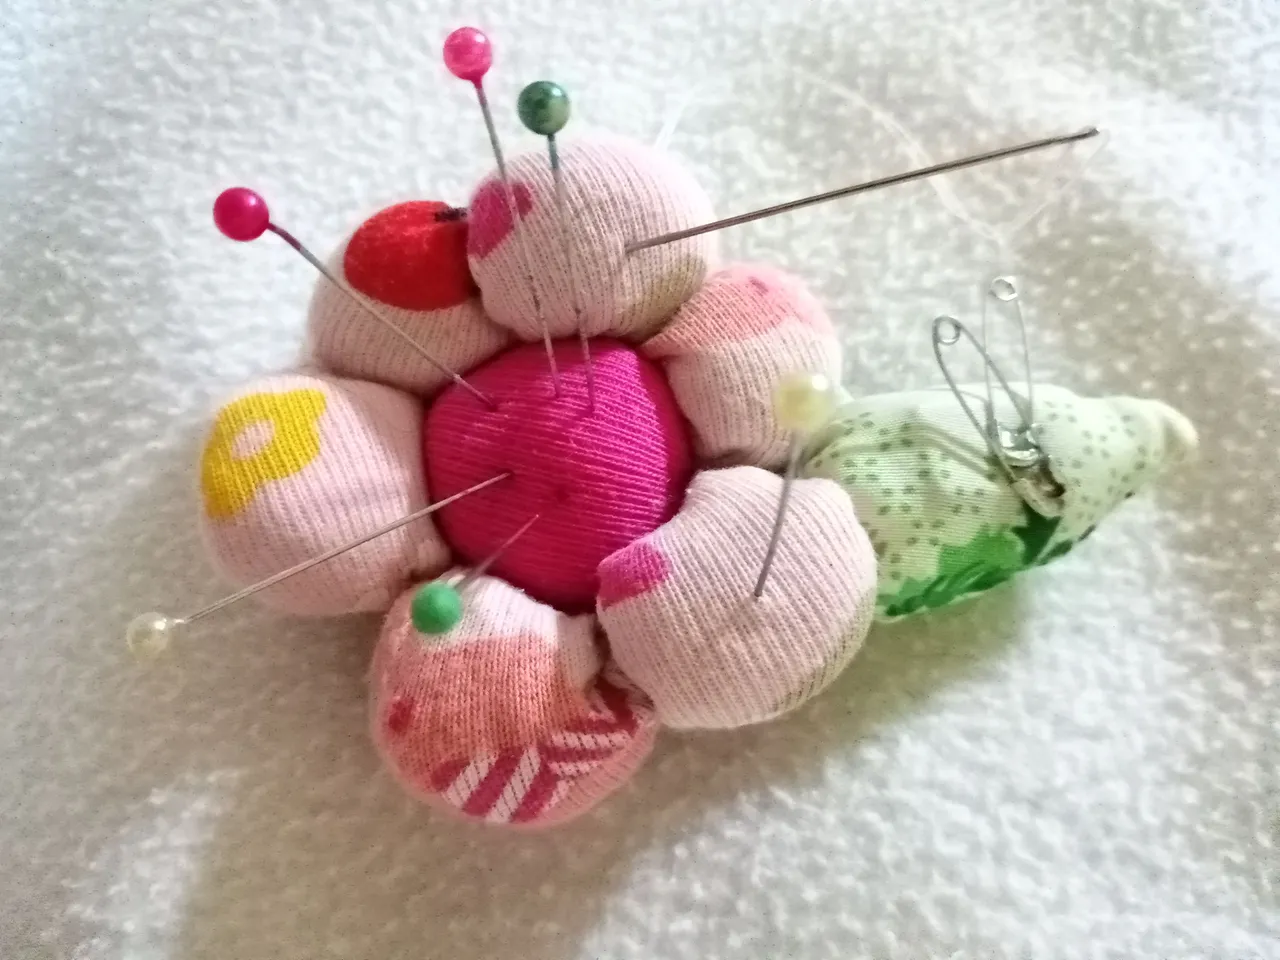
En la hoja podemos pegar agujas, imperdibles o cualquier cosa matálica gracias al imán.
I hope you like my participation in the contest and leave your comments. See you next time!
Espero que les guste mi participación en el concurso y que dejen sus comentarios. Hasta la próxima!
Contenido original del autor.
Recursos: Text on Photo app|| 📷Sony Cyber-Shot
Traducido con Deepl.com
Todos los Derechos Reservados
_
Original content by the author.
Resources: Text on Photo app || 📷Sony Cyber-Shot
Translation done with Deepl.com
All Rights Reserved
