✨🐮¡Hola amigos amantes de la creatividad! Espero que hayan pasado un muy buen comienzo de semana.🐮✨
Feliz de estar compartiendo una nueva publicación en una de mis comunidades favoritas. Como todas las semanas les comparto un tutorial del cual me siento realmente orgullosa en cuanto a los avances que he tenido en el tema de dibujo en foami. Este mes va a ser un poco de creaciones de este estilo porque estoy tratando de mejorar para comprar más materiales que me ayuden con este proceso. Pero bueno, esta vez les comparto un hermoso adorno de vaca para la cocina. Hace unos días mi papá trajo unas maderas cortadas en forma de paleta de cocina, pero no estaban lijadas, así que decidí lijarlas y ponerles barniz para decorar al menos una de ellas y ver cómo quedaba. Estoy muy feliz, porque fue muy tierno y quería compartir este proceso con ustedes.
🔸Sin más que añadir, a continuación los dejo con el paso a paso:
✨🐮¡Hello friends who love creativity! I hope you had a very good start to the week.🐮✨
Happy to be sharing a new post in one of my favorite communities. Like every week I share a tutorial of which I feel really proud in terms of the advances I have had in the subject of drawing in foami. This month is going to be a bit of creations of this style because I'm trying to improve myself to buy more materials to help me with this process. But hey, this time I'm sharing a beautiful cow ornament for the kitchen. A few days ago my dad brought some wood cut in the shape of a kitchen palette, but they weren't sanded, so I decided to sand them and put varnish on them to decorate at least one of them and see how it would look. I am very happy, because it was very tender and I wanted to share this process with you.
🔸Without more to add, then I leave you with the step by step:

♥️ESPERO QUE TE GUSTE,
¡Empecemos!
♥️I HOPE YOU LIKE IT,
Let's start!

🥄 MATERIALES | 🥄 MATERIALS
- Paleta o cuchara de madera.
- Foami blanco.
- Foami marron claro.
- Foami marron oscuro.
- Foami color piel.
(Clara u oscura).
🌸Para la flor:
- Foami amarillo.
- Foami fucsia escarchado.
- Foami dorado escarchado.
✂️Resto de materiales:
- Pintura blanca.
- Marcadores.
- Sombras o tizas.
- Lija suave.
- Barniz.
- Regla.
- Hoja.
- Tijera.
- Palette or wooden spoon.
- White foam.
- Light brown foam.
- Dark brown foam.
- skin color foami.
(Either light or dark).
🌸For the flower:
- Yellow foam.
- Frosted fuchsia foami.
- Frosted golden foami.
✂️Other materials:
- White paint.
- Markers.
- Shadows or chalks.
- Sandpaper smooth.
- Varnish.
- Ruler.
- Sheet.
- Scissors.

🐮 PROCEDIMIENTO | 🐮 PROCESS
- PASO 1:
Lo primero que hice fue lijar todos los bordes de la paleta de madera para que quedaran lisos y sin astillas. Una vez lisa y prolija, con la ayuda de un taladro, abre un hueco en la parte superior del mango para colgar la decoración. Si notamos que hay astillas en el agujero, volvemos a pasar la lija, hasta que quede prolijo.
- STEP 1:
The first thing I did was sand all the edges of the palette so they were smooth and there were no splinters. Once smooth and neat, with the help of a drill, open a hole in the upper part of the handle to hang the decoration. If we notice that there are splinters in the hole, we pass the sandpaper again, until it is neat.


- PASO 2:
Tomar un poco de barniz con una brocha o esponja, aplica una primera capa y deja secar (aprovecha el agujero que hiciste antes para colgar la paleta). Una vez seco, aplica otra capa de barniz. Puedes agregar tantas capas como desees, hasta obtener la tonalidad de tu elección, solo procura dejar que cada capa se seque muy bien.
- STEP 2:
Take a bit of varnish with a brush or sponge, apply a first layer and let it dry (take advantage of the hole you made earlier to hang the palette). Once dry, apply another layer of varnish. You can add as many layers as you want, until you get the hue of your choice, just try to let each layer dry very well.


- PASO 3:
Para empezar a hacer la vaca, vamos a dibujar las partes de su cuerpo individualmente en una hoja blanca y las vamos a recortar. Cuando tengamos todas las piezas, las vamos a calcar y cortar en el color de foami correspondiente. En mi caso: la cabeza de 5 cm en foami blanco y las orejas de 4,5 cm en foami blanco. La trompa de 6 cm en foami color piel y el interior de las orejas de 2 cm en color piel. Los cuernos de 1,5 cm en foami marrón oscuro y el pelo de 5 cm en marrón claro.
- STEP 3:
To start making the cow, we are going to draw the parts of its body individually on a white sheet and cut them out. When we have all the pieces, we are going to trace and cut them in the corresponding color of foami. In my case: the 5 cm head in white foam and the 4.5 cm ears in white foam. The trunk of 6 cm in skin-colored foami and the inside of the ears of 2 cm in skin-colored. The 1.5 cm horns in dark brown foami and the 5 cm hair in light brown.


- PASO 4:
Es hora de darle un poco de color con tizas o sombras, si en tu caso son sombras; toma un paño de algodón unta un poco de sombra y aplica solo en los bordes del foami. Para la cabeza y las orejas, pinte el borde de negro, para el interior de las orejas y la trompa, pinte de un rosa oscuro. Finalmente, para el cabello un tono más oscuro que el color del foami.
- STEP 4:
It is time to give it a little color with chalk or shadows, if in your case they are shadows; take a cotton cloth smear some shadow and apply only to the edges of the foami. For the head and ears, paint the rim black, for the inside of the ears and trunk, paint a dark pink. Finally, for the hair a darker tone than the color of the foami.


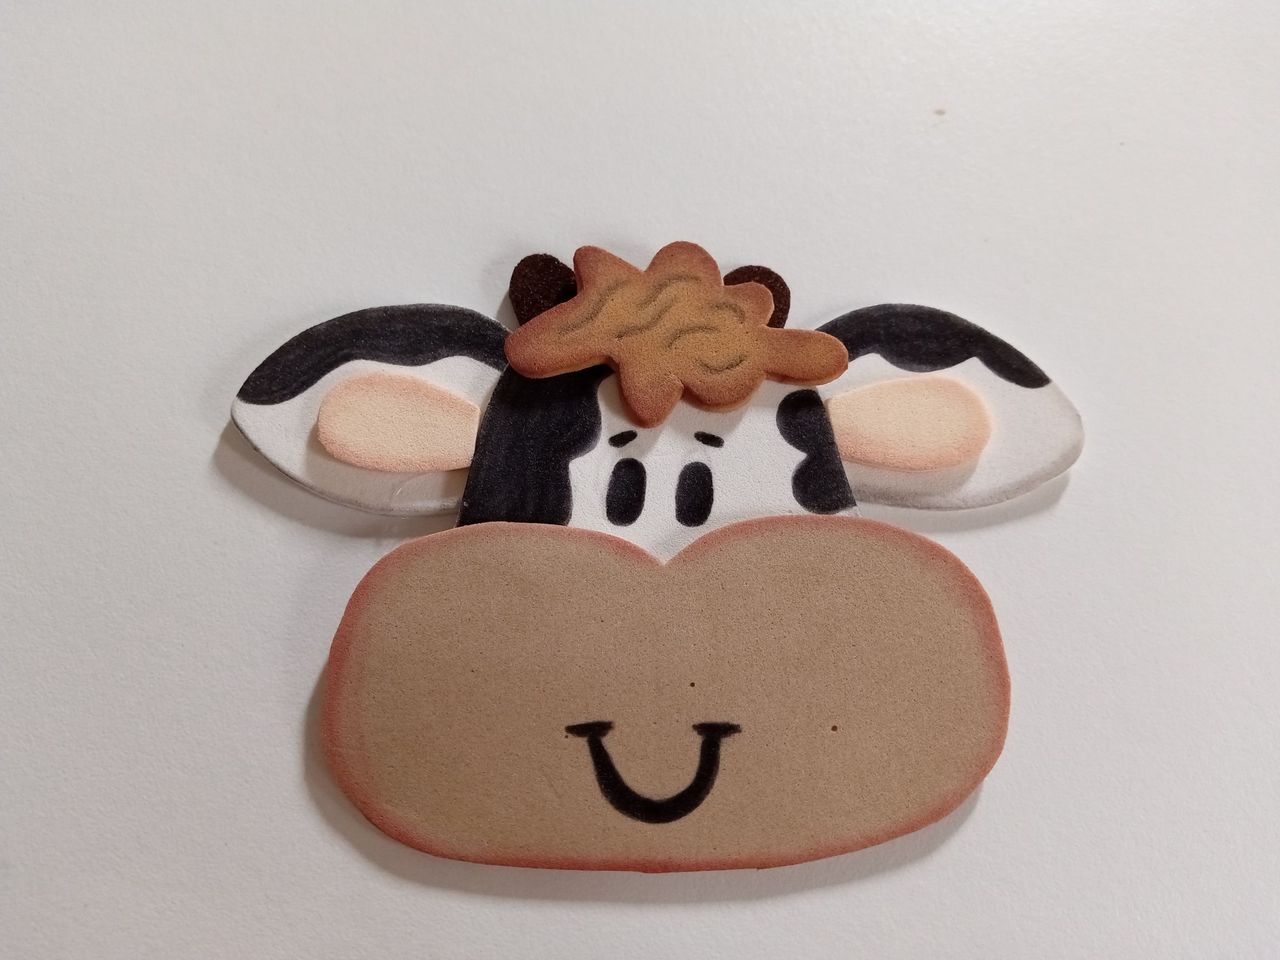
- PASO 5:
Dibuja con un lápiz las manchas de la vaca en la cabeza y las orejas, luego rellena con pintura o marcador negro. Armar la Vaca con cada pieza donde corresponda y finalmente pega el cabello y dale algunos detalles con tiza o lápiz para hacer las ondas del cabello.
- STEP 5:
Draw with a pencil the spots of the cow on the head and ears, then fill in with paint or black marker. Assemble the Cow with each piece where it corresponds and finally, glue the hair and give some details with chalk or a pencil to make the waves of the hair.


- PASO 6:
Dibuja los ojos, las cejas y la boca, con ayuda de un marcador negro. Si prefieres, dibuja con un lápiz antes de pasar el marcador. Tome un poco de sombra de ojos rosa y coloque el rubor en cada lado de su boca. Dibuja unas líneas curvas para darle forma de nariz y por último, con ayuda de la punta de un lápiz toma un poco de pintura blanca, coloca un punto en cada ojo y puntos blancos por toda la figura para dar luz.
- STEP 6:
Draw the eyes, eyebrows and mouth, with the help of a black marker (If you prefer, draw with a pencil before passing the marker). Take some pink eyeshadow and place the blush on each side of your mouth. Draw some curved lines to give it the shape of a nose and finally, with the help of the tip of a pencil, take some white paint, place a dot on each eye and white dots throughout the figure to give light.


- PASO 7:
En este punto, pega la figura de la vaca debajo del hueco de la paleta y como otra opción puedes cortar una tira de tela y atar debajo de la figura, formando un lindo lazo.
- STEP 7:
At this point, glue the figure of the cow under the hole of the palette and as another option you can cut a strip of fabric and tie under the figure, forming a nice bow.


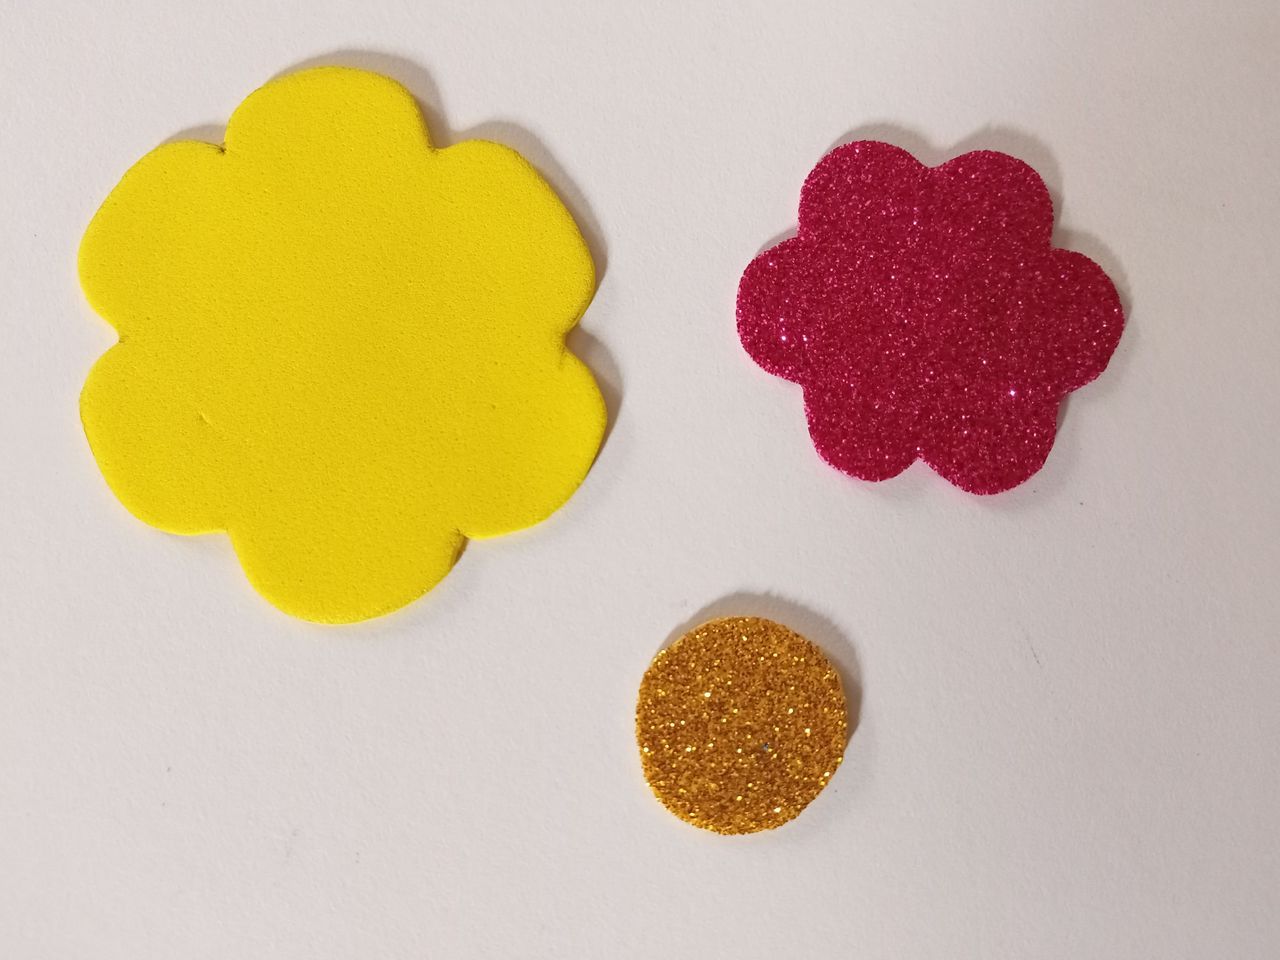
- PASO 8:
También dibuja y recorta una flor en foami amarillo, y en foami fucsia la misma flor un poco más pequeña, así como un círculo en foami dorado para el centro de la flor. Dale color a la flor amarilla con sombras en el borde y unos puntos con pintura blanca . Con ayuda de la plancha, dale relieve a las flores, quita y hunde el centro de las flores con el dorso de un marcador. Pega la flor pequeña en el centro de la grande y el centro de la flor. Finalmente, pegar en el centro del lazo.
- STEP 8:
Also draw and cut out a flower in yellow foam, and in fuchsia foam the same flower a little smaller, as well as a circle in gold foam for the center of the flower. Give color to the yellow flower with shadows on the edge and some dots with white paint. With the help of the iron, give relief to the flowers, remove and sink the center of the flowers with the back of a marker. Glue the small flower in the center of the big one and the center of the flower. Finally, glue in the center of the loop.


✨🐮¡Y listo!🐮✨ Así pueden hacer esta hermosa decoración para la cocina, me parece un lindo detalle para regalar a sus mamás o abuelas. Aunque parece un poco complicado no lo es, en mi caso fue más fácil de lo que pensé y aproveché usando las paletas de madera que trajo mi papá. Si en tu caso no tienes paleta o cuchara de madera, puedes hacerlo en foami o cartulina. Espero que les haya gustado y se animen a hacerlo.
❤️Hasta la próxima publicación.
✨🐮¡And ready!🐮✨ This is how they can make this beautiful decoration for the kitchen, I think it is a nice detail to give to their mothers or grandmothers. Although it seems a bit complicated, it is not, in my case it was easier than I thought it would be and I took advantage of using the wooden palettes that my dad brought. If in your case you do not have a palette or wooden spoon, you can make it in foami or cardboard. I hope you liked it and are encouraged to make it
❤️Until the next post.
✨RESULTADO: | ✨RESULT:


!TE DESEO UN GRAN DÏA¡
Todas las fotografías son de mi propiedad.
Separador y Fotos editadas en Canva
!I WISH YOU A GOOD DAY
All photographs are my property.
Photos edited in Canva