✨🌙¡Hola amigos amantes de la creatividad! Espero hayan tenido un muy buen inicio de semana.🌙✨
Hoy comparto con ustedes una linda decoración para la habitación. Para los que no han visto mis posts anteriores, me encanta traer decoraciones para adornar algún rincón de la casa, en esta oportunidad les traigo una linda decoración que, si bien la elabore pensando en una habitación, puede ser para decorar el espacio que desees. Sin embargo, también puede ser una gran idea como decoración para la época navideña, ya falta muy poco para que llegue mi época favorita y así traerles lindas decoraciones. Quise elaborar una luna en 3D acompañada de dos estrellas colgadas, la realice en 3D ya que, me parece que se vería más glamoroso y hasta que exista la duda entre si es comprada o no, creo que hablo en nombre de todos cuando digo que nos encanta la pregunta: ¿dónde lo compraste? Y muy sonriente, responder: Yo lo hice.
🔸A continuación, los dejo con el paso a paso:
✨🌙 Hello friends who love creativity! I hope you had a very good start to the week.🌙✨
Today I share a beautiful decoration for the room of the moon and the stars. For those who have not seen my previous posts, I love to bring you ornaments to decorate some corner of the house, this time I bring you a nice ornament that although I did it thinking of a room, it can be to decorate the space that you like However, it can also be a great idea as a decoration for the Christmas season, it's almost time for my favorite season to come and bring you beautiful decorations. I wanted to make a 3D moon accompanied by two hanging stars, I made it in 3D since, I think it would look more professional and until there is any doubt whether to buy it or not, I think I speak for everyone when I say that we love the question: where did you buy it? And very smiling, he replies: I did it.
🔸Here I leave you with the step by step:

♥️ESPERO QUE TE GUSTE,
¡Empecemos!
♥️I HOPE YOU LIKE IT,
Let's start!

✨ MATERIALES | ✨ MATERIALS
Foami escarchado plateado.
Foami escarchado dorado.
Cartulina metalizada dorada o tachuelas.
Cartón grueso.
Hoja blanca.
Cinta o hilo.
Abre huecos.
Silicón caliente.
Tijeras.
Regla.
Lápiz.
Silver frosted foami.
Gold frosted foami.
Gold metallic cardstock or thumbtacks.
thick cardboard.
white sheet
Ribbon or thread.
Open holes.
hot silicon.
Scissors.
Rule.
Pencil.

🌙 PROCEDIMIENTO | 🌙 PROCESS
Al finalizar el post les dejo los enlaces de las imágenes de referencia y los patrones que utilicé.
At the end of the post I leave you the links of the reference images and the patterns that I use.
- PASO 1:
Lo primero que debemos hacer es dibujar en una hoja de papel lo que sería el patrón de la luna, utilicé las siguientes medidas: 14 cm de largo y 12.5 cm de ancho. Una vez hecho esto, transfiere al cartón con la ayuda de un lápiz y recortar.
- STEP 1:
The first thing we must do is draw on a sheet of paper what would be the pattern of the moon, I used the following measurements: 14 cm long and 12.5 cm wide. Once this is done, transfer it to the cardboard with the help of a pencil and cut it out.


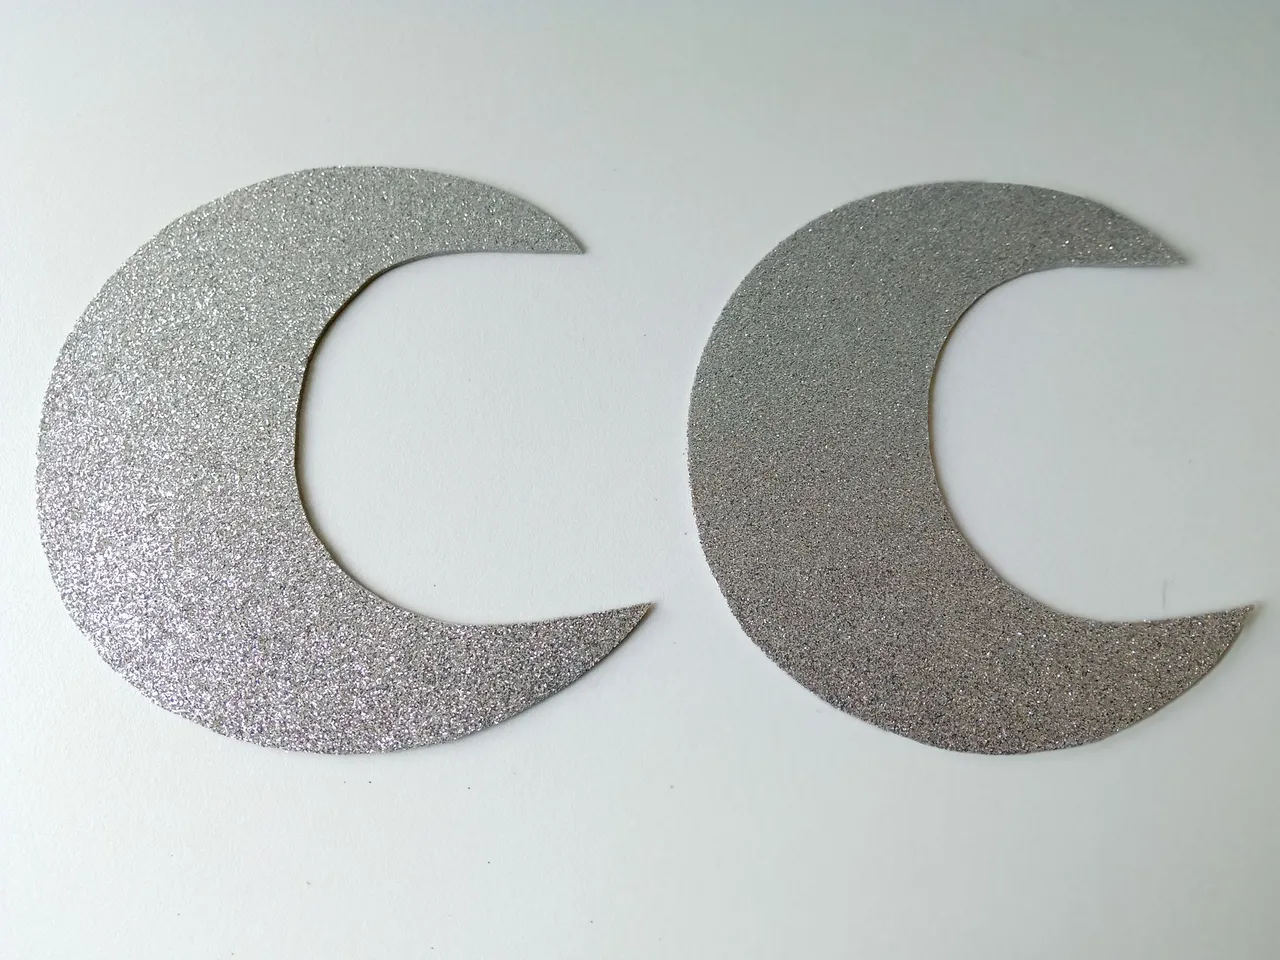
- PASO 2:
Luego, dibuja la luna dos veces en el foami escarchado plateado y pega una a cada lado del cartón; es decir, uno delante y otro detrás del cartón, dejando el cartón en medio de ambos.
- STEP 2:
Then, draw the moon twice on the silver frosted foami and glue one to each side of the cardboard; that is, one in front and one behind the cardboard, leaving the cardboard in the middle of both.

- PASO 3:
Continuamos, medir el ancho de los laterales, en mi caso: 0.7cm. Cortar una tira con este ancho y, con ella, cubre todo el borde de la luna, poco a poco para que el acabado quede prolijo.
- STEP 3:
We continue, measure the width of the sides, in my case: 0.7cm. Cut a strip with this width and, with it, cover the entire edge of the moon, little by little so that the finish is neat.


- PASO 4:
Tomar la cartulina metalizada dorada, hacer unos círculos con ayuda del abridor de huecos y pegar al frente de forma desordenada o la cantidad deseada en el frente de la luna.
- STEP 4:
Take the gold metallic cardboard, make some circles with the help of the hole opener and stick them to the front in a disorderly way or the desired amount on the front of the moon.


- PASO 5:
Una vez hecho esto, dibujar patrones de dos estrellas, una más pequeña que la otra, transfiere al foami escarchado dorado dibujando dos estrellas de ambos tamaños y recorta.
- STEP 5:
Once this is done, draw patterns of two stars, one smaller than the other, transfer to the gold frosted foami by drawing two stars of both sizes and cut out.

- PASO 6:
Tomar la estrella grande, peguar un trozo de cinta doblada por la mitad en la parte superior, otra cinta en la parte inferior y peguar la otra estrella encima, cubriendo así las cintas.
- STEP 6:
Take the big star, glue a piece of ribbon folded in half to the top, another ribbon to the bottom, and glue the other star on top, thus covering the ribbons.


- PASO 7:
Pegar la cinta en la parte de atrás de la luna, un poco antes de llegar al extremo y cubrir la cinta con un trozo de foami escarchado plateado. Luego pega las estrellas más pequeñas una encima de la otra, deja un agujero en la parte superior y pegar la cinta.
- STEP 7:
Stick the ribbon on the back of the moon, a little before reaching the end and cover the ribbon with a piece of silver frosted foami. Then glue the smaller stars on top of each other, leave a hole at the top and glue the ribbon.


- PASO 8:
Para terminar hacer la base para la luna, dibujar un círculo de 12x12 cm sobre el cartón y sobre el foami escarchado dorado, recortar, pegar ambos con silicona caliente, cortar una tira de foami escarchado dorado de 0.8cm, pegar en el borde del foami y pegar la luna en el medio de esta base.
- STEP 8:
To finish making the base for the moon, draw a 12x12 cm circle on the cardboard and on the gold frosted foami, cut it out, glue both with hot silicone, cut a 0.8cm strip of gold frosted foami, paste on the edge of the foami and paste the moon in the middle of this base.


✨🌙¡Y listo!🌙✨ Así es como se elabora esta linda luna 3D acompañada de dos estrellas, ideal para decorar una habitación o incluso, como decoración para alguna fiesta, si se elabora de un tamaño mayor al mencionado. Espero se animen a elaborarla. Nos vemos en un próximo post.
✨🌙¡And ready!🌙✨ This is how this beautiful 3D moon accompanied by two stars is made, ideal for decorating a room or even as a decoration for a party, if it is made larger than the size mentioned. I hope you are encouraged to make it. See you in a next post.
Imágen de referencia:
Aquí
Reference image:
Here


Todas las fotografías son de mi propiedad.
Separador y Fotos editadas en Canva
All photographs are my property.
Photos edited in Canva