✨¡Hola amigos amantes de la creatividad! Espero que estén todos bien.✨
¡Buenas tardes, amigos! Espero estén pasando una excelente semana. Por mi parte, contenta de pasar por acá a compartir una nueva creación con ustedes. En esta ocasión les comparto el paso a paso para elaborar unas lindas decoraciones navideñas para el árbol. Continuamos con las creaciones navideñas, así que pensando un poco en alguna idea para decorar mi árbol se me ocurrió elaborar algo diferente, algo con un reno o con muñecos de nueve y como nunca me decidí qué idea me gustaba más, hice ambas jaja.
Al ver el resultado de las creaciones quede enamorada, pero tengo que ver si al final me decido a elaborar unos cuantos más o me voy por una decoración más sencilla para mi árbol de este año. Sin embargo, sé que les viene bien esta idea por si les gusta para decorar sus arbolitos.
🔸Sin más que añadir, a continuación los dejo con el paso a paso:
✨¡Hello friends who love creativity! I hope you are all well.✨
Good afternoon, friends! I hope you are having a great week. For my part, I am happy to stop by here to share a new creation with you. On this occasion I am sharing with you the step by step to make some beautiful Christmas decorations for the tree. We continue with the Christmas creations, so thinking a little about an idea to decorate my tree I came up with making something different, something with a reindeer or with nine-figures and as I never decided which idea I liked the most, I made both haha.
Seeing the result of the creations I fell in love, but I have to see if in the end I decide to make a few more or go for a simpler decoration for my tree this year. However, I know that this idea will be good for you if you like to decorate your little trees.
🔸Without more to add, then I leave you with the step by step:

♥️ESPERO QUE TE GUSTE,
¡Empecemos!
♥️I HOPE YOU LIKE IT,
Let's start!

✂️ MATERIALES | ✂️ MATERIALS
- Cartulina escarchada dorada.
- Foami escarchado verde, rojo, dorado y marrón.
- Foami blanco y marrón.
- Hilo dorado.
- Lazos.
- Pinturas y marcadores.
- Pegamento.
- Hoja blanca.
- Tijeras.
- Lápiz.
- Golden frosted cardboard.
- Green, red, gold and brown frosted foam.
- White and brown foam.
- Golden thread.
- Laces.
- Paints and markers.
- Glue.
- White sheet.
- Scissors.
- Pencil.
🌟 PROCEDIMIENTO | 🌟 PROCESS
✨PASO 1:
Lo primero, como siempre, es dibujar los patrones en una hoja blanca, así que comencé dibujando el cuerpo y accesorios de mis personajes y luego los transferí a los colores correspondientes de foami, utilizando los siguientes colores:
❄️Para el muñeco de nieves:
- Cuerpo entero en foami blanco.
- Sombrero en foami escarchado verde y rojo.
🎄Para el reno:
- Cuerpo entero en foami marrón.
- Cuernos en foami escarchado marrón.
- Nariz en foami rojo.
✨STEP 1:
The first thing, as always, is to draw the patterns on a white sheet, so I started by drawing the body and accessories of my characters and then I transferred them to the corresponding colors of foam, using the following colors:
🎄For the snowman:
- Full body in white foam.
- Hat in green and red frosted foam.
🎄For the reindeer:
- Full body in brown foam.
- Antlers in brown frosted foam.
- Nose in red foam.

✨PASO 2:
Al tener todas las piezas recortadas, comencé a dar color con pinturas a los bordes de las piezas de foami liso, como los cuerpos de ambos personajes. Seguidamente, al estar secas las piezas, dibujé los rostros de cada uno, incluyendo la nariz de zanahoria con marcador naranja. Luego, pegué las piezas hasta formar por completo al muñeco de nieves con sus accesorios y por supuesto el cuerpo entero del reno. Ambos personajes tienen una medida de 8 cm de largo (por si se quieren guiar de mis medidas).
✨STEP 2:
Once I had all the pieces cut out, I began to color the edges of the pieces of smooth foam with paints, like the bodies of both characters. Next, when the pieces were dry, I drew the faces of each one, including the carrot nose with an orange marker. Then, I glued the pieces together until I had completely formed the snowman with his accessories and of course the entire body of the reindeer. Both characters are 8 cm long (in case you want to use my measurements as a guide).


✨PASO 3:
Por otra parte, tomé la cartulina escarchada dorada y recorté dos círculos de 7.5 cm de circunferencia y en medio de estos círculos recorté otros de 4 cm de circunferencia para formar los aros. Seguidamente, pegué al muñeco de nieves y al reno como si estuvieran sosteniéndose de los aros, así como se muestra en las imágenes de a continuación:
✨STEP 3:
On the other hand, I took the gold frosted cardboard and cut out two circles of 7.5 cm in circumference and in the middle of these circles I cut out others of 4 cm in circumference to form the rings. Next, I glued the snowman and the reindeer as if they were holding on to the rings, as shown in the images below:


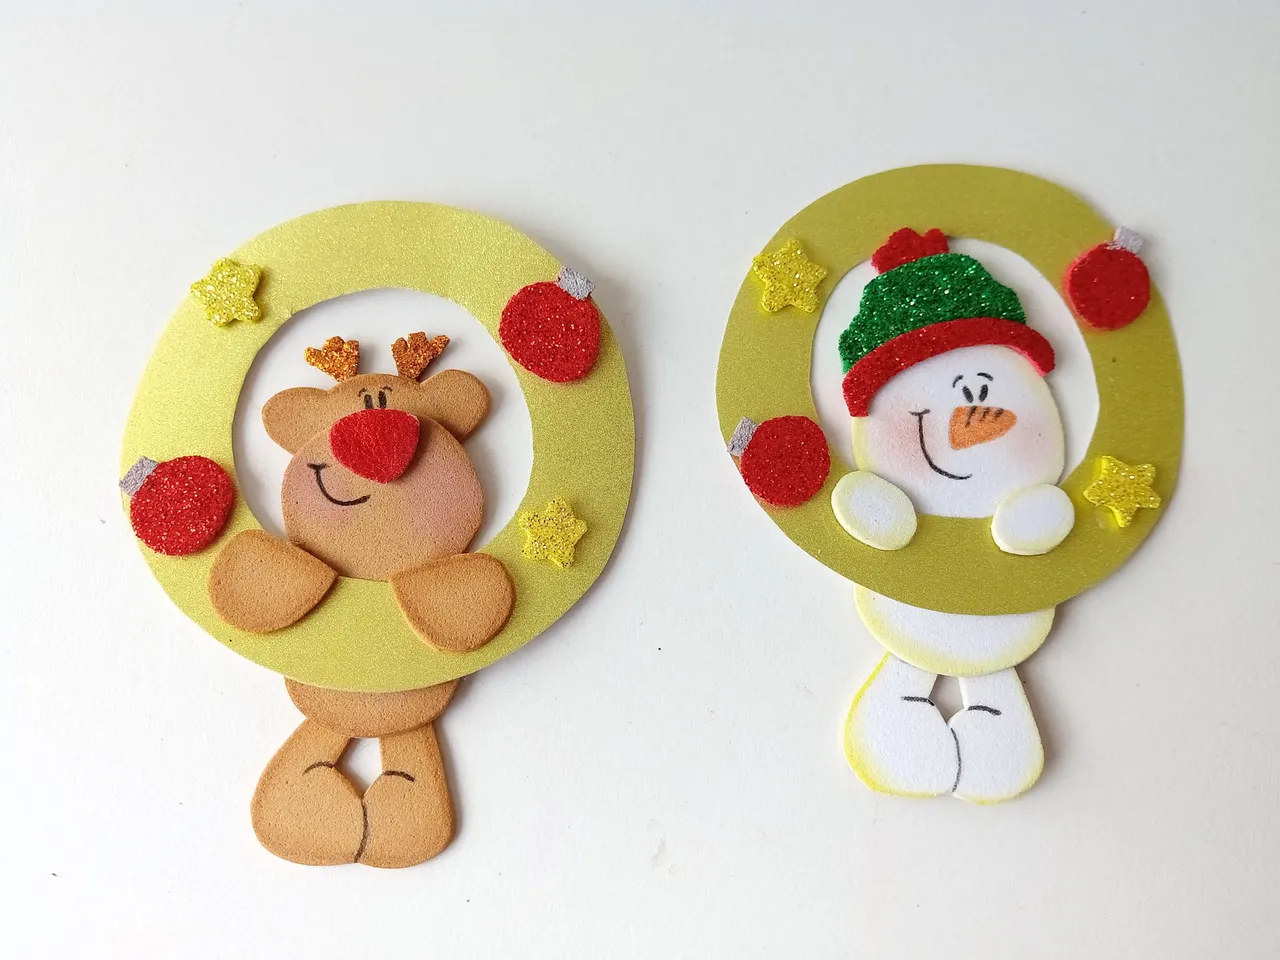
✨PASO 4:
Para decorar ambos arcos, recorté 4 esferas y 4 estrellas, las cuales las pegué alrededor de los arcos. Por último, pegué hilo dorado en la parte superior trasera para colgar y unos lazos en la parte superior delantera.
✨STEP 4:
To decorate both arches, I cut out 4 spheres and 4 stars, which I glued around the arches. Finally, I glued gold thread on the top back to hang and some bows on the top front.

✨De esta manera es como pueden comenzar a elaborar sus lindos colgantes para decorar sus árboles en estas Navidades. También es una bonita idea como colgante para alguna pared, obviamente utilizando otras medidas. Espero les haya gustado el paso a paso y se animen a elaborarlo.
Espero les haya gustado mi participación, y no me voy sin antes invitar a mis amigas 

❤️Hasta la próxima publicación.
✨This is how you can start making your cute pendants to decorate your trees this Christmas. It is also a nice idea as a pendant for a wall, obviously using other measurements. I hope you liked the step by step and are encouraged to make it.
I hope you liked my participation, and I will not leave without first inviting my friends
❤️Until the next post.
✨RESULTADO: | ✨RESULT:


!TE DESEO UN GRAN DÏA¡
Todas las fotografías son de mi propiedad.
Separador y Fotos editadas en Canva
!I WISH YOU A GOOD DAY
All photographs are my property.
Photos edited in Canva