✨✏️¡Hola amigos amantes de la creatividad! Espero que hayan pasado un muy buen comienzo de semana.✏️✨
🔸Sin más que añadir, a continuación los dejo con el paso a paso:
✨✏️¡Hello friends who love creativity! I hope you had a very good start to the week.✏️✨
I hope you are doing well and had a nice Monday. On this occasion I share with you the step by step to make a school badge. A few days ago I had this nice idea in mind for children who are just starting their classes. Since I was little I always wanted to wear one of these identifications on my uniform, I think they look very pretty and children are more encouraged by wearing something pretty or colorful on them.
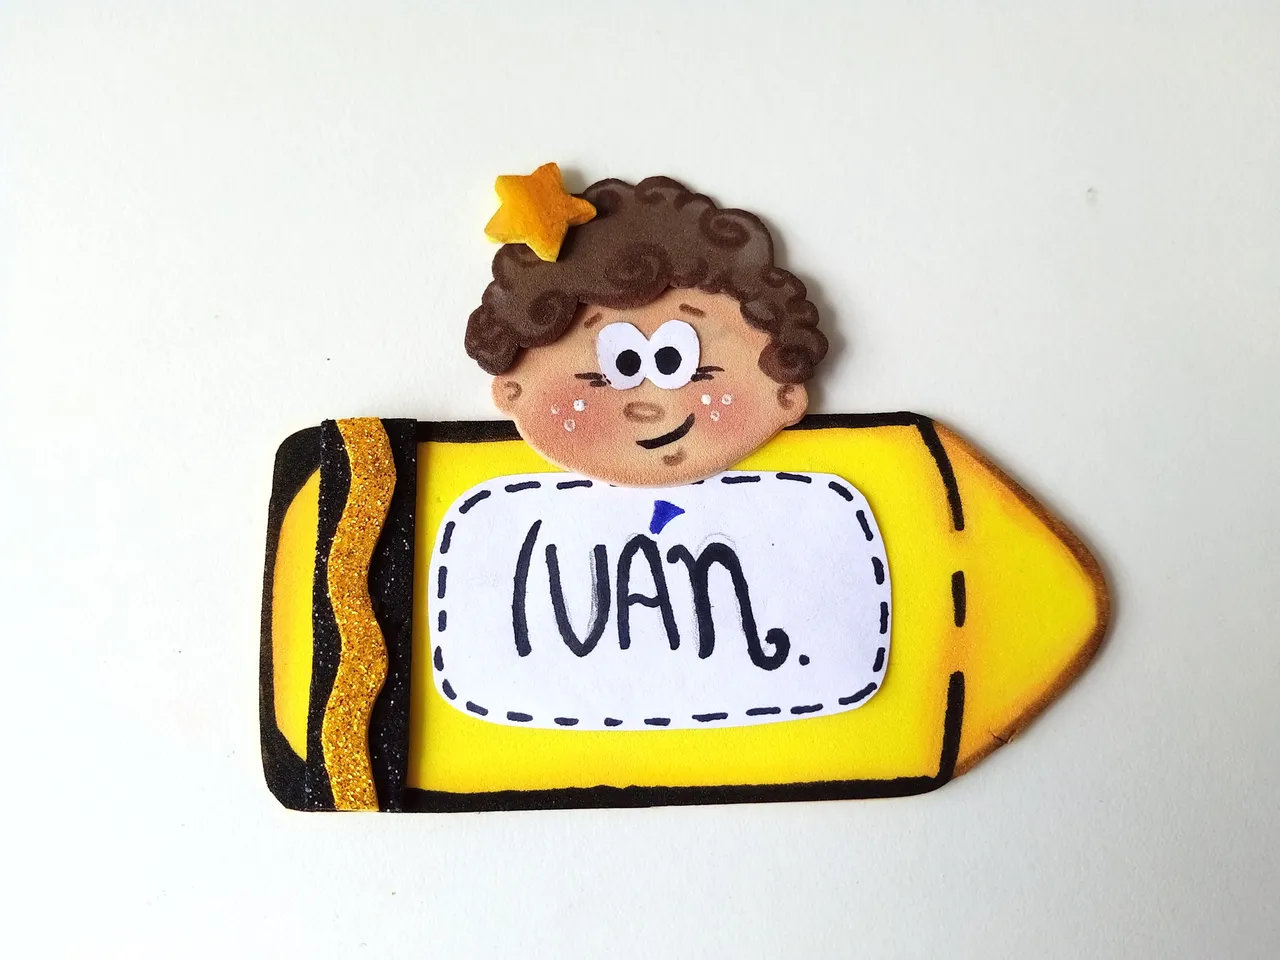
In this case I wanted to create a crayon with some details that stand out, in the middle place the name and at the top, the idea would be to create the figure of the child, as similar as possible. By the way, I fell in love with the doll I made, it looked very cute.
🔸Without more to add, then I leave you with the step by step:

♥️ESPERO QUE TE GUSTE,
¡Empecemos!
♥️I HOPE YOU LIKE IT,
Let's start!

✂️ MATERIALES | ✂️ MATERIALS
- Foami amarillo.
- Foami negro escarchado.
- Foami marrón.
- Foami piel.
- Hoja blanca.
- Alfiler o cinta.
- Pintura blanca
- Marcadores.
- Tizas.
- Regla.
- Tijera.
- Lápiz.
- Yellow foam.
- Frosted black foam.
- Brown foam.
- Leather foam.
- White sheet.
- Pin or ribbon.
- White paint
- Markers.
- Chalks.
- Ruler.
- Scissors.
- Pencil.
✏️ PROCEDIMIENTO | ✏️ PROCESS
- PASO 1:
Lo primero que hice fue el patrón del crayón y dibujé al personaje en una hoja. Luego, lo trasferimos al color correspondiente de foami, en este caso, el crayón y la estrella en foami amarillo, el centro ovalado y los ojos con hoja blanca, la cara en foami piel y el cabello en foami marrón. Luego, recorté todas las piezas.
- STEP 1:
The first thing I made was the crayon pattern and I drew the character on a sheet. Then, we transfer it to the corresponding color of foami, in this case, the crayon and the star in yellow foami, the oval center and the eyes with white foil, the face in skin foami and the hair in brown foami. Then, I cut out all the pieces.


- PASO 2:
Para dar más detalles, tracé el borde de la cabeza, el crayón y la estrella, con tizas, un tono más oscuro que cada pieza, y para el cabello, partes del crayón y detalles del rostro, remarqué con marcador negro y marrón. Al cabello le hice unos espirales, al rostro los detalles de la nariz y orejas, y para el crayón tracé solo una parte y di algunos detalles extras, pero esto es totalmente al gusto.
- STEP 2:
To give more details, I traced the edge of the head, the crayon and the star, with chalk, a tone darker than each piece, and for the hair, parts of the crayon and details of the face, I highlighted with black and brown marker. I made some spirals for the hair, the details of the nose and ears for the face, and for the crayon I traced only a part and gave some extra details, but this is totally up to taste.


- PASO 3:
En el óvalo, escribí el nombre del niño y por el borde tracé pequeñas líneas, dejando espacio entre cada una y pegué. Como quedaba un espacio vacío, quise agregar la decoración típica de estos crayones, así que recorté una tira en foami negro escarchado y otra tira fina con forma de ondas, pegué en medio de la tira negra y luego al espacio vacío.
- STEP 3:
On the oval, I wrote the child's name and along the edge I drew small lines, leaving space between each one and glued. Since there was an empty space, I wanted to add the typical decoration of these crayons, so I cut out a strip of frosty black foam and another thin strip in the shape of waves, I glued it in the middle of the black strip and then to the empty space.


- PASO 4:
Por último, pegué todas las piezas del niño, pegué los ojos y dibujé el punto negro con marcador. Dibujé las pestañas y boca con marcador negro. Con tiza rosa pinté las mejillas, agregué puntos de luz con pintura blanca y pegué al niño al crayón.
- STEP 4:
Lastly, I glued all the boy pieces together, glued on the eyes and drew the black dot with a marker. I drew the eyelashes and mouth with black marker. With pink chalk I painted the cheeks, I added highlights with white paint and glued the boy to the crayon.


- PASO 5:
Para pegar el alfiler, recorté un cuadrado de foami, pegué uno de los bordes en la parte de atrás, coloqué el alfiler en medio y pegué el otro borde del foami. Si prefieren, por seguridad, pueden colocar una cinta y pegarla detrás, como el alfiler.
- STEP 5:
To glue the pin, I cut out a square of foam, glued one of the edges to the back, placed the pin in the middle and glued the other edge of the foam. If you prefer, for safety, you can place a ribbon and stick it behind it, like the pin.


✨¡And ready!✨ This is how you can make a cute school ID for your children at the beginning of school, I'm sure they will love it. I was fascinated with the figure, it was so cute and I think it is an excellent idea. They can do it as is or with an animal theme. I hope you liked it and are encouraged to make it.
❤️Until the next post.
✨RESULTADO: | ✨RESULT:


Todas las fotografías son de mi propiedad.
Separador y Fotos editadas en Canva
All photographs are my property.
Photos edited in Canva