✨¡Hola amigos amantes de la creatividad! Espero que estén todos bien.✨
¡Buenas tardes, amigos! Espero que estén pasando una excelente semana. Por mi parte, estoy contenta de pasar por acá a compartir una linda idea con ustedes. En esta ocasión, les muestro el paso a paso para elaborar un lindo colgante para la cocina. Y sí, amigos, seguimos con los colgantes, porque son las decoraciones que más me gusta actualizar cada año. Para la cocina quería algo tipo letrero, por lo que me pareció una linda idea elaborar una vaquita sosteniendo el letrero y un par de utensilios a los lados.
🔸Sin más que añadir, a continuación los dejo con el paso a paso:
✨¡Hello friends who love creativity! I hope you are all well.✨
Good afternoon, friends! I hope you're having a wonderful week. I'm happy to stop by and share a lovely idea with you. This time, I'll show you step-by-step how to make a cute kitchen hanging decoration. And yes, friends, we're continuing with hanging decorations, because they're my favorite decorations to update every year. For the kitchen, I wanted something like a sign, so I thought it would be a nice idea to make a little cow holding the sign and a couple of utensils on either side.
🔸Without more to add, then I leave you with the step by step:

♥️ESPERO QUE TE GUSTE,
¡Empecemos!
♥️I HOPE YOU LIKE IT,
Let's start!

✂️ MATERIALES | ✂️ MATERIALS
- Foami blanco.
- Foami crema.
- Foami marrón.
- Foami escarchado plateado.
- Cinta.
- Pinturas y marcadores.
- Pegamento.
- Tijeras.
- Regla.
- Hoja blanca.
- Lápiz.
- White foam sheet.
- Cream-colored foam sheet.
- Brown foam sheet.
- Silver glitter foam sheet.
- Tape.
- Paints and markers.
- Glue.
- Scissors.
- Ruler.
- White paper.
- Pencil.
🌟 PROCEDIMIENTO | 🌟 PROCESS
✨PASO 1:
Lo primero, como siempre, es tomar una hoja blanca y dibujar la idea que tenemos en mente para el diseño del colgante; que en mi caso tenía la idea de que la vaca fuera la decoración principal del letrero, junto con decoraciones extras de un par de utensilios. Al tener lista la idea, hacemos las piezas de la decoración del tamaño deseado y transferimos a los colores correspondientes de foami, como explico a continuación:
✨Cabeza: 6 cm x 4 cm en foami blanco.
✨Orejas: 3 cm x 2.5 cm en foami blanco.
✨Hocico: 6.5 cm x 3.5 cm en foami crema.
✨Cuernos: 1.5 cm x 1 cm en foami marrón.
✨Gorro de chef: 4 cm x 2.5 cm en foami blanco.
✨Cartel: 11 cm x 6 cm en foami marrón.
✨Utensilios: 4.5 cm en foami escarchado plateado.
✨STEP 1:
The first thing, as always, is to take a white sheet of paper and sketch the design you have in mind for the hanging decoration; in my case, I wanted the cow to be the main decoration of the sign, along with some extra decorations of a couple of utensils. Once the idea is ready, we make the decorative pieces in the desired size and transfer them to the corresponding colors of foam, as explained below:
✨Head: 6 cm x 4 cm in white foam.
✨Ears: 3 cm x 2.5 cm in white foam.
✨Snout: 6.5 cm x 3.5 cm in cream foam.
✨Horns: 1.5 cm x 1 cm in brown foam.
✨Chef's hat: 4 cm x 2.5 cm in white foam.
✨Sign: 11 cm x 6 cm in brown foam.
✨Utensils: 4.5 cm in silver glitter foam.
 |  |
|---|
✨PASO 2:
Al estar listas todas las piezas, es momento de dar color a los bordes con pinturas o marcadores, utilizando tonos que hagan contraste o den una sombra, menos a las piezas de foami escarchado. En el caso de la vaca, utilicé un color marrón clarito para la mayoría de las piezas del cuerpo, pero para el letrero y gorro, utilicé un color negro.
✨STEP 2:
Once all the pieces are ready, it's time to color the edges with paints or markers, using contrasting or shading tones, except for the glitter foam pieces. For the cow, I used a light brown color for most of the body pieces, but for the sign and hat, I used black.

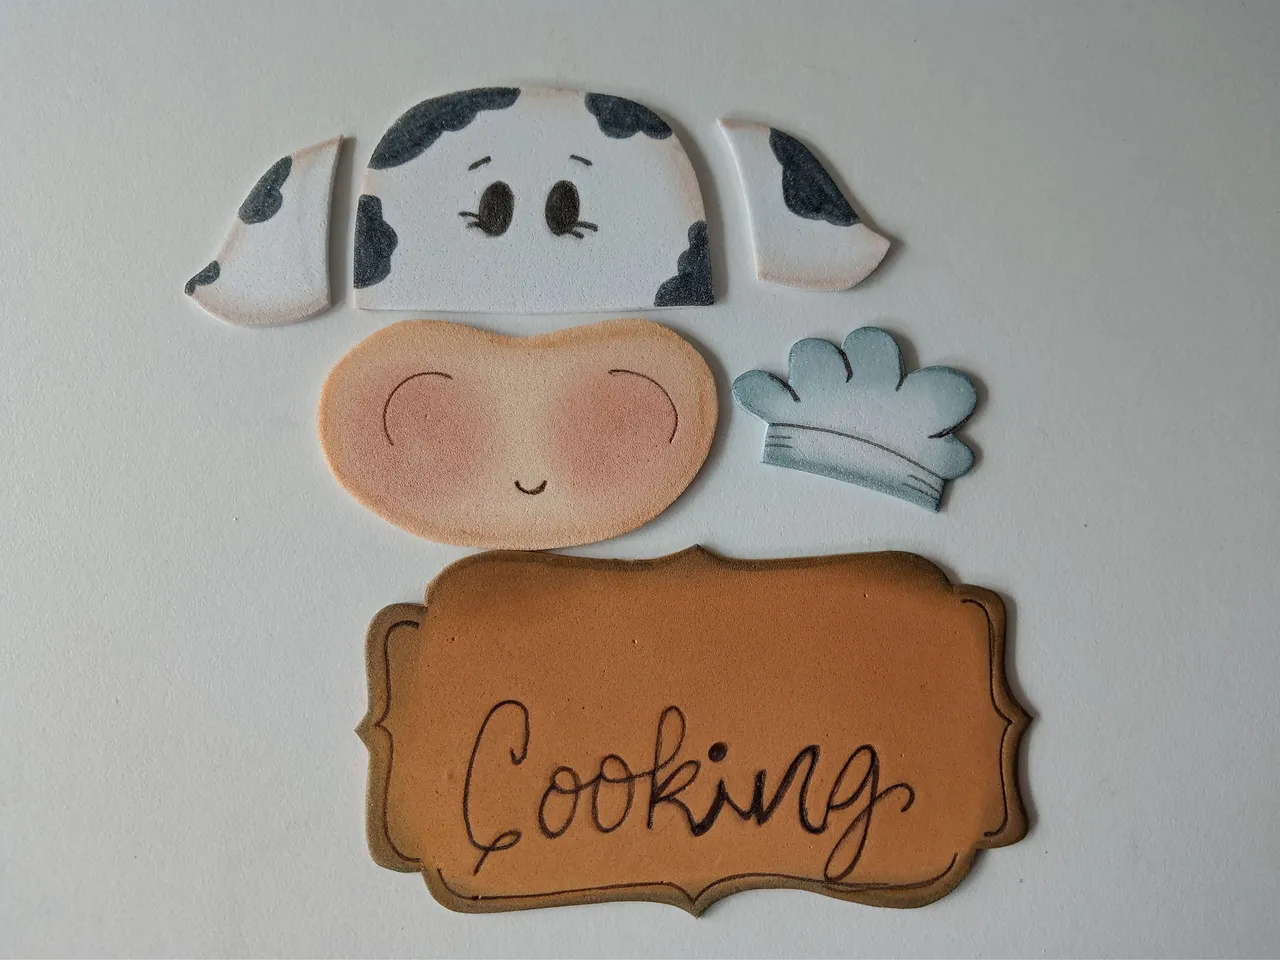
✨PASO 3:
Al estar totalmente secas las piezas, es momento de pintar detalles, como ojos, cejas, mejillas, boca y las manchas de la vaca. Al igual que es momento de definir lo que sería el gorro de chef y el letrero en el cual escribí “Cooking”.
✨STEP 3:
Once the pieces were completely dry, it was time to paint details, such as the eyes, eyebrows, cheeks, mouth, and the cow's spots. It was also time to define the chef's hat and the sign on which I wrote "Cooking."
✨PASO 4:
Ahora llegó el momento de comenzar a pegar las piezas, y como siempre les digo, me gusta comenzar por la cabeza; seguimos con el hocico, las orejas, los cuernitos, el gorro y luego pegué encima del cartel, de forma centrada, y a los laterales del cartel, simplemente pegué los utensilios.
✨STEP 4:
Now it was time to start gluing the pieces, and as I always say, I like to start with the head; then I added the snout, the ears, the horns, the hat, and then I glued the sign on top, centered, and to the sides of the sign, I simply glued the utensils.
 |  |
|---|
✨PASO 5:
Para finalizar y darle mi toque personal, tomé la pintura blanca e hice algunos puntos en el letrero y un puntito a las mejillas para dar un poco de luz. Por último, tomé una tela de cuadritos, la recorté tipo cinta, pegué en la parte superior trasera para poder colgar e hice un lacito, el cual pegué en la parte baja del letrero.
✨STEP 5:
To finish and add my personal touch, I took the white paint and made some dots on the sign and a small dot on the cheeks to add a little light. Finally, I took a piece of checkered fabric, cut it into a ribbon, glued it to the top back so it could be hung, and made a little bow, which I glued to the bottom of the sign.
 |  |
|---|
✨Y listo. Así, de esta manera bastante sencilla y fácil, pueden elaborar sus decoraciones para la cocina o cualquier área de la casa. Estoy segura de que se les pueden ocurrir muchísimas ideas fascinantes. En mi caso, hace mucho que no utilizaba la idea de una vaquita para decorar la cocina y ya me hacía falta. Espero que les haya gustado el paso a paso y se animen a elaborarlo.
❤️Hasta la próxima publicación.
✨And that's it! In this simple and easy way, you can make your own decorations for the kitchen or any area of the house. I'm sure you can come up with lots of fascinating ideas. In my case, it had been a long time since I'd used a cow to decorate the kitchen, and I really needed to. I hope you liked the step-by-step instructions and are inspired to make one.
❤️Until the next post.
✨RESULTADO: | ✨RESULT:
 |  |
|---|

!TE DESEO UN GRAN DÏA¡
Todas las fotografías son de mi propiedad.
Separador y Fotos editadas en Canva
!I WISH YOU A GOOD DAY
All photographs are my property.
Photos edited in Canva