✨💄¡Hola amigos amantes de la creatividad! Espero que hayan pasado un muy buen comienzo de semana.💄✨
Este día les comparto el paso a paso para elaborar un organizador de maquillaje. Cómo les comenté me había quedado un poco estancada en cuanto a mi creatividad, no se me ocurrían muchas cosas para hacer y la verdad estaba preocupada, pero últimamente han surgido unas cuantas ideas que me tienen bastante contenta y me ayudan a que la creatividad se active.
Sin desviarme del tema, Desde hace un tiempo había pensado en hacer una mini gaveta con patas, pues en mi cabeza se veía muy elegante y coqueto, así que quise traerles esta idea, que además de ser bastante sencilla, utilicé materiales de provecho.
🔸Sin más que añadir, a continuación los dejo con el paso a paso:
✨💄¡Hello friends who love creativity! I hope you had a very good start to the week.💄✨
This day I share the step by step to make a makeup organizer. As I was saying, I had been a bit stagnant in terms of my creativity, I couldn't think of many things to do and the truth was that I was worried, but lately some ideas have emerged that make me very happy and help in terms of activating creativity.
Without deviating from the subject, for some time I had been thinking about making a mini drawer with legs, because in my head it looked very elegant and flirtatious, so I wanted to bring you this idea, which in addition to being quite simple, I used useful materials
🔸Without more to add, then I leave you with the step by step:

♥️ESPERO QUE TE GUSTE,
¡Empecemos!
♥️I HOPE YOU LIKE IT,
Let's start!

✂️ MATERIALES | ✂️ MATERIALS
- Cartón grueso.
- Cartón delgado.
- Cartulina dorada.
- Pintura blanca.
- Tela con el diseño de preferencia.
- Tapas de esmalte.
- Perla plastica.
- Abre huecos.
- Pegamento
- Regla.
- Lápiz.
- Thick cardboard
- Thin cardstock
- Gold cardboard.
- White paint.
- Fabric with the preferred design.
- Enamel lids.
- Plastic pearl
- Open holes.
- Glue
- Ruler.
- Pencil.

💄 PROCEDIMIENTO | 💄 PROCESS
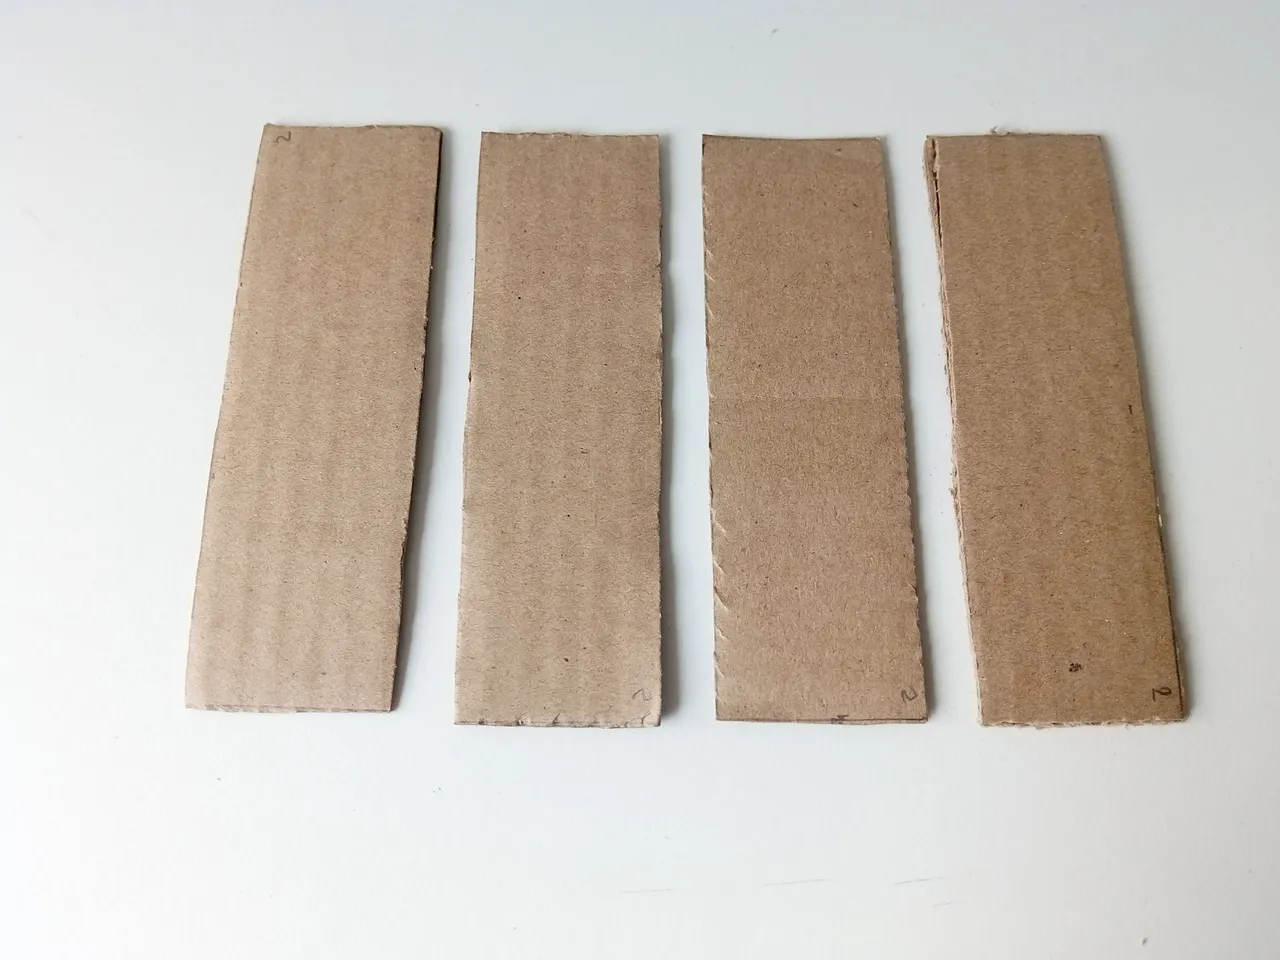
- PASO 1:
Empecé dibujando en cartulina las medidas del cajón principal. Para las piezas más grandes, trazar y recortar en cartulina: 2 piezas de 15 cm x 15 cm y para los lados: 3 piezas de 15 cm x 6 cm. Luego pegué todas las piezas en el siguiente orden: la base, las paredes y finalmente la pieza superior.
- STEP 1:
I started by drawing on cardboard the measurements of the main drawer. For the larger pieces, trace and cut out on cardboard: 2 pieces of 15 cm x 15 cm and for the sides: 3 pieces of 15 cm x 6 cm. Then I glued all the pieces in the following order: the base, the walls, and finally the top piece.


- PASO 2:
Luego comencé a trazar y recortar las medidas del cajón pequeño. En este caso; para la base: 1 pieza grande de 14 cm x 14 cm y para los lados 4 piezas de 14 cm x 5 cm. Luego pegué las piezas en el siguiente orden: la base y los laterales.
- STEP 2:
Then I began to trace and cut out the measurements of the small drawer. In this case; for the base: 1 large piece of 14 cm x 14 cm and for the sides 4 pieces of 14 cm x 5 cm. Then I glued the pieces in the following order: the base and the sides.


- PASO 3:
Una vez listo, pinté solo el cajón principal de blanco (puedes pintarlo del color que prefieras). Para el cajón, recorté 1 pieza de cartón fino de 16 cm x 6 cm, y sobre esta pegué un trozo de tela del mismo tamaño. Luego, pegué esta pieza del cajón pequeño.
- STEP 3:
Once ready, I painted only the main drawer white (you can paint it any color you prefer). For the drawer, I cut out 1 piece of thin cardboard measuring 16 cm x 6 cm, and on it I glued a piece of fabric of the same size. Then I glued on this small drawer piece.


- PASO 4:
Como decoración, pegué una perla grande justo en el medio del cajón, para poder abrirlo y cerrarlo. Finalmente, con la ayuda del abridor, corté muchos círculos en cartulina dorada y los pegué en la parte superior del cajón más grande. Además, pegué tapas de esmalte a las esquinas de la base para que sirvieran como patas.
- STEP 4:
As a decoration, I glued a large pearl right in the middle of the drawer, so that it can be opened and closed. Finally, with the help of the opener, I cut many circles out of gold cardboard and glued them to the top of the largest drawer. Also, I glued enamel caps to the corners of the base to serve as legs.


✨💄¡Y listo!💄✨ De esta manera súper sencilla, puedes hacer un hermoso organizador de maquillaje o lo que prefieras. Puedes decorar con los colores o diseños que más te gusten, incluso puedes añadir algún piso más. Creo que se ve bastante lindo y delicado para colocar en una habitación o incluso en un escritorio para guardar lápices. Espero les haya gustado el paso a paso y se animen a elaborarlo en casa.
❤️Hasta la próxima publicación.
✨💄¡And ready!💄✨ In this super simple way, you can make a beautiful makeup organizer or whatever you prefer. You can decorate with the colors or designs that you like the most, you can even add some more floor. I think it looks quite cute and delicate to be placed in a room or even on a desk to hold pencils. I hope you liked the step by step and are encouraged to make it at home.
❤️Until the next post.
✨RESULTADO: | ✨RESULT:


Todas las fotografías son de mi propiedad.
Separador y Fotos editadas en Canva
All photographs are my property.
Photos edited in Canva