
| Esp | Eng |
|---|
| Hola amigos es un placer saludarles y compartir con ustedes unos de mis trabajos. Tenía bastante tiempo sin compartir en está comunidad creadora y creativa, pero como dice el refrán popular "El buen hijo siempre vuelve a su casa", hoy yo volví a está linda comunidad, y lo hago presentándoles esté LINDO BRAZALETE CON CONECTOR EN DELICAS MIYUKI. Esté conector es de la caricatura Snoopy uno de los personajes protagónicos de la serie animada "El show de Charlie Brown y Snoopy", una serie de todos los tiempos que gusta a grandes y chicos. Para hacer esté lindo y divertido conector use *"La técnica de construcción ladrillo". A continuación les comparto el proceso que espero les guste y la lista de materiales. | Hello, friends! It’s a pleasure to greet you and share some of my work with you. It’s been quite a while since I’ve shared anything in this creative community, but as the saying goes, “A good son always comes home.” Today, I’ve returned to this wonderful community, and I’m doing so by presenting this CUTE BRACELET WITH A MIYUKI DELICA CLASP. This connector features Snoopy, one of the main characters from the animated series “The Peanuts Movie,” a timeless classic loved by both adults and children. To make this cute and fun connector, I used the “brick-by-brick construction technique.” Below, I’ll share the process—which I hope you’ll enjoy—and the list of materials. |
| Materiales: | Materials: |
|---|
| Delicas de la marca Miyuki colores: negro, blanco, rojo, azul claro, verde turquesa; hilo negro: tapicería, Miyuki o para mostacillas, hilo chino gris, aguja mostacillera, balines dorados calibre 0,03 mm, cuentas azul turquesa calibre 0,06 mm, cuenta cuadrada azul turquesa, yesquero, tijeras, dije pequeño para el collar del perrito. | Miyuki Delica beads in the following colors: black, white, red, light blue, turquoise green; black thread: upholstery, Miyuki, or beading thread; gray Chinese thread; beading needle; 0.03 mm gold-plated jump rings; 0.06 mm turquoise blue beads; turquoise blue square bead; glue gun; scissors; small pendant for the puppy necklace. |

| Instrucciones: | Instructions: |
|---|

| Paso 1 | Step 1 |
|---|
| El primer paso es contruir el patrón de la figura que queramos construir, yo utilicé el siguiente patrón, que no es de mí autoria, por lo que doy los créditos a su autor. | The first step is to create a pattern for the figure we want to make. I used the following pattern, which I did not create myself, so I give credit to its author. |

https://share.google/XcJ7V1L1yX6eKaXUs
| Paso 2 | Step 2 |
|---|
| Enhebré 2 metros de hilo en la aguja. | | Enhebré 2 metros de hilo en la aguja. |

| Paso 3 | Step 3 |
|---|
| Construí la fila principal o columna vertebral, es la fila más larga y es de 20 delicas, en la imágen observamos el orden de los colores. | Build the main row, or backbone; it is the longest row and consists of 20 delicas. In the image, you can see the order of the colors. |
| Paso 4 | Step 4 |
|---|
| Para construir está primera fila llevamos las delicas justo a la mitad del hilo y allí comenzamos a tejer, introduciendo la aguja en la segunda delica y allí pocisionamos las piezas y seguimos introduciendo la aguja en cada delica hasta culminar con las 20 delicas. | To make this first row, place the Delica beads exactly halfway along the thread and start weaving there, inserting the needle into the second Delica bead. Position the pieces as you go, continuing to insert the needle into each Delica bead until you’ve used all 20. |

| Paso 5 | Step 5 |
|---|
| Esté conector es un triángulo de dos puntas por los que las siguientes líneas serán casi en su mayoría iniciadas en reducción para dar esa forma de triángulo invertido de cada lado, para hacer la reducción debemos posicionar el hilo siempre en la segunda delica de la línea e iniciar siempre cada línea con dos delicas, e introducir la aguja en la segunda delica y seguimos colocando el resto de las delicas hasta terminar esta fila. | This connector is a two-pointed triangle; most of the following rows will begin with a decrease to create that inverted triangle shape on each side. To make the decrease, always position the thread on the second bead of the row and always start each row with two beads. Insert the needle into the second bead and continue placing the remaining beads until you finish this row. |

| Paso 6 | Step 6 |
|---|
| En las imágen observamos las primera 5 líneas en reducción. | In the image, we can see the first 5 lines in reduced form. |

| Paso 7 | Step 7 |
|---|
| Las siguientes filas que corresponden a la cabeza tienen inicio con reducción y ampliación tanto al final como al inicio, por lo que el secreto de esta técnica es aprender a realizar las ampliaciones y reducciones y con el patrón claro podemos construir lo que queramos. | The following rows, which correspond to the head, begin with decreases and increases at both the end and the beginning; therefore, the key to this technique is learning how to make these increases and decreases, and with a clear pattern, we can create whatever we want. |

| Paso 8 | Step 8 |
|---|
| Concluida la cabeza iniciamos en reducción hasta llegar a dos para construir un ojal de 7 delicas. En la imágen observamos la construcción de la primera parte del conector que son 19 filas. | Once the head is finished, we begin decreasing until we have two stitches left to create a 7-bead loop. In the image, we can see the construction of the first part of the connector, which consists of 19 rows. |

| Paso 9 | Step 9 |
|---|
| La parte de abajo también tiene filas con reducción y ampliaciónes. En la imágen observamos la construcción de las 3 primeras filas de la parte inferior del conector , y en la segunda fila coloqué un dije en el collar del perrito para darle un toque especial y se vea más bonito. | The bottom part also has rows with reductions and increases. In the image, you can see how the first three rows of the bottom part of the connector are constructed, and in the second row, I added a charm to the puppy’s collar to give it a special touch and make it look nicer. |

| Paso 10 | Step 10 |
|---|
| Continuamos añadiendo las filas que corresponden a la parte del cuerpo. | We continue adding the rows that correspond to the torso. |

| Paso 11 | Step 11 |
|---|
| En las imagenes observamos la culminación del cuerpo del perrito. | In the images, we can see the completion of the puppy's body. |

| Paso 12 | Step 12 |
|---|
| Y a continuación la culminación de las últimas filas y la construcción del ojal para hacer las manillas. | Next, finish the last rows and create the buttonholes for the handles. |

| Paso 13 | Step 13 |
|---|
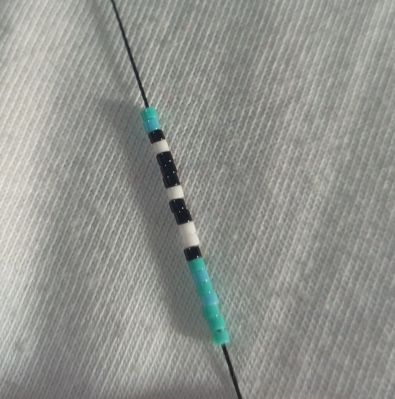
| Para construir las manillas corté para cada manilla 2 piezas de hilo una de 40 cm y la otra de 30 cm. Sujeté con una gancho de carpeta el conector e introduje por los dos hilos el balín y realicé la manilla con 20 nudos planos. | To make the handles, I cut two pieces of string for each handle—one 40 cm long and the other 30 cm long. I secured the connector with a paperclip, threaded the bead onto both strings, and tied the handle with 20 flat knots. |

| Paso 14 | Step 14 |
|---|
| Repetí el mismo proceso en el otro lado de la manilla. | I repeated the same process on the other side of the handle. |

| Paso 15 | Step 15 |
|---|
| Cerré la manilla con un trancadero hecho en nudos macramé, 10 nudos en total. | I fastened the handle with a clasp made of macramé knots—10 knots in total. |

| Paso 16 | Step 16 |
|---|
| Para uno de los lados de la manilla realicé un nudo e introduje la cuenta cuadrada e hice otro nudo y luego introduje la cuenta verde, corté y quemé el hilo excedente. | On one side of the clasp, I tied a knot, threaded on the square bead, tied another knot, then threaded on the green bead, and cut and sealed off the excess thread. |

| Paso 17 | Step 17 |
|---|
| Realice del otro lado dela manilla el nudo, introduje la cuenta y corté y quemé el excedente. | I tied a knot on the other side of the handle, threaded the bead through, and cut and sealed the excess. |
| Despedida | Farewell |
|---|
| Y esté es mi post para el día de hoy LINDO BRAZALETE CON CONECTOR EN DELICAS MIYUKI muy contenta y agradecida con Dios por el resultado. | And this is my post for today CUTE BRACELET WITH A MIYUKI DELICA CONNECTOR very happy and thankful to God for the result. |


