
Este trozo de espejo lo iba a botar y luego dije, tiene que haber una forma de que sea útil y hermoso... Así que puse mi imaginación a volar, para mi Nuevo Proyecto cumpliera con lo siguiente:
* Se parara solo, es decir que tuviese una posición sólida y estable para verme.
* Que tuviera una posición o un ángulo que pueda sacarme las cejas o hacerme mi limpieza facial donde quiera, ya que a veces necesito estar en la cocina haciendo alguna mascarilla o vaporización, etc.
* Que tuviera una especie de depósito, para incluir mi pinza de cejas, algodón o cualquier otra cosita que quiera mover de sitio junto con él.
I was going to throw this piece of mirror away and then I said, there has to be a way to make it useful and beautiful... So I put my imagination to flight, for my New Project I fulfilled the following:
* He would stand up on his own, meaning that he would have a solid and stable position to see me.
* That I have a kind of storage, to include my eyebrow tweezers, cotton or any other little thing that I want to move along with it.
Así que, pensando en todo esto en realidad me emocioné, ya que entendí que tenía posibilidades y que sería otro **DIY con un objetivo de ser Funcional y a la vez Decorativo.** Me encantó tener la idea, aunque cuando mis hijas me preguntaban que iba a hacer con un espejo roto, no veían las posibilidades, pero lo correcto es Creer en ti misma y Hacerlo con Amor.
So, thinking about all this I actually got excited as I understood that it had possibilities and that it would be another **DIY with a goal of being Functional and at the same time Decorative.** I loved having the idea, although when my daughters asked me What was I going to do with a broken mirror, they didn't see the possibilities, but the right thing to do is Believe in yourself and Do it with Love.
A continuación les explico mi DIY de Espejo Móvil, Funcional y Práctico.
Next I explain my DIY Mobile Mirror, Functional and Practical.
Los Materiales:
- Espejo (en mi caso era un trozo roto)
- Cartón de reciclaje
- Papel contac
- Silicón Caliente
- Lápiz - Tijera - Regla
The materials:
* Mirror (in my case it was a broken piece)
* Recycle
* Contact
* Hot
* Pencil - Scissors - Ruler* Mirror (in my case it was a broken piece)

Sí, con tan pocos materiales puedes lograr algo hermoso. En caso de que no tengas Papel Contac, que a veces es costoso, puedes pintar, pegar o forrar con tela, usar otro material de reciclaje para decorar, es decir las posibilidades las da tu imaginación y tus posibilidades. Yo decidí hacer uso de un papel contac que tenía de hace años y desde que creo contenido en Hive Blog, me ha resultado de utilidad, por eso tal vez lo has visto en otros proyectos y lo seguiré usando hasta que se me acabe, porque los Recursos hay que usarlos...
Yes, with so few materials you can achieve something beautiful. In case you don't have Contact Paper, which is sometimes expensive, you can paint, paste or cover with fabric, use other recycled material to decorate, that is, the possibilities are given by your imagination and your possibilities. I decided to make use of contact paper that I had from years ago and since I create content on Hive Blog, it has been useful to me, that is why you may have seen it in other projects and I will continue using it until I run out, because the Resources must be used...
Tutorial o Paso a Paso / Tutorial or Step by Step

Paso 1:
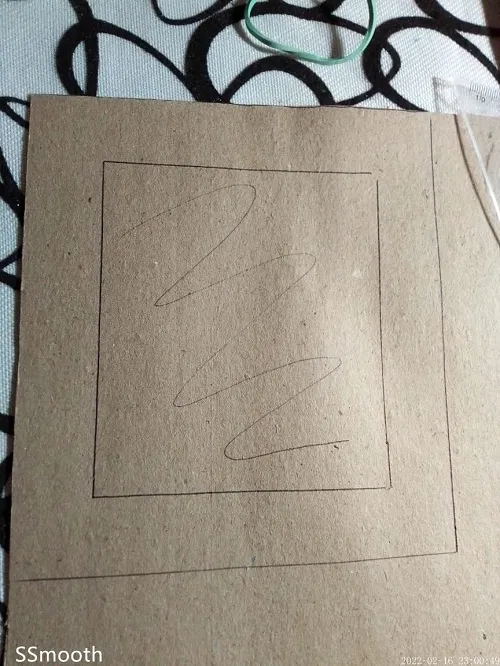
Mi espejo roto tenía una forma irregular, pero si lo medía desde lo mas largo de su forma era de 16cms por 18cms, así que asumí que esa iba a ser mi medida. Busqué un cartón que fuese un poco mas grande que eso, para establecer como la base, el marco por decirlo de alguna forma, que sobraran como 2cms de espacio alrededor de todo el espejo.
Step 1: My broken mirror had an irregular shape, but if I measured it from the longest of its shape it was 16cms by 18cms, so I assumed that was going to be my measurement. I looked for a piece of cardboard that was a little bigger than that, to establish as the base, the frame so to speak, that there would be about 2cm of space left over around the entire mirror.

Paso 2:
Corté unas tiras de cartón para colocarlas alrededor del espejo para que estas fueses como un soporte que no permitan que este se mueva, de 1cms aproximadamente. Dado que mi cartón no era tan delgado, era perfecto para hacer este soporte.
Step 2: I cut some strips of cardboard to place them around the mirror so that these would be like a support that does not allow it to move, approximately 1 cm. Since my cardboard wasn't that thin, it was perfect for making this stand.

Paso 3:
Con el Silicón caliente pegué las tiras de cartón y el espejo. En la parte de arriba he dejado el corte irregular de mi espejo roto, y este espacio lo rellené con silicón caliente igualmente.
Step 3: With the hot silicone I glued the cardboard strips and the mirror. At the top I have left the irregular cut of my broken mirror, and I filled this space with hot silicone as well.

Paso 4:
En la parte de arriba dejé una pestaña de 2cms aproximadamente para que ésta doble y me de el ángulo del vertical, ya que la forma que le idee es un triángulo. Me gusta el triángulo porque es una forma que aporta fuerza y estabilidad a las cosas, y me iba a dejar un espacio abajo para hacer mi almacenamiento. La parte de abajo la dejé de 15 cms.
Es así como en una sola pieza de cartón me quedó: El frente del espejo, arriba la pestaña de soporte y abajo la base de soporte.
Step 4: In the upper part I left a tab of approximately 2cms so that it bends and gives me the angle of the vertical, since the shape that I devised for it is a triangle. I like the triangle because it is a shape that gives strength and stability to things, and I was going to leave a space below for my storage. I left the bottom part 15 cms.
This is how it turned out in a single piece of cardboard: The front of the mirror, above the support tab and below the support base.

Paso 5:
Ahora me faltaba una pieza para darle la altura a mi triángulo, así que hice otra pieza de cartón de 18cms, que fueron 15cms para altura y una pestaña de 3cms para pegarla en la parte de la base. El ancho de esto es el mismo ancho que va saliendo toda la pieza, que son 17cms.
Cabe señalar que, no disponía de mucho cartón en este momento para hacer todo en una sola pieza, pero si tu dispones de una pieza mas grandecita de cartón puedes hacer una sola pieza que contemple los tres lados del triángulo. Pero yo trabajé con lo que tenía, incluso tuve que empatar cartón para dar el ancho, pero todo quedó bien.
Step 5: Now I needed a piece to give the height to my triangle, so I made another 18cm piece of cardboard, which was 15cm for height and a 3cm tab to stick it on the base part. The width of this is the same width that the whole piece comes out, which is 17cms.
It should be noted that I didn't have much cardboard at this time to make everything in one piece, but if you have a larger piece of cardboard you can make a single piece that covers all three sides of the triangle. But I worked with what I had, I even had to tie cardboard to give the width, but everything turned out fine.
Paso 6:
En el mismo cartón hice un marco para ponerlo frente al espejo y poder tapar toda esa base. Esto lo haces, lo recortas y lo reservas junto con las demás piezas.
Step 6: In the same cardboard I made a frame to put it in front of the mirror and to be able to cover all that base. You do this, cut it out and reserve it along with the other pieces.


Paso 7:
A FORRAR..! Tal y como lo hacíamos con nuestros cuadernos en el colegio, forramos con el papel contac todo. Esto es cortándolo un poco mas ancho que cada pieza, cortamos y pegamos, alisamos con una tela o pañito y ya vas a ir viendo todo transformarse en algo bello poco a poco.
Step 7: LET'S COVER...! Just as we did with our notebooks at school, we covered everything with contact paper. This is cutting it a little wider than each piece, we cut and paste, smooth with a cloth or cloth and you will see everything transform into something beautiful little by little.

Paso 8:
Como puedes ver mi estructura en forma de triángulo me ha dejado una base abajo, para aprovechar este espacio como un almacenamiento, corté unas tiras de 3cms cada una, y le día la forma en las esquinas necesarias para montarlas con silicón caliente.
Step 8: As you can see, my triangle-shaped structure has left me a base below, to take advantage of this space as storage, I cut some strips of 3cm each, and shaped the corners necessary to mount them with hot silicone.

Y ya está listo mi hermoso Espejo Práctico, Funcional y Decorativo. Pensé en agregarle otros detalles, pero dado que el papel contac es bastante colorido pensé que ponerle otras cosas sería un exceso.
And my beautiful Practical, Functional and Decorative Mirror is ready. I thought about adding other details, but since the contact paper is quite colorful I thought that adding other things would be an excess.
Estoy muy satisfecha con el resultado, y también siento que éste debe ser el Espíritu de mi Contenido, los DIY que hagan nuestra vida mas fácil, mas hermosa, que le de una segunda y hasta una tercera oportunidad a los materiales, que disponemos.
I am very satisfied with the result, and I also feel that this should be the Spirit of my Content, the DIYs that make our lives easier, more beautiful, that give a second and even a third chance to the materials that we have.
Deseo que te haya gustado, y que antes de botar algo siempre te preguntes: Qué podría hacer con esto..? Te garantizo que el nivel de satisfacción que sentirás es increíble y maravilloso.
I hope you liked it, and that before throwing something away you always ask yourself: What could I do with this...? I guarantee you that the level of satisfaction you will feel is incredible and wonderful.
Las fotos las tomé con mi teléfono Smooth 6.5
Los Collage los hice con la herramienta Collage del mismo teléfono, no usé ninguna aplicación
Usé Traductor Google.
The photos were taken with my Smooth 6.5
I made the Collages with the Collage tool of the same phone, I did not use any application
I used Google Translate.
