
🔸Sin más que añadir, a continuación los dejo con el paso a paso:
✨Good afternoon, holozing friends!✨ I hope you are all doing well and had a happy Christmas. For this part, I am very well, thank God. As always, I am happy to stop by here again to share a nice idea for a Christmas pendant, inspired by Zingu. I couldn't be happier with these cute Christmas creations that I have shared with you and I hope that you are also enjoying them as much as I am. You don't know how happy I was with the result of this cute pendant and with the tender touch that I always try to give to all the characters or creatures of Holozing, especially with their red cheeks haha.
🔸Without more to add, then I leave you with the step by step:
♥️ESPERO QUE TE GUSTE,
¡Empecemos!
♥️I HOPE YOU LIKE IT,
Let's start!

✂️ MATERIALES | ✂️ MATERIALS
- Foami escarchado dorado.
- Foami escarchado azul.
- Foami negro.
- Foami blanco.
- Foami rojo.
- Cinta.
- Pinturas y marcadores.
- Hoja blanca.
- Pegamento.
- Tijeras.
- Lápiz.
- Golden frosted foam.
- Blue frosted foam.
- Black foam.
- White foam.
- Red foam.
- Tape.
- Paints and markers.
- White sheet.
- Glue.
- Scissors.
- Pencil.
✨ PROCEDIMIENTO | ✨ PROCESS
- ✨ PASO 1:
Lo primero que hice fue el patrón en una hoja blanca para dibujar a Zingu, claro que lo hice con ojitos cerrados para que se viera un poco más tierno de lo que ya es y obviamente un gorrito navideño. Seguidamente, transferí los patrones a los colores correspondientes de foami, como explico a continuación:
✨ La cabeza y manitas en foami negro.
✨ Parte central de la cabeza en foami blanco.
✨ Copo de nieve y partes del gorro en foami blanco.
✨ Gorro en foami rojo.
✨ Cristal en foami escarchado azul.
- ✨STEP 1:
The first thing I did was the pattern on a white sheet to draw Zingu, of course I did it with closed eyes so that it looked a little more tender than it already is and obviously a Christmas hat. Next, I transferred the patterns to the corresponding colors of foam, as I explain below:
✨ The head and hands in black foam.
✨ Central part of the head in white foam.
✨ Snowflake and parts of the hat in white foam.
✨ Hat in red foam.
✨ Crystal in blue frosted foam.


- ✨ PASO 2:
Al tener todo recortado, comencé a dar color a los bordes con pinturas y difuminando con ayuda de un pañito para dar más contraste y sombras. Al estar seco, di más detalles con marcador negro, dibujando los ojos, algunos detalles al gorro y con marcador verde, algunos puntos en la parte blanca del gorro y las mejillas con rubor.
- ✨ STEP 2:
Once everything was cut out, I began to color the edges with paints and blending with the help of a cloth to give more contrast and shadows. When it was dry, I gave more details with a black marker, drawing the eyes, some details on the hat and with a green marker, some dots on the white part of the hat and the cheeks with blush.


- ✨ PASO 3:
Luego, llego el momento de pegar todas las piezas de la cabeza, comenzando con la parte central, seguidamente el pico y por último, en la frente, el cristal. Seguidamente, uní las piezas del gorro y este a la cabeza de Zingu.
- ✨ STEP 3:
Then, it was time to glue all the pieces of the head, starting with the central part, then the beak and finally, on the forehead, the crystal. Next, I attached the pieces of the hat and this to Zingu's head.


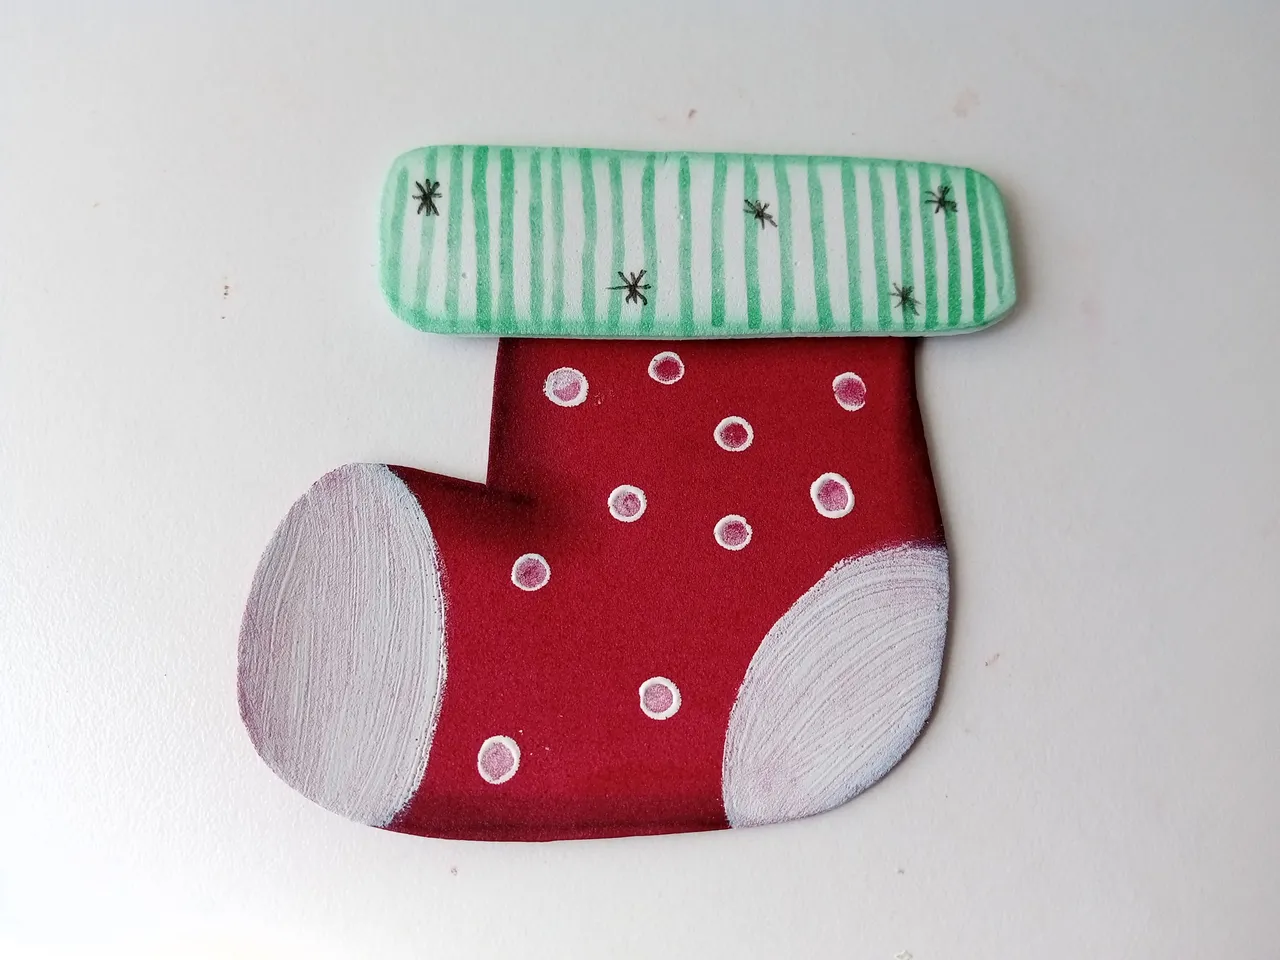
- ✨ PASO 4:
Seguidamente, dibujé un calcetín en hoja blanca, lo transferí a los colores correspondientes de foami que fueron rojo y blanco para la parte superior y repetí más o menos los mismos pasos anteriormente mencionados; di color a los bordes con pinturas, dejé secar, di detalles con marcadores y pinté en algunas partes del calcetín con blanco y puntos. Además, a la parte superior del calcetín le di detalles con marcadores y dejé secar.
- ✨ STEP 4:
Next, I drew a sock on white paper, transferred it to the corresponding colors of foam, which were red and white for the top part and repeated more or less the same steps mentioned above; I colored the edges with paints, let it dry, added details with markers and painted some parts of the sock with white and dots. Also, I gave details to the top of the sock with markers and let it dry.


- ✨ PASO 5:
Al estar seco pegué las piezas hasta formar el calcetín y seguidamente pegué a Zingu en la parte superior y sus manitas tocándose la cara. Finalmente, di puntos de luz a las mejillas, pegué el copo de nieve al gorro y en la parte superior trasera pegué la cinta para poder colgar esta linda decoración y así decorar un poco más mi hogar.
- ✨ STEP 5:
Once it was dry, I glued the pieces together to form the sock and then glued Zingu on the top part and his little hands touching his face. Finally, I gave points of light to the cheeks, glued the snowflake to the hat and on the top back I glued the ribbon to be able to hang this cute decoration and thus decorate my home a little more.


❤️Until the next post.
❤️ Hasta la próxima publicación.
❤️ Until the next post.


Todas las fotografías son de mi propiedad.
Separador y Fotos editadas en Canva
All photographs are my property.
Photos edited in Canva