Hola queridos amigos de Hive GEMS el día de hoy quiero mostrarles como paso a paso como elaborar un cuadro con una tapa de cartón y unos pocos materiales que tengamos en casa!
Hello dear friends of Hive GEMS, today I want to show you how to make a box with a cardboard cover and a few materials that we have at home step by step!

Este cuadro lo hice para decorar el cuarto de mi hija! A ella le gusta los gatos, por eso saque un diseño lo más parecido a la Gatita Mary de lo comiquita de los Aristogatos! Sin más preámbulo aquí les muestro como hacerlo!
I made this painting to decorate my daughter's room! She likes cats, that's why I took a design the closest thing to Cat Mary from the Aristocats comic! Without further ado, here I show you how to do it!
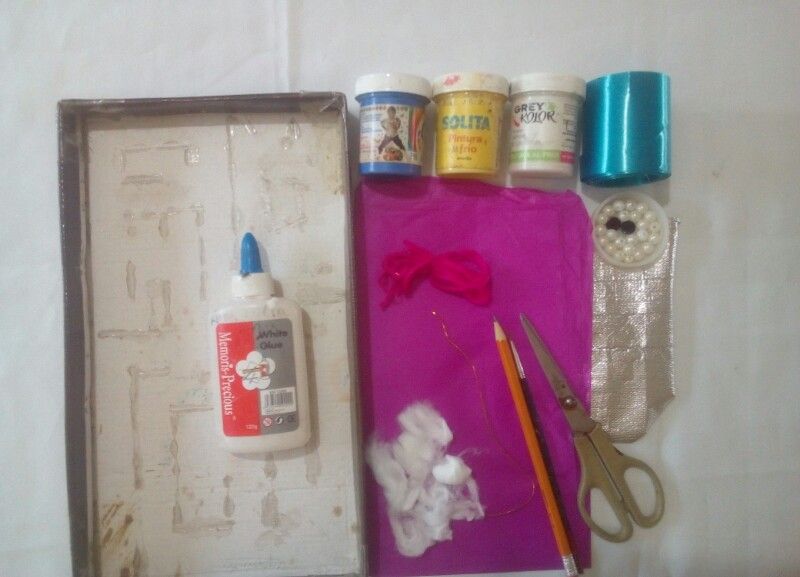
| Materiales-Una tapa de cartón, puede ser de las de las cajas de zapato. -Papel de color fuccia! -Un trozo de papel de regalo color plateado. -Un trozo de foami o goma eva color piel. -Cinta de regalo la más ancha que tengamos. -Pinturas: (color amarillo, azul, blanco). -Pincel. -Pega. -Lápiz. -Tijera. -Estambre. -Guata. -Cuencas o perlitas. | Materials -A cardboard lid, it can be one of the shoe boxes. -Fuccia color paper! -A piece of silver-colored wrapping paper. -A piece of skin-colored foam or eva rubber. -Gift ribbon the widest we have. -Paints: (yellow, blue, white). -Brush.-Job.-Pencil.-Scissor.-Stamen.-Wadding.-Basins or pearls. |
Paso 1
Lo primero que vamos a realizar es forrar nuestra tapa con el papel de color fuccia lo pegamos en el fondo de la tapa, con la cinta vamos a forrar los bordes.
Step 1
The first thing we are going to do is cover our cover with the fuccia colored paper, we stick it on the bottom of the cover, with the tape we are going to cover the edges.

Paso 2
Luego vamos a pintar con el lápiz un foceto de la gatita. Seguidamente procedemos a pintar con el color blanco la imagen y de amarillo el collar!
Step 2
Then we are going to paint a picture of the kitten with the pencil. Then we proceed to paint the image white and the necklace yellow!
 |  |
Paso 3
Esperamos que seque la pintura para luego colocar pega sobre la pintura para pegar trozos de guata para simular el pelaje de la gatita.
Step 3
We wait for the paint to dry and then place glue on the paint to stick pieces of wadding to simulate the kitten's fur.

Paso 4
Para finalizar vamor hacer los ojos: pegamos estambre de color negro hacemos la forma y por dentro pegamos la cuenca negra para hacer el iris del ojo, luego pintamos con un poco de azul.
Pegamos más estambre negro para sacar los pelitos de la barbilla.
Step 4
To finish, make the eyes: we glue black stamen, we make the shape and inside we glue the black socket to make the iris of the eye, then we paint with a little blue.
We glue more black yarn to remove the hairs from the chin.

De esta manera queda lista nuestra gatita.
In this way our kitten is ready.


Gracias por su visita! Espero les haya gustado!!!
Thanks for your visit! I hope you liked it!!!
Mis fotos fueron tomadas con mi teléfono de la marca Blu.
My photos were taken with my Blu brand phone.