¡Hola queridos usuarios de Hive ✨💕!
Hi dear Hive users ✨💕!
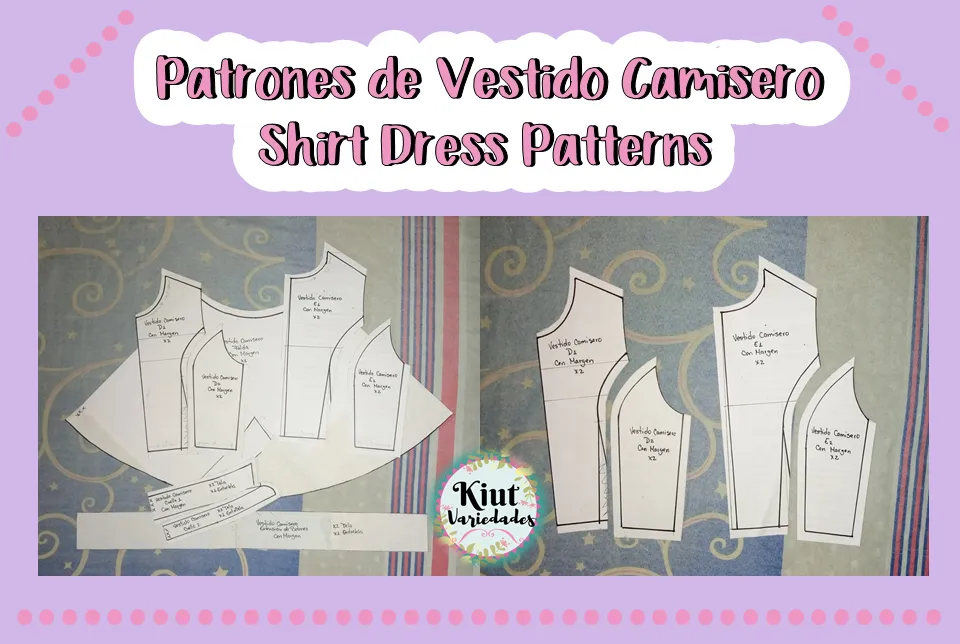
Inicialmente, este sería un solo post, donde les explicaría el trazo de los patrones y la confección del vestido, sin embargo, conforme iba realizando todo sentí que unir ambas partes en una sola publicación seria mucho, es decir quedaría muy larga, entonces mejor he decido realizar esta primera parte con los patrones, y así explicarlos detalladamente, y en la siguiente publicación realizar la confección. En este modelo de vestido, les estaré explicando el corte princesa, el cual debo confesar es uno de mis favoritos, pues le da una muy bonita forma al cuerpo, así que sin más, vamos a comenzar.
Initially, this would be a single post, where I would explain the layout of the patterns and the making of the dress, however, as I was doing everything I felt that joining both parts in one post would be too much, so I decided to make this first part with the patterns, and explain them in detail, and in the next post I will explain the making of the dress. In this dress model, I will be explaining the princess cut, which I must confess is one of my favorites, because it gives a very nice shape to the body, so without further ado, let's get started.

📐👗 MATERIALES || MATERIALS 📐👗
• Hojas de Papel
• Patrón Básico de Blusa para Dama.
• Lapiz o Marcador.
• Cinta Metrica.
• Reglas de patronaje (solo si se poseen).
• Tijera.
• Paper Sheets.
• Basic Blouse Pattern for Lady.
• Pencil or Marker.
• Tape measure.
• Pattern Rulers (only if you have them).
• Scissors.

📐👗 MANOS A LA OBRA || HANDS ON 📐👗
Aunque para la confección de estos patrones estaremos utilizando el básico de blusa para dama, también necesitaremos unas pocas medidas extras.
- Altura de Busto: se toma desde el nacimiento cuello-hombro hasta la parte más prominente del busto.
- Separación de Busto: se toma desde la parte más prominente de un seno al otro.
- Largo de Total de Falda: desde la cintura hasta el largo deseado.
Although for the making of these patterns we will be using the basic blouse pattern for women, we will also need a few extra measurements.
- Bust height: is taken from the neck-shoulder point to the most prominent part of the bust.
- Bust Spread: is taken from the most prominent part of one breast to the other.
- Total Skirt Length: from the waist to the desired length.
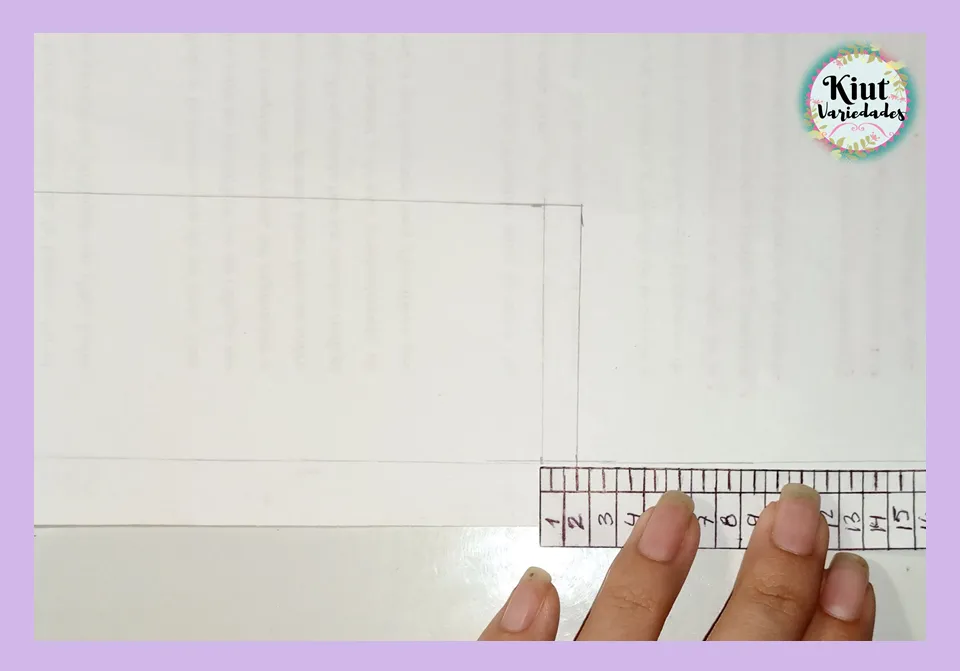
Calcamos patrón delantero, y lo primero que haremos será bajar 1cm en la sisa y quitar 2 cm en al hombre, y formaremos una nueva sisa. Después de esto añadiremos 3cm en la cintura, y uniremos esta marca a la nueva sisa.
We calculate the front pattern, and the first thing we will do is to lower 1cm in the armhole and remove 2cm in the man, and we will form a new armhole. After this we will add 3cm at the waist, and join this mark to the new armhole.


Vamos a medir desde la parte superior (en el vértice cuello hombro) hacia abajo la medida de Altura de Busto, luego mediremos desde la línea central hacia la parte interna la mitad de la medida de Separación de Busto, y lo mediremos igual en la cintura. De esta forma haremos una pinza.
We will measure from the top (at the apex of the shoulder neck) down the Bust Height measurement, then we will measure from the center line to the inside half of the Bust Gap measurement, and we will measure the same at the waist. In this way we will make a clamp.

Ubicamos la mitad de la sisa, y unimos ese punto con una curva a la pinza que acabamos de hacer. Ahora tendremos dos piezas delanteras (D1 y D2), a esto se le conoce como corte princesa, para añadir márgenes de costura calcamos una de las dos piezas en un papel aparte, y entonces damos los centímetros de margen a cada lado, excepto en la sisa y en la parte central (por allí ira la extensión de botones).
We locate the middle of the armhole, and we join that point with a curve to the clip we just made. Now we will have two front pieces (D1 and D2), this is known as princess cut, to add seam allowances we trace one of the two pieces on a separate piece of paper, and then we give the centimeters of seam allowance on each side, except in the armhole and in the center part (there will be the button extension).


El patrón de la espalda se hará de la misma manera en cuanto a la sisa y al corte, solo que aquí la pinza si se hará en la mitad de la cintura y llegara a 4cm por debajo de la línea de sisa.
The back pattern will be made in the same way as for the armhole and the cut, only here the darts will be made in the middle of the waist and will reach 4cm below the armhole line.


Sin embargo, en la espalda haremos un pequeño entalle, para ello eliminaremos 1cm en la cintura por la parte central, y uniremos ese punto al vértice del cuello. De esta forma la prenda se ajustara mejor en la espalda. Para dar los márgenes hacemos igual que con el delantero, aquí solo evitaremos dar márgenes a la sisa.
However, in the back we will make a small notch, for this we will eliminate 1cm in the waist by the central part, and we will join that point to the vertex of the neck. This way the garment will fit better in the back. To give the margins we do the same as with the front, here we will only avoid giving margins to the armhole.


Para hacer el cuello mediremos el escote delantero y espalda, sin incluir los márgenes de costura, y haremos un rectángulo que tenga la suma de esas medidas, por 10 cm de ancho. Añadimos otro pequeño rectángulo de 1.5 cm que será para la extensión de botones en el cuello.
To make the collar, measure the front and back neckline, not including seam allowances, and make a rectangle that is the sum of those measurements, by 10 cm wide. Add another small rectangle of 1.5 cm for the extension of the buttons on the collar.

En la parte central subiremos 3cm y además vamos a realizar una marca con la medida del escote de la espalda. En el rectángulo que pertenece a la extensión de botones, vamos a subir 1,5cm, y uniremos esta marca con una curva suave a la del escote de la espalda, el resto va en línea recta.
In the central part we will raise 3cm and we will also make a mark with the measurement of the back neckline. In the rectangle that belongs to the button extension, we will raise 1.5cm, and we will join this mark with a smooth curve to the back neckline, the rest goes in a straight line.

A partir de esta línea que acabamos de formar, vamos a medir 3cm hacia arriba y trazaremos esta línea finalizando con una curva un poco más cerrada, en la parte de la extensión de botones.
From this line that we have just formed, we will measure 3cm upwards and we will draw this line ending with a slightly tighter curve, in the part of the button extension.

Vamos a medir 1cm desde la línea del rectángulo inicial hacia adentro, además subiremos 2cm en la parte central, y uniremos estas dos marcas con una curva suave contraria a la de abajo.
We will measure 1cm from the line of the initial rectangle towards the inside, we will also raise 2cm in the central part, and we will join these two marks with a smooth curve opposite to the one below.

Prolongamos hacia arriba la línea del rectángulo inicial, y desde el punto del cm que metimos, vamos a medir de 7 a 8cm en dirección a esta línea que acabamos de prolongar. Unimos estos puntos con una línea recta, y después finalizamos la parte superior con una curva suave y una línea recta.
We extend upwards the line of the initial rectangle, and from the point of the cm that we put in, we will measure 7 to 8cm in the direction of this line that we have just prolonged. We join these points with a straight line, and then we finish the upper part with a smooth curve and a straight line.


Para dar márgenes de costura hacemos lo mismo que explique anteriormente, calcamos una de las piezas en otro parte, las dos piezas del cuello se deben cortar 2 veces en tela y 1 en entretela.
To give seam allowances we do the same as explained above, we trace one of the pieces in another part, the two pieces of the collar should be cut 2 times in fabric and 1 in interlining.

Para hacer el patrón de la falda primero debemos medir la cintura en los patrones (sin añadir el margen de costura) la medida que obtengamos la vamos a multiplicar por 2, y el resultado los dividiremos entre 3.14, y así obtendremos la medida de radio de la cintura. En la esquina del papel realizamos un semi arco con la medida que acabamos de obtener. Para darle el largo a la falda, realizaremos lo mismo, solo que a la medida del largo deseado le sumaremos esta medida de radio de cintura (y los 3cm de dobladillo), para así realizar el arco desde la esquina del papel. En la cintura daremos el margen de costura.
To make the pattern of the skirt we must first measure the waist in the patterns (without adding the seam allowance) the measurement we obtain will be multiplied by 2, and the result will be divided by 3.14, and thus we will obtain the measurement of the waist radius. In the corner of the paper we make a semi-arc with the measurement we just obtained. To give the length to the skirt, we will do the same, only that we will add this waist radius measurement (and the 3cm of hem) to the desired length, in order to make the arc from the corner of the paper. At the waist we will give the seam allowance.


Para la extensión de botones vamos a medir el largo de la falda (sin el margen de la cintura), y el largo del corpiño delantero central, a esta medida le sumaremos unos 5cm extra aproximadamente (solo para que no falte tela) y haremos un rectángulo que tenga esta medida de largo, y de ancho 8cm. Ya la medida del ancho viene con los márgenes de costura incluidos, al igual que el cuello, se debe cortar 2 piezas en tela y 1 en entretela.
For the extension of buttons we will measure the length of the skirt (without the waist margin), and the length of the front center bodice, to this measure we will add about 5cm extra (just to avoid missing fabric) and we will make a rectangle that has this measure of length, and width of 8cm. The width measurement comes with the seam allowances included, as well as the neckline, you must cut 2 pieces in fabric and 1 in interlining.

LISTOOOOO!!!!👏👏, ya los patrones están terminados y estamos más cerca de realizar un hermoso vestido camisero, en la próxima publicación les mostrare toda la confección de dicho y vestido, y de verdad espero sea mucha utilidad.
READY!!!!👏👏, the patterns are already finished and we are closer to make a beautiful shirt dress, in the next publication I will show you all the confection of the dress, and I really hope it will be very useful.


Te invitamos igual que siempre a que intentes este proyecto por tu cuenta y nos cuentes en los comentarios 👇 como es tu experiencia.
We invite you as always to try this project on your own and tell us in the comments 👇 as is your experience..


Síguenos en todas nuestras redes sociales… || Follow us on all our social networks ...
Facebook:KiutVariedades
Instagram:@Kiut_variedades
Twitter:@Kiut_variedades