Buenas amigos de hive, espero estén bien. Hoy quiero compartir con ustedes un hermoso círculo decorativo con la temática de hot wheels que realice para celebrar los 5 años de mi sobrino, este fue utilizado como foco central para la decoración. Esta realizado con material de provecho y fáciles de conseguir. Lo fascinante de estos círculos decorativos es su versatilidad, ya que, una vez cubiertos podemos adornarlos con la temática de nuestra preferencia.
Good hive friends, I hope you are well. Today I want to share with you a beautiful decorative circle with the theme of hot wheels that I made to celebrate the 5 years of my nephew, this was used as a central focus for the decoration. It is made with useful material and easy to get. The fascinating thing about these decorative circles is their versatility, since, once covered, we can decorate them with the theme of our preference.

Materiales:
1 caja de cartón
Hojas recicladas
Tijera
Pega blanca o silicón
Lápiz
Colores
Materials:
1 carton
Recycled sheet
Scissor
White glue or silicone
Pencil
Colors

Paso 1:
Lo primero que debemos hacer es dibujar y recortar un circulo en la caja de cartón, yo lo realice de aproximadamente 50 cm de diámetro, usted puede realizarlo del tamaño de su preferencia ya que va a depender de para que lo desee usar.
Step 1:
The first thing we must do is draw and cut out a circle in the cardboard box, I will make it approximately 50 cm in diameter, you can make it the size of your preference since it will depend on what you want to use it for.
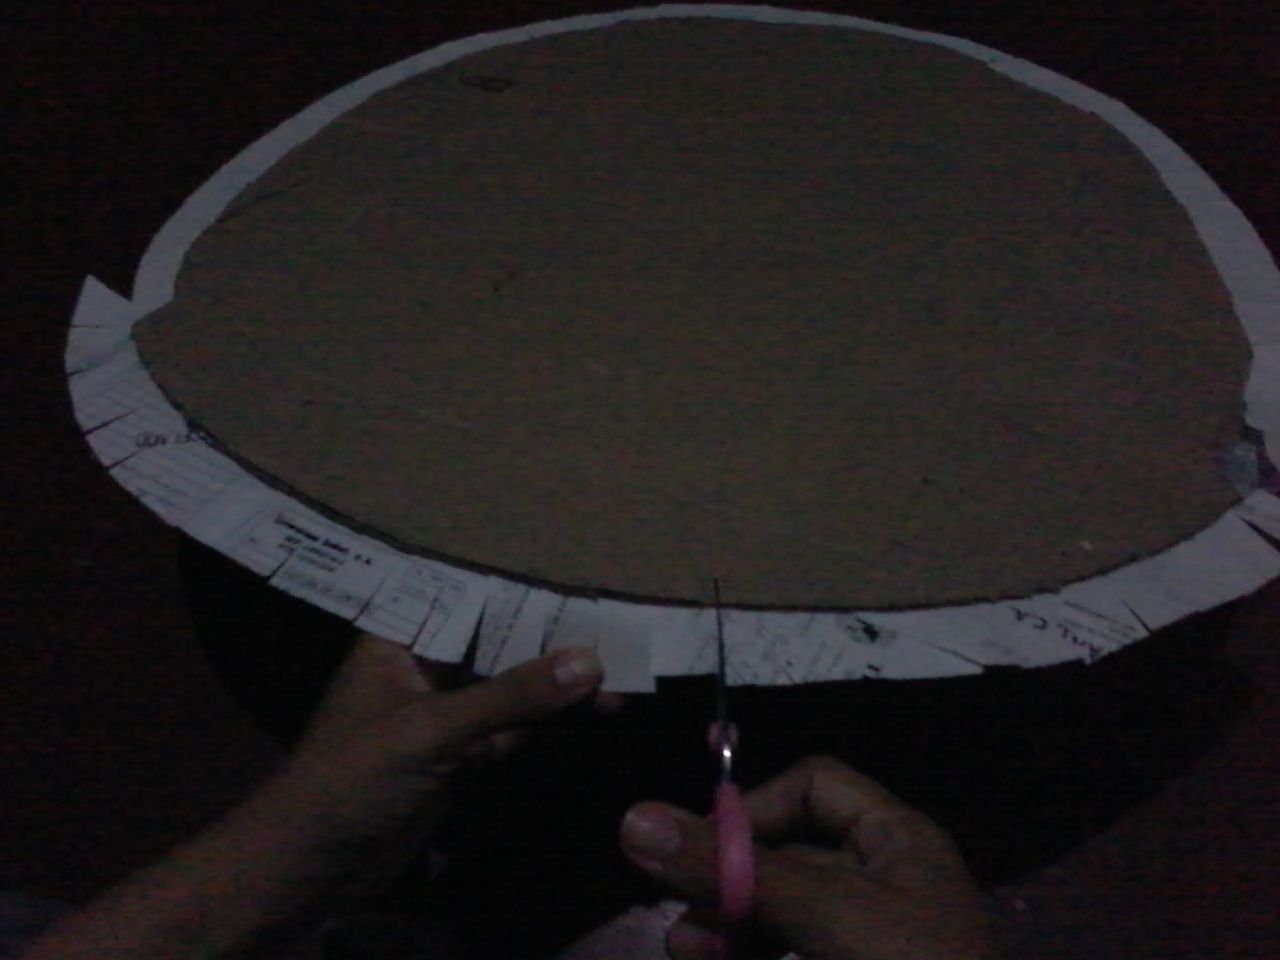

Paso 2:
Una vez que tengamos el círculo debemos cubrirlo con las hojas de reciclaje. Para hacer este trabajo un poco más fácil procedemos a pegar varias hojas antes cubrir el circulo, también puede ir pegando una a una directamente sobre el circulo hasta cubrirlo por completo, como le resulte más cómodo. Como pueden observar yo primero uní todas las hojas. Para que resulte más bonito, no recorte las hojas al ras del cartón sino que remate todo el círculo por el lado contrario para lo que le realice varios cortes a las hojas a lo largo de toda la circunferencia.
Step 2:
Once we have the circle we must cover it with the recycling sheets. To make this work a little easier we proceed to glue several sheets before covering the circle, you can also glue one by one directly on the circle until it is completely covered, as is more comfortable for you. As you can see, I first joined all the leaves. To make it more beautiful, do not cut the leaves flush with the cardboard, but finish the entire circle on the opposite side, making several cuts to the leaves along the entire circumference.


Paso 3: Dibujar y colorear.
Ya que el círculo está cubierto realice el dibujo de la pista y lo coloree. En mi caso para que quedara muy lindo utilice un poco de tiza azul para darle el efecto del cielo. En este paso debo pedir disculpas ya que el dibujo del carro lo realice previamente y no tome fotos del procedimiento pero es básicamente lo mismo. En una próxima oportunidad les mostraré como hacer un dibujo igual. Una vez que termine todos los detalles de la pista sobre el círculo pegue el auto sobre la misma y listo. Tenemos un bonito adorno para utilizar en la decoración de una fiesta de cumpleaños como era mi caso o para decorar el cuarto de los más pequeños de la casa.
Step 3: Draw and color.
Since the circle is covered, draw the track and color it. In my case, to make it look very nice, I used a little blue chalk to give it the effect of the sky. In this step I must apologize since the drawing of the car was done previously and I did not take photos of the procedure but it is basically the same. In a next opportunity I will show you how to make a similar drawing. Once you finish all the details of the track on the circle, stick the car on it and you are done. We have a nice ornament to use in the decoration of a birthday party as was my case or to decorate the room of the smallest of the house.


Me despido hasta una nueva publicación, espero les haya gustado…..!
I say goodbye until a new publication, I hope you liked it… ..!
Todas las traducciones se hicieron con ayuda de Google Translate.
All translations were done with the help of Google Translate.