
Hace unos días, como cosa rara, se fue la luz en mi casa 🤦♀️. En esos momentos, como dependemos mucho de la tecnología, no encontramos mucho que hacer, así que toca desempolvar los juegos de mesa. En ese momento me dieron ganas de hacer un rompecabezas así que me puse a buscar pero, para mi tristeza, o no encontré o los que encontré estaban incompletos.
A few days ago, as a strange thing, the power went out in my house 🤦. In those moments, as we depend a lot on technology, we don't find much to do, so it's time to dust off the board games. At that moment I felt like doing a puzzle so I started looking but, to my sadness, either I didn't find it or the ones I found were incomplete.
Para no decirle terquedad, lo llamaré perseverancia, y gracias a eso decidí ponerme a hacer rompecabezas por mi cuenta. A continuación les dejo el paso a paso.
Not to call it stubbornness, I'll call it perseverance, and thanks to that I decided to start doing puzzles on my own. Here is the step-by-step.
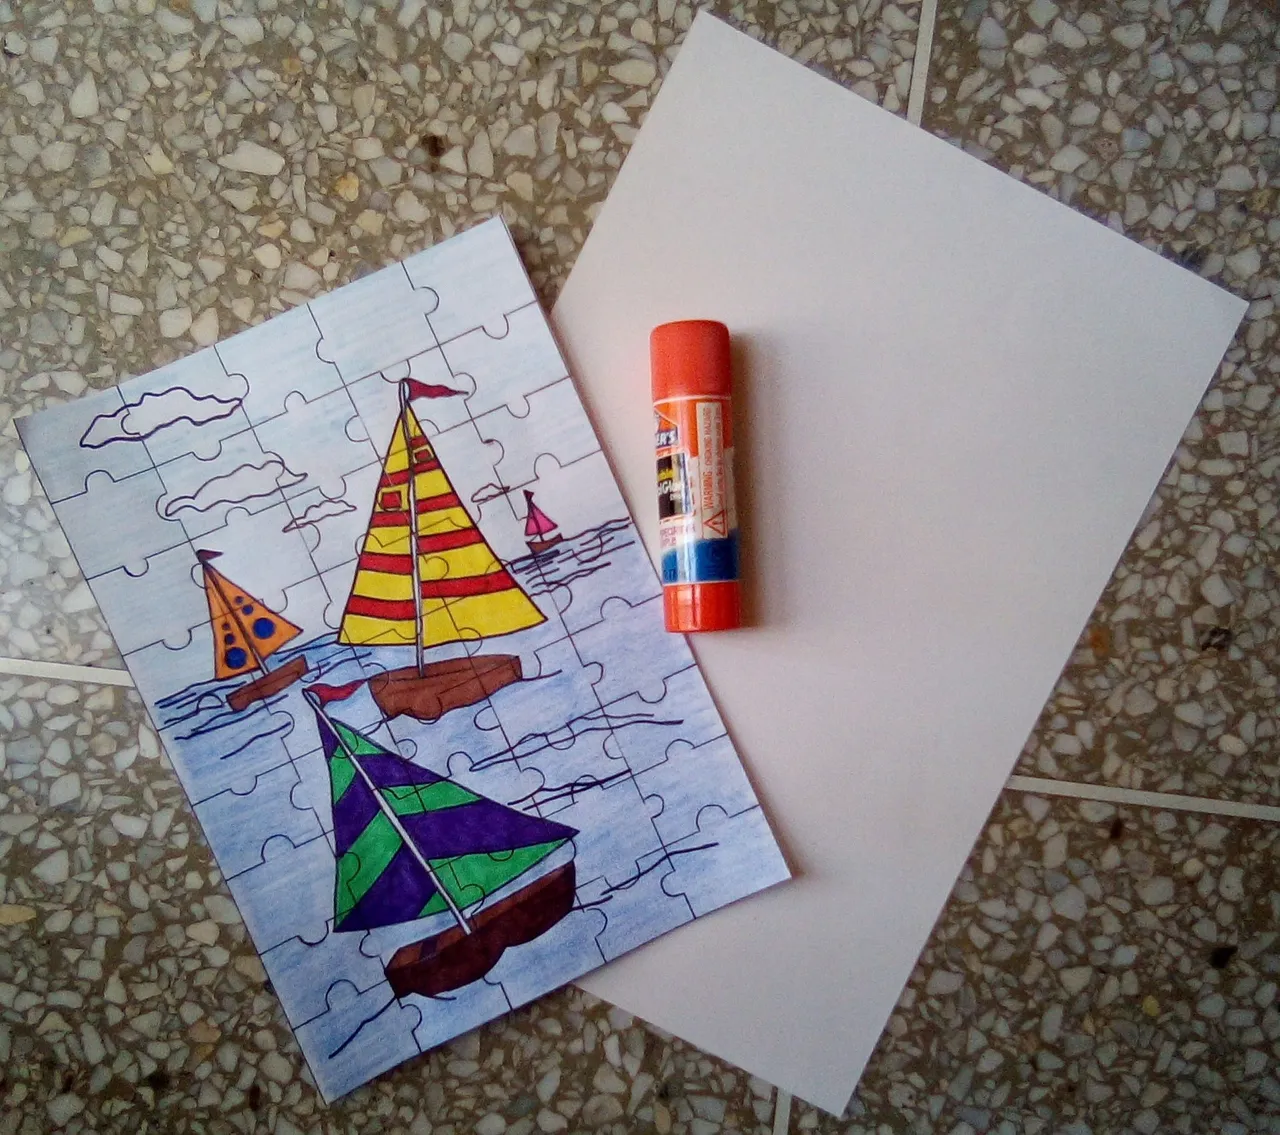
Materiales:
- Dibujo para calcar
- Hoja, lápiz, marcador, regla y colores para el dibujo y la forma del rompecabezas
- Cartulina y pegamento para darle mayor firmeza al rompecabezas
- Tijera para recortar las piezas
Materials:
- Drawing for trace
- Sheet, pencil, marker, ruler and colors for the drawing and the shape of the puzzle
- Cardboard and glue to make the puzzle stronger
- Scissors to cut out the pieces

Paso 1: Calcar el dibujo
Step 1: Trace the drawing

Paso 2: Colorear el dibujo
Step 2: Color the drawing

Paso 3: Dibujar la forma del rompecabezas
Step 3: Draw the shape of the puzzle
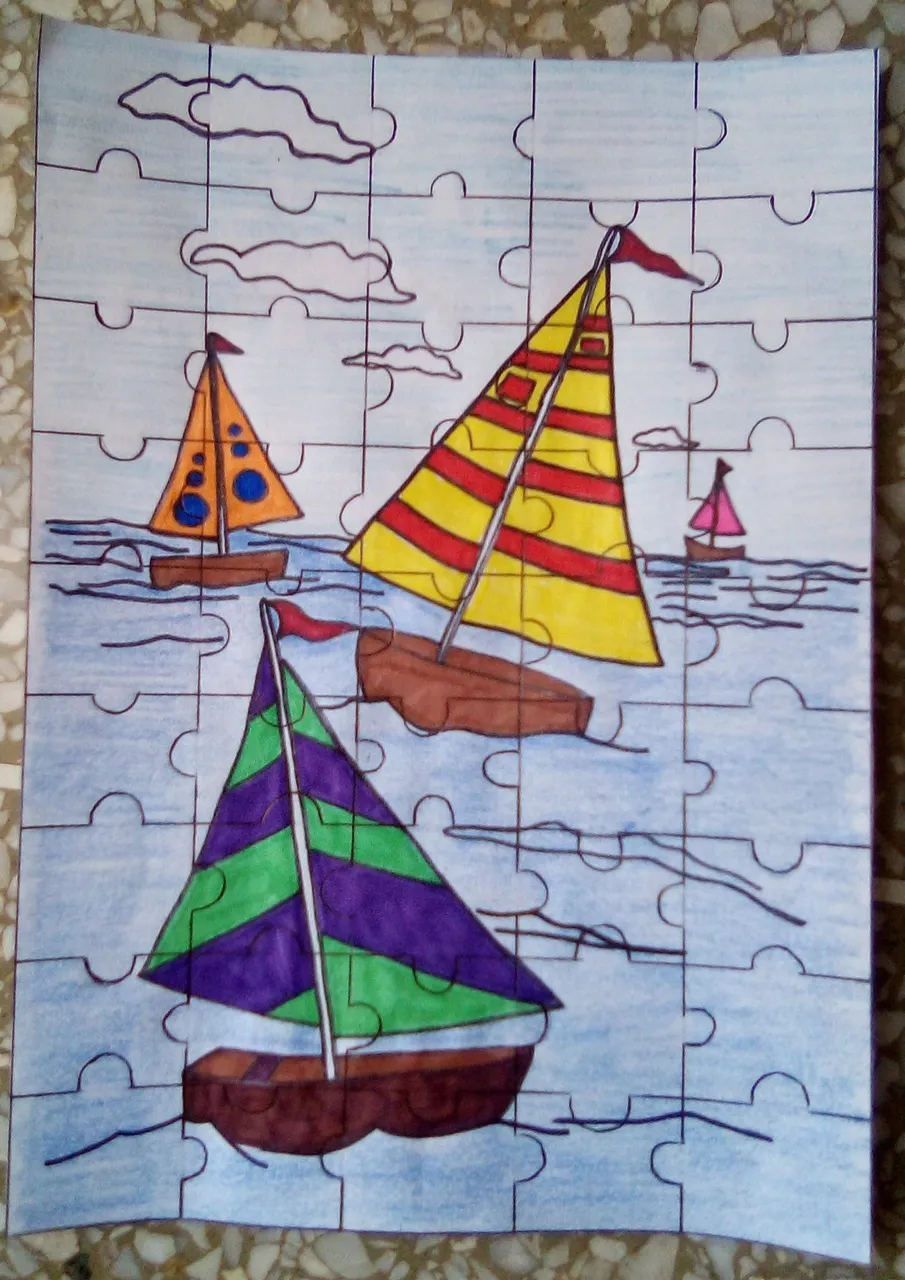
Paso 4: Pegar la cartulina detrás del dibujo
Step 4: Paste the cardboard behind the drawing
Paso 5: Recortar alrededor de la forma del rompecabezas
Step 5: Cut out around the shape of the puzzle

Resultado: / Result:

En realidad, la cartulina que utilice era demasiado delgada para este tipo de manualidad. Así que, como de todo se aprende, ya sé que la próxima debo seguir los mismos pasos pero tengo que usar, o doble cartulina o un cartón de mayor consistencia. Sin embargo, para ser la primera vez, me gustó mucho el resultado y creo que podré utilizarlo si próximamente se me vuelve a ir la luz 🤷♀️.
Actually, the cardboard I used was too thin for this type of craft. So, as you learn from everything, I know that next time I must follow the same steps but I have to use either double cardboard or a more consistent cardboard. However, to be the first time I do it, I really liked the result and I think I will be able to use it if the light goes out again soon 🤷.
El texto fue traducido en Deepl. - The text was translated in Deepl.