Hi friends!
I continue to learn a capabilities of programm Realistic Paint Studio.
In last tutorial I drew with sketch drawing tools as a pastel and color pencils.
Now I decided to try a watercolor tools in this programm.

I took a shot of my Livejournal friendin I was take as a reference
I started my work with lunch a programm and create new project (marked with red square)

Then I choosed a kind of paintinsg - "Watercolor"

and choosed a sort of canvas

So I can set a name of my artwork hier

In license version the program has an advanced settings to create a new artwork
(top right button "Create custom")

Here I can select a custom work size,

canvas texture and background

So I started to work

With green select top button I choose a sketching tools

If the palette interferes with drawing, you can remove it (to select button with palette view)

Making a sketch

Then I started a watercolor painting.
Created new layer and choosed a basic brush

Painting the evening winter sky

Choosing a blur brush

So colorful sky I drew
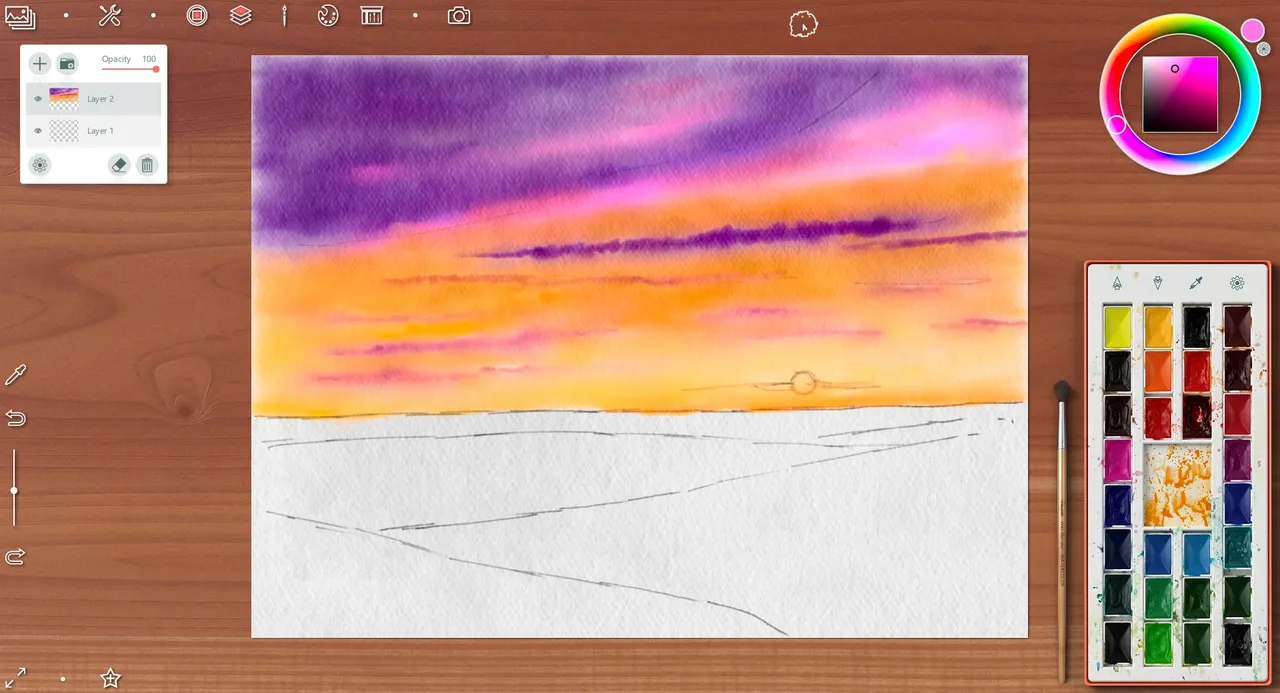
Earth is deep blue on foreground and more light as far away

For drawing the sun I choosed a brush with very thin and delicate stroke

Drawing the sun, some clouds near it and a light pole on new layer

Then I created another new layer and choosed a brush for trees

I decided to draw a spruce forest

Using a sponge tool , I maked a back trees blurry a little


In this step I painted a details - the forest on middle distance

and on foreground

To save a intermediate step of artwork I select this button in top left angle

Duplicated sky layer to make it more colorful

Detalized a separate clouds

And finish way - I choosed a special tool "container with water" and addet to drawind some paint drips (as real in watercolor picture)

And changed an opasity of earth layer to 66%

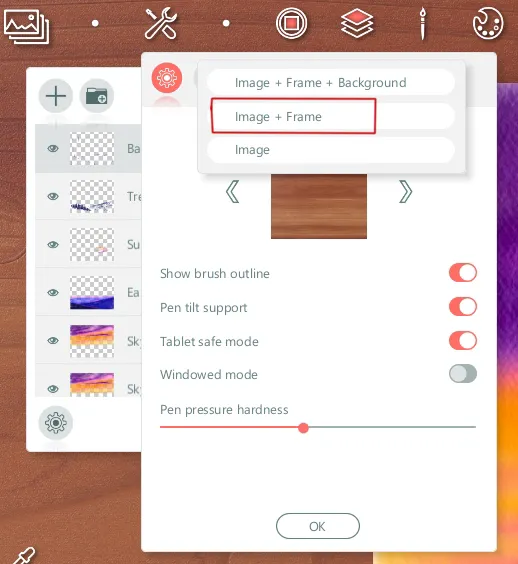
To save artwork as simple picture (without painting decoration) you can choose an option you want

I choosed this time an option with frame
Final artwork
And two presentation for Instagram and etc.


Have a nice and creative day!
Gera