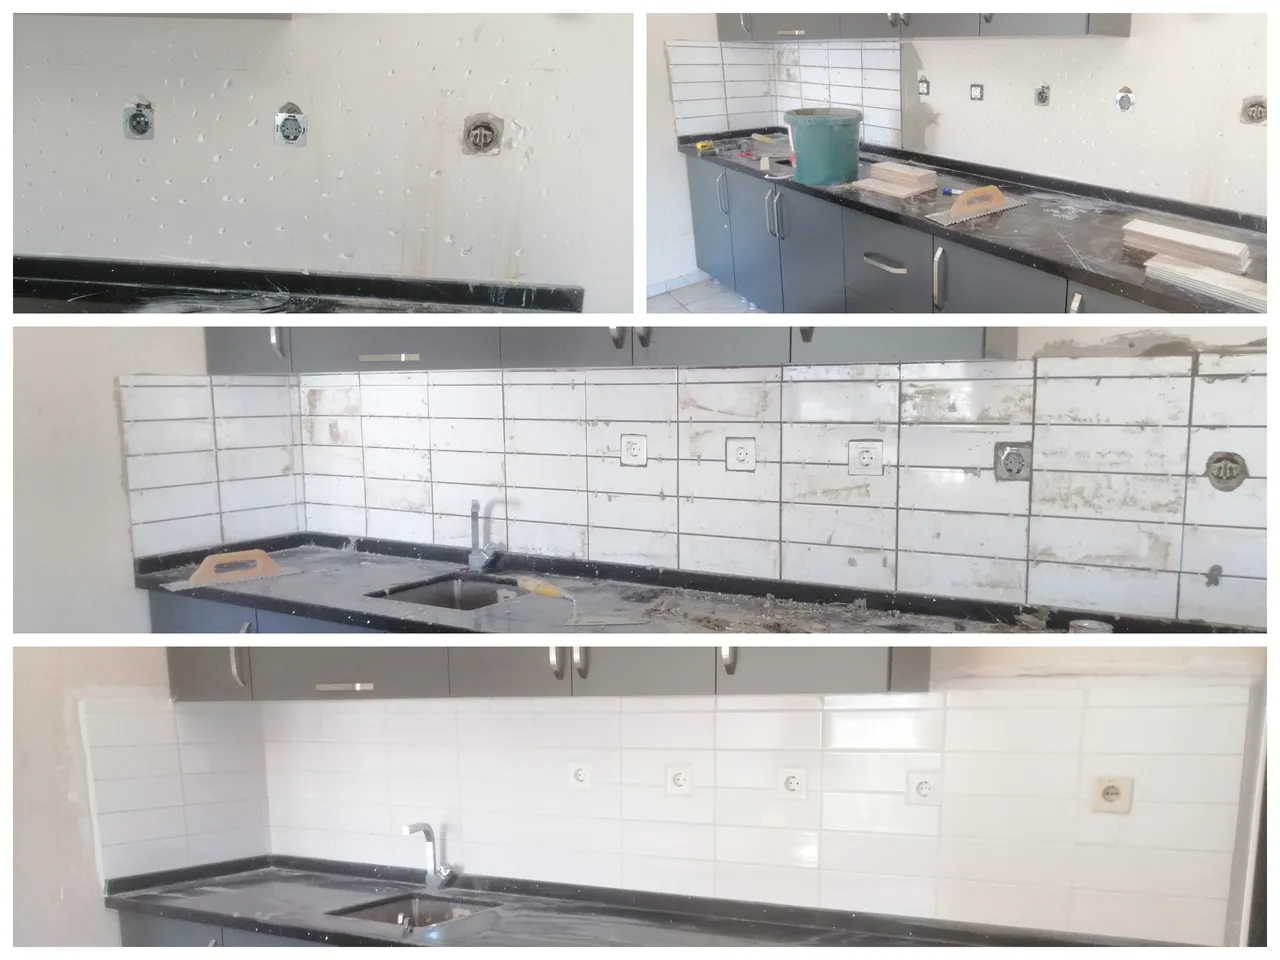
I haven't written here for a long time. I am about to make radical changes in my life. Anyways. Here I am again with another architectural renovation article. We renewed our kitchen cabinets at my workplace. It's been a long time since I replaced kitchen cabinets with new ones. However, we postponed the laying of tiles on the wall between the cabinets and the marble sink for a long time. In fact, this procrastination was quite damaging to the wall and cabinets. Because there is a big cauldron with tea and hot water on the black marble you see. And this tea samovar is always in operation. So every minute of the day it pumps steam into the walls and cabinets. In addition, dishes are constantly being washed on this kitchen counter. These conditions caused both steam and water to accumulate on the wall and caused the wall to be worn and dirty. We have decided to accelerate the tile laying work, which we postponed for a long time.
Uzun zamandır burada yazı yazmıyorum. Hayatımında köklü değişiklikler yapmak üzereyim. Neyse. İşte yine karşınızda mimari açıdan bir tadilat yazısı ile karşınızdayım. İş yerimde bulunan mutfak dolaplarımızı yeniledik. Mutfak dolaplarını yenileriyle değiştireli çok oldu. Ancak dolaplar ile lavabo mermeri arasında kalan duvara fayans döşeme işini uzun bir süre erteledik. Aslında bu erteleme işi duvara ve dolaplara oldukça zarar veriyordu. Çünkü gördüğünüz siyah mermerin üzerinde çayın ve sıcak suyun bulunduğu büyük bir kazan bulunuyor. Ve bu çay semaveri sürekli çalışır durumda. Yani günün her dakikası duvara ve dolaplara buhar pompalıyor. Ayrıca bu mutfak tezgahında sürekli bulaşık yıkanıyor. Bu durumlar da hem buharın hem de suyun duvarda birikmesine ve duvarın yıpranıp kirlenmesine neden oluyordu. Biz de uzun zamandır ertelediğimiz fayans işini hızlandırmaya karar verdik.


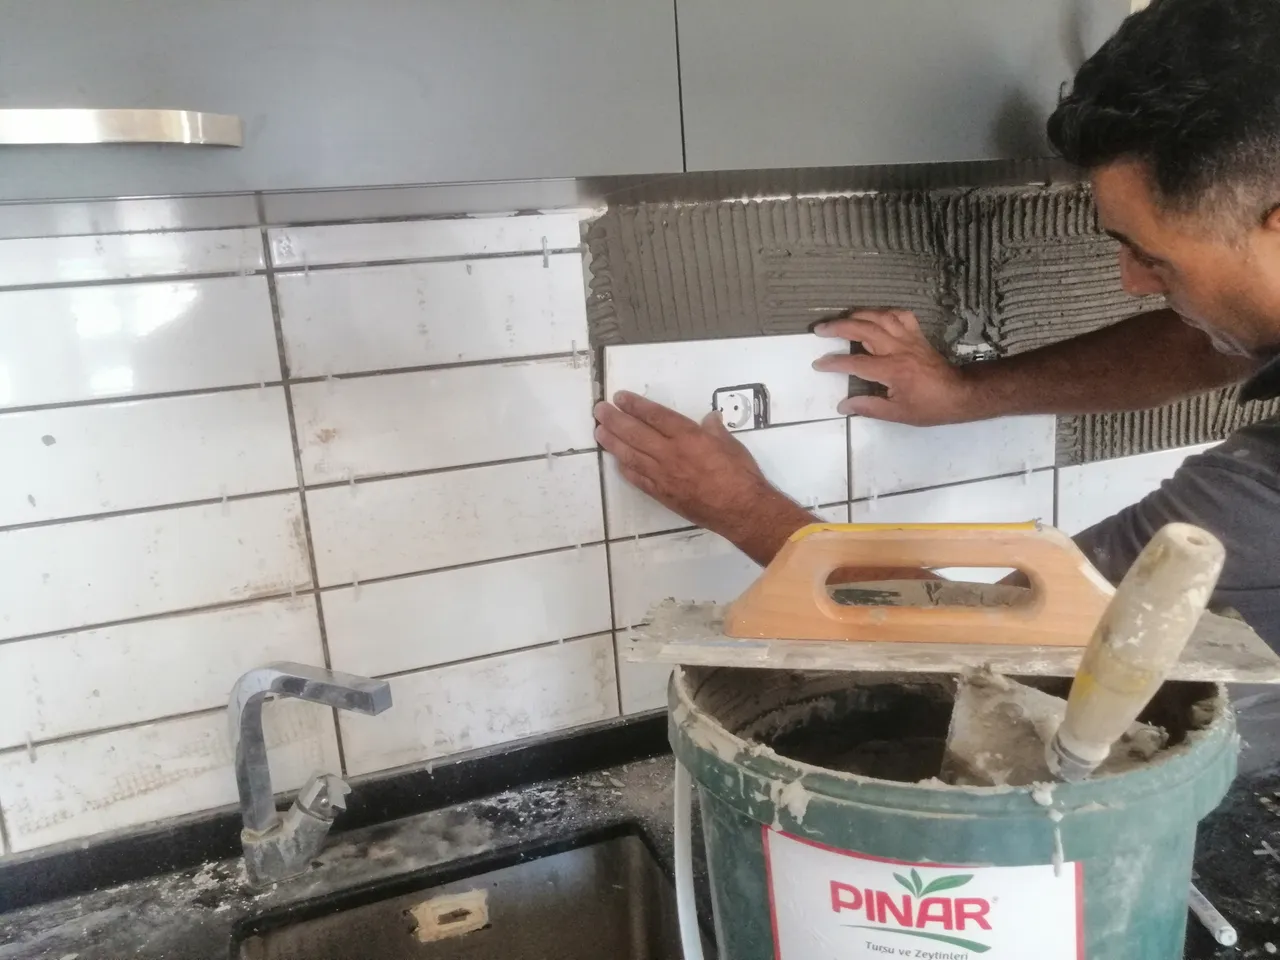
The master who will do the tile work first removed the sockets on the wall and started to make holes in the wall with the spatula in his hand. The reason he drilled these holes was to keep the tile intact during the plastering process on the wall. The tiles we received were normally square in shape. However, in order to make it look more aesthetic on the wall, our master started to cut the tiles as 30x10 cm rectangles and stick them on the wall.
Fayans işini yapacak usta önce duvardaki prizleri söktü ve elindeki spatula ile duvarda delikler açmaya başladı. Bu delikleri açmasının nedeni duvara yapacağı sıva işleminde fayansın sağlam durması içindi. Aldığımız fayanslar normalde kare şeklindeydi. Ancak duvarda daha estetik görünmesi açısından ustamız, fayansları 30x10 santimetre ölçülerinde dikdörtgen olarak kesip öyle duvara yapıştırmaya başladı.


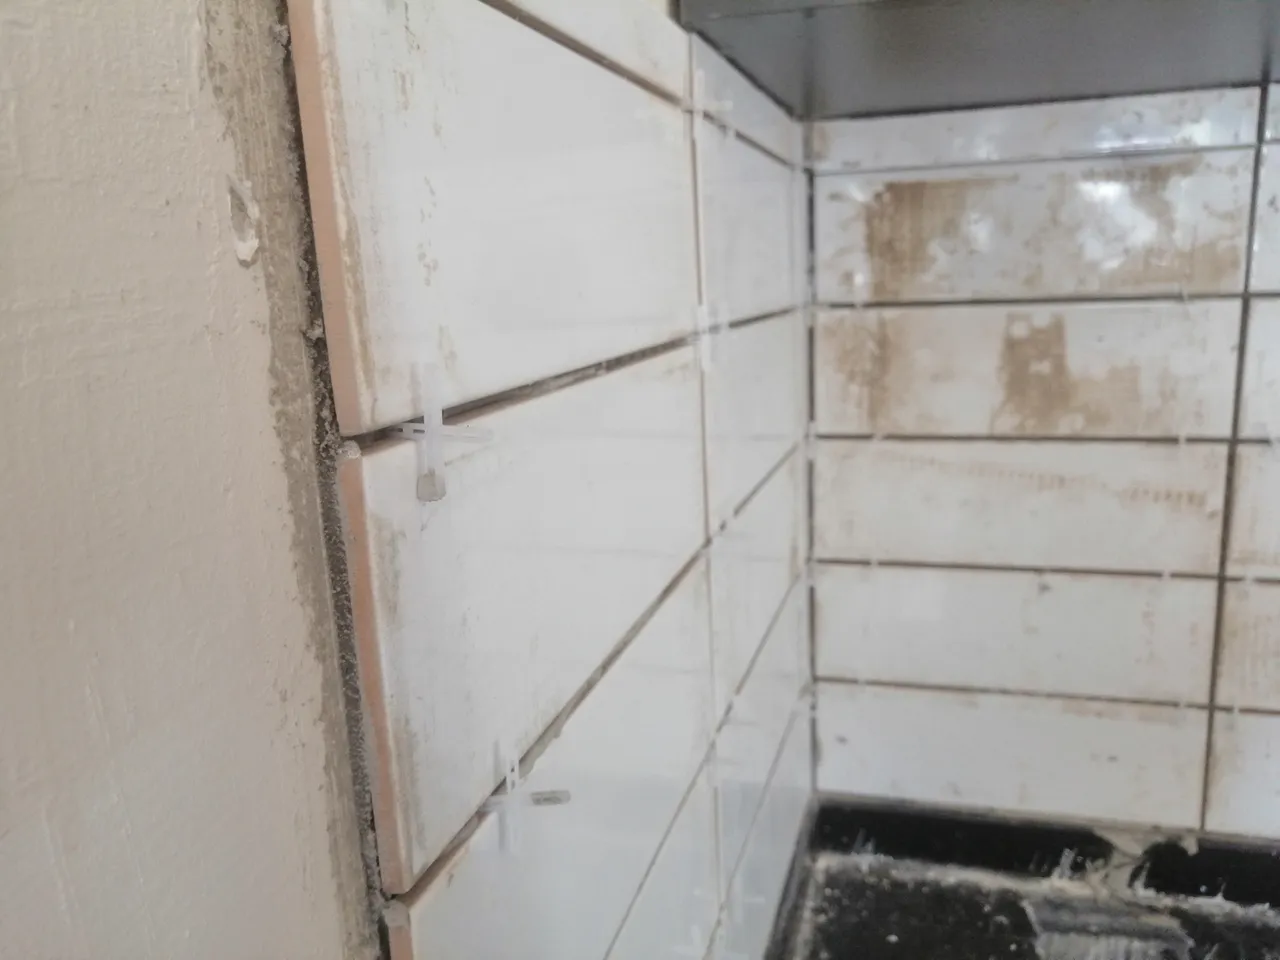
Our master finished a certain part of the wall first and left plus-shaped brackets between the tiles laid on the wall. The reason he left this separator was to prevent the tile from sliding down left and right. Then, waiting for the plaster under the tile to dry, our master would remove those braces after the plaster dried. After the braces were removed, he cleaned the tiles with a damp cloth. And then left it to dry for a day. What our master suggested to us was that these tiles should not come into contact with water until they are thoroughly dry.
Ustamız duvarın önce belli bir kısmını bitirdi ve duvara döşenen fayansların aralarına artı biçiminde ayraçlar bıraktı. Bu ayracı bırakmasının nedeni fayansın aşağı sağa sola kaymasının önüne geçmekti. Daha sonra fayansın altındaki sıvanın kurumasını bekleyen ustamız o ayraçları sıva kuruduktan sonra söküp çıkaracaktı. Ayraçlar da çıktıktan sonra nemli bir bezle fayansları temizledi. Ve sonra bir gün boyunca kurumaya bıraktı. Ustamızın bize önerdiği şey, bu fayansların tamamen kuruyana kadar suyla temas etmemesiydi.


After the cement residues were removed from the top, the beautiful appearance of the tiles began to emerge gradually. In fact, even if they stay like this, I can say that it looks much better than before. The tiles were left in this state for a day without any contact with water. So the cement underneath dried and the tiles became more solid.
Üstünden çimento kalıntıları alındıktan sonra fayansların güzel görüntüsü yavaş yavaş ortaya çıkmaya başladı. Aslında böyle kalsalar bile eski halinden çok daha güzel göründüğünü söyleyebilirim. Fayanslar bir gün boyunca bu halde ve suyla hiç temas etmeden beklediler. Böylece altındaki çimento kurudu ve fayanslar daha sağlam hale geldi.


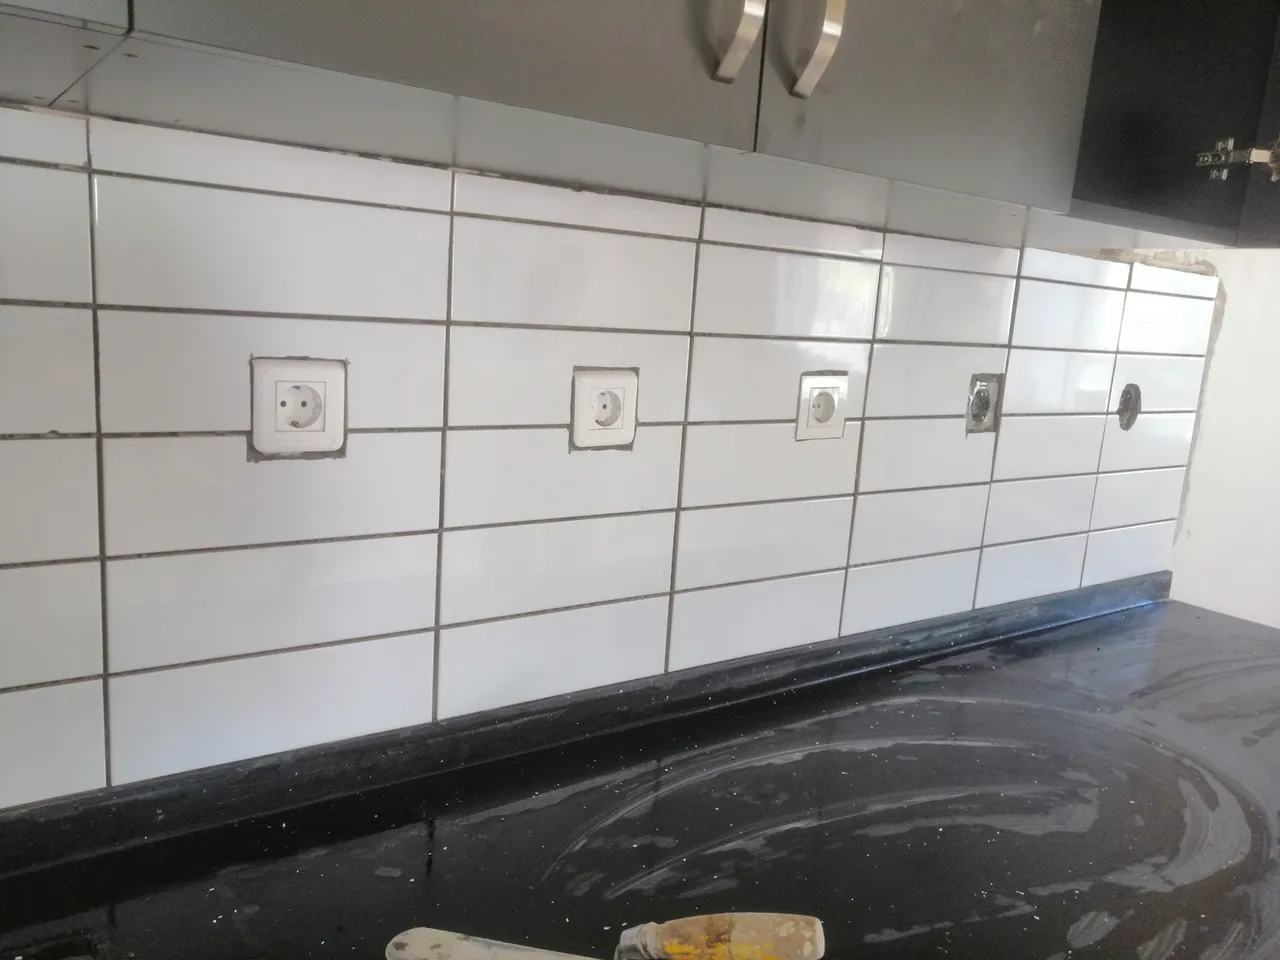


After waiting like this for a day and after it dries well, our master came and started working again. First, he made a white filling for the tile gaps. This filling is made of plaster. It is generally used as a filling plaster in constructions. Before filling the gaps between the tiles with plaster, he replaced the removed sockets. Then he started to fill the gaps between the tiles with filler plaster. It was obvious that he worked with fine workmanship and meticulousness. I can say that the tiles looked much better after the process. There was almost no trace of cement blackness the day before.
Bir gün boyunca böyle bekledikten sonra ve iyice kuruduktan sonra ustamız geldi ve tekrar çalışmaya başladı. Önce fayans araları için beyaz renkte bir dolgu yaptı. Bu dolgu alçıdan yapılıyor. Genelde inşaatlarda dolgu alçısı olarak kullanılıyor. Fayans aralarını dolgu alçı ile doldurmadan önce sökülen prizleri yerine taktı. Sonra fayans aralarını dolgu alçıyla doldurmaya başladı. İnce işçilikle ve titizlikle çalıştığı belliydi. Yapılan işlemlerden sonra fayanslar çok daha güzel göründü diyebilirim. Bir gün önce çimento siyahlığında eser yoktu adeta.


After the work of filling the gaps between the tiles with plaster was finished, our master started to paint the small parts outside the kitchen cabinets that cause a bad image. Because we had already painted the walls, there were unused paints in the same color at work. We were lucky in this respect because we could have difficulty finding paint of the same shade and color. Fortunately, there was nothing to fear. :)
Fayans aralarını dolgu alçı ile doldurma işi de bittikten sonra ustamız mutfak dolaplarının dışında kalan ve kötü görüntüye neden olan küçük kısımları boyamaya başladı. Duvarları önceden boyadığımız için iş yerinde aynı renkte kullanılmayan boyalar vardı. Bu açıdan şanslıydık çünkü aynı tonda ve aynı renkte boya bulmakta zorlanabilirdik. Neyse ki korkacak bir şey yoktu. :)


That's it, dear friends. With every step our master made, the wall began to look much more beautiful. In addition, after each step, the beauty of the cabinets was revealed. Thus, we renewed a part of our kitchen at my workplace. I hope it has been an enjoyable renovation post for you as well. Thank you for accompanying me here. See you in my next interesting building, architecture and renovation repair articles. Stay with photos and love...
İşte böyle sevgili dostlar. Ustamızın yaptığı her adımda duvar çok daha güzel görünmeye başlıyordu. Ayrıca her adımdan sonra dolapların güzelliği ortaya çıkıyordu. Böylece iş yerimdeki mutfağımızın bir bölümünü yenilemiş olduk. Umarım sizin için de keyifli bir tadilat yazısı olmuştur. Bana buraya kadar eşlik ettiğiniz için teşekkür ederim. Sonraki ilginç yapı, mimari ve tadilat tamirat yazılarımda görüşmek üzere. Fotoğraflarla ve sevgiyle kalın...
