
Empezaré por los MATERIALES QUE UTILIZARAN:
I will start with the MATERIALS YOU WILL USE:

PROCEDURE:

PASO 1y2: Dibujamos la figura en el papel, luego la transferimos presionando con la oreja de la
tijera para marcar en el foami.
PASOS 3 Y 4: Repasamos la figura en el foami y dibujamos las montañas y el sol, simulando una puesta de sol.
STEP 1 and 2: We draw the figure on the paper, then we transfer it by pressing with the ear of the
scissors to mark on the foami.
STEPS 3 AND 4: We review the figure in the foami and draw the mountains and the sun, simulating a sunset.

PASOS 5,6 y7: Con la esponja humedecida con un poco de agua, mojaremos en la pintura amarilla para empezar a pintar el sol del atardecer foto 6 y luego mojaremos en pintura roja.
PASOS 8,9 y 10: Con la esponja mojada en rojo empezamos a pintar de arriba hacia abajo y de derecha a izquierda rellenando todo el espacio hasta unir con el color amarillo.
STEPS 5,6 and 7: With the sponge moistened with a little water, we will dip in the yellow paint to start painting the sunset sun photo 6 and then we will dip in red paint.
STEPS 8,9 and 10: With the sponge soaked in red we begin to paint from top to bottom and from right to left, filling the entire space until joining with the yellow color.

PASOS 11 Y 12: Empezamos nuevamente a colorear en rojo debajo del color amarillo y luego mojaremos la esponja en color vino para ir oscureciendo hacia abajo, con el mismo procedimiento de izquierda a derecha.
PASOS 13 y 14: Mojamos la esponja en color negro y pintaremos la orilla inferior hasta unir al color vino.
STEPS 11 AND 12: We start again to color in red under the yellow color and then we will wet the sponge in wine color to darken down, with the same procedure from left to right.
STEPS 13 and 14: Wet the sponge in black and paint the bottom edge until it joins the wine color.

PASOS 15 y 16: Unidos los colores, con un pincel angular sombrearemos la circunsferencia del sol, sino tienes doblas un pedacito de esponja y mojas en color naranja y haces el sombreado.
PASOS 17 Y 18: Tomas un pedacito de esponja y lo mojas en pintura blanca para aclarar y darle luz al sol Foto(18).
PASO 19: Con otro pedacito de esponja sombreas las montañas.
STEPS 15 and 16: United colors, with an angle brush we will shade the circumference of the sun, if you do not fold a bit of sponge and wet in orange and do the shading.
STEPS 17 AND 18: You take a small piece of sponge and dip it in white paint to clarify and give light to the sun Photo (18).
STEP 19: With another little piece of sponge you shade the mountains.

PASOS 22 y 23: Recortamos en foami, la falda, turbante ,accesorios y luego sombrearemos la falda y top, dejamos secar y pintamos unas flores en blanco para adornar la falda.
STEPS 20 and 21: We paint the body of the African woman in black and let it dry.
STEPS 22 and 23: We cut the skirt, turban, accessories in foami, and then we will shade the skirt and top, let dry and paint some flowers in white to decorate the skirt.
PASOS 27: Pegamos todas las piezas a la africana yo,( recorté los accesorios en retazos de foamy escarchado)... luego recortaremos 4 tiras en cartulina o foami negro si lo prefieres para armar el marco del cuadro, pegamos y listo, nuestro cuadro quedará totalmente terminado..
Anímate y hazlo, es muy fàcil y los materiales son muy económicos.
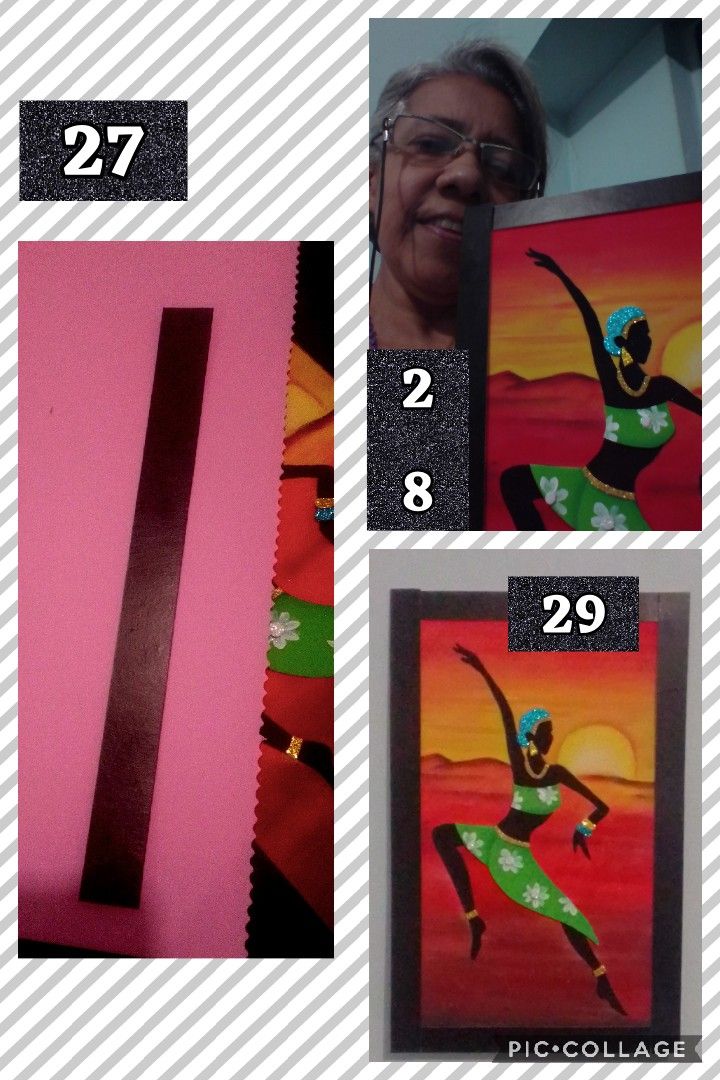
STEPS 27: We glued all the pieces to the African me, (I cut the accessories into pieces of frosted foamy) ... then we will cut 4 strips in cardboard or black foami if you prefer to assemble the frame of the picture, glue and ready, our picture it will be totally finished ..
Go ahead and do it, it is very easy and the materials are very cheap.