💞¡Hola mi gente hermosa de la bisutería!💞
💞¡Hello my beautiful jewelry people!💞
¡Felíz y bendecida tarde para mis amigos lectores de 
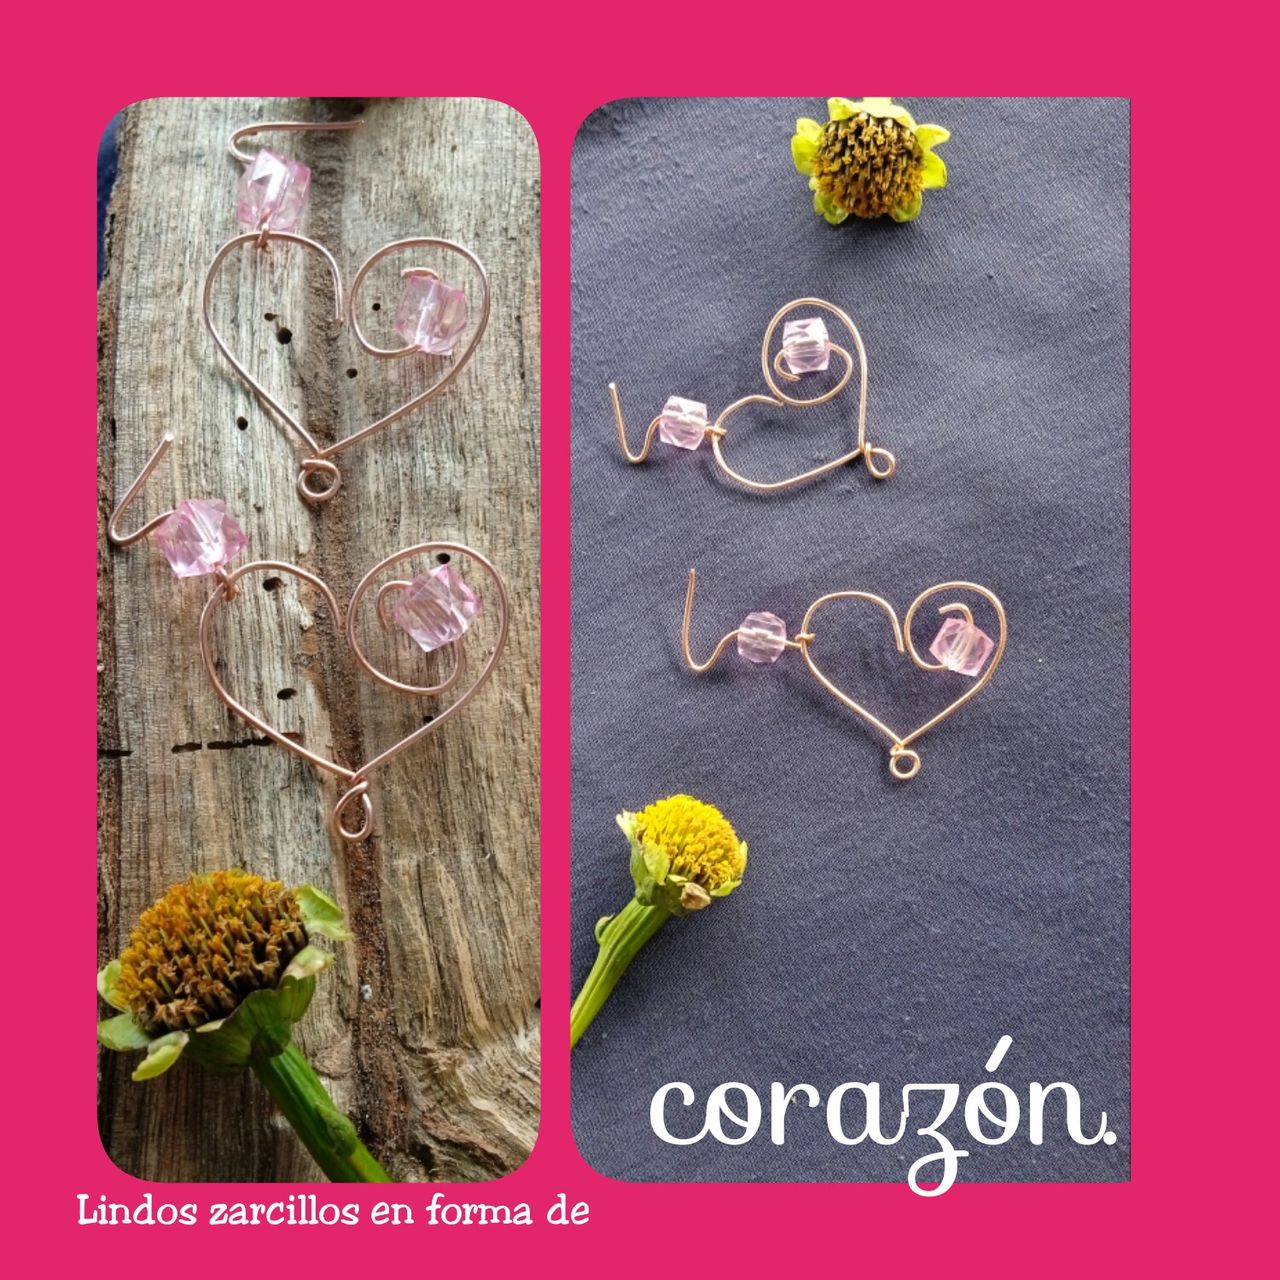
En esta oportunidad les mostraré como hice un par de zarcillos en forma de corazón y algunas piedras rosadas.
Hace días tenía muchas ganas de elaborar unos así, y hoy pude hacerlos. Estos zarcillos son muy lindos y muy fáciles de elaborar, así que desde ya puedes buscar tus materiales y comenzar hacer los tuyos.
Amigos sin más, les invito a leer el siguiente tutorial y podrán apreciar el procedimiento para elaborarlos,¡Empecemos!.
¡Happy and blessed evening to my
🌻Materiales que utilicé.🌻
- Alambre de cobre.
- Tenaza.
- Piedras.
- Aguja de tejer.
- Par de anzuelos para zarcillos.
🌻Materials I used.🌻
- Copper wire.
- Pincer.
- Stones.
- Knitting needle.
- Pair of hooks for tendrils.

Paso 1.
Amigos comencemos a elaborar estos lindos zarcillos en forma de corazón, lo primero que debemos hacer será tomar el alambre y cortar un par de trozos de aproximadamente 5cm. Tomamos la aguja de tejer y damos unas vueltas al alambre alrededor de dicha aguja, esto para crear el arito de la parte inferior de corazón.
Step 1.
Friends, let's start making these cute heart-shaped earrings, the first thing we should do is take the wire and cut a couple of pieces of approximately 5cm. We take the knitting needle and wrap the wire around the needle a few times, to create the ring for the bottom of the heart.

Paso 2.
Con ayuda de la tenaza damos vuelta al arito, cortamos uno de los extremos para que quede más corto que el otro y así poder dar la forma que deseamos.
Step 2.
With the help of the pliers we turn the ring, cut one of the ends so that it is shorter than the other and thus be able to give the shape we want.

Paso 3.
Doblamos un poco el extremo más corto para que quede como un gancho, al extremo más largo damos forma con la tenaza y colocamos la piedra, doblamos un poco más para que la piedra no se mueva ni se salga.
Step 3.
We bend the shortest end a little so that it looks like a hook, we shape the longest end with the tongs and place the stone, we bend a little more so that the stone does not move or come out.

Paso 4.
Aquí en este paso lo que haremos será cerramos un poco el gancho que hicimos en el extremo más corto, aquí si podemos dar forma sin utilizar la tenaza, con nuestras manos llevamos el extremo un poco hacía la parte interior. Así deben quedar, en forma de corazón.
Step 4.
Here in this step what we will do is close the hook that we made on the shorter end a little, here if we can shape it without using the pliers, with our hands we take the end a little towards the inside. This is how they should be, in the shape of a heart.

Paso 5.
Miren que aquí he terminado de hacer el par de corazones, colocamos unas piedras en los anzuelos y entrelazamos estos anzuelos a cada pieza y de esta manera terminamos el paso a paso.
Step 5.
Look here I have finished making the pair of hearts, we put some stones on the hooks and intertwine these hooks to each piece and in this way we finish the step by step.

🌻Resultado.🌻
Este es el resultado que hemos obtenido al terminar de dar forma a este alambre el cual es muy provechoso para hacer cualquier tipo de bisutería o joya.
Amigos espero que les guste el resultado, así que anímense a elaborar unos iguales y luzcan muy bellas con dichos zarcillos.
¡Disfrútenlo!.
🌻Result.🌻
This is the result that we have obtained when we finish shaping this wire, which is very useful for making any type of jewelry or jewelry. Friends, I hope you like the result, so go ahead and make some that are the same and look very beautiful with these earrings. Enjoy it!.

Hemos finalizado con este sencillo pero muy lindo tutorial. No me quiero despedir sin antes darles las gracias por leer cada paso hasta el final, por apoyar cada trabajo que hago y por su lindo comentario.
Espero volver a compartir un nuevo contenido con todos ustedes, ¡Cuidense mucho!¡Feliz y bendecida tarde!.
We have finished with this simple but very nice tutorial. I don't want to say goodbye without first thanking you for reading each step to the end, for supporting every job I do and for your nice comment. I hope to share new content with all of you, take care of yourselves! Happy and blessed afternoon!
Todo el contenido es de mi autoría.
Algunas fotos fueron capturadas por mi tablet Samsung galaxy y Xiaomi 9 a. Editadas por collage maker.
Traductor utilizado Esp/ing google.com
All content is my own.
Some photos were captured by my >Samsung galaxy and Xiaomi 9a tablet. Edited by collage maker.
Translator used Esp/ing google.com