Hola queridos amigos , espero que hayan amanecido bien, sean todos bienvenidos a mi publicación mi blog , hoy les quiero compartir un lindo cintillo con rostro de gatica , sencillo pero delicado para nuestras pequeñas , este nuevo tutorial se trata especialmente de la transformación de una prenda vieja a un accesorio nuevo , reutilizando y creando a nuestro estilo y gusto especialmente para nuestras niñas que le gustan lucir siempre hermosas
Hello dear friends, I hope you have dawned well, you are all welcome to my blog post, today I want to share a nice headband with face of kitten, simple but delicate for our little girls, this new tutorial is especially about the transformation of an old garment to a new accessory, reusing and creating our style and taste especially for our girls who like to look always beautiful.

Materiales que utilice para la transformación de mi cintillo :
-Cintillo
-Foamis
-Cartulina
-Tijera
-Silicon
Materials I used for the transformation of my headband :
-Headband
-Foamis
-Cardboard
-Scissors
-Silicon

Pasos que seguir :
Comenzaremos tomando nuestro foamis color blanco y recortaremos la cabeza o silueta de nuestra gatita ,solo utilizaremos su cabeza y su rostro en esta ocasión ya que es un proceso sencillo y además rápido para trabajar
Steps to follow:
We will start by taking our white foamis and we will cut out the head or silhouette of our kitten, we will only use her head and face this time because it is a simple process and also fast to work with.

En nuestro siguiente paso Una vez que tengamos la cabeza de nuestra gata ,vamos a continuar recortando las piezas para realizar nuestro rostro , comenzaremos con sus ojos azul y negro , su nariz ,los bigotes que llevan a los lados (pelitos ) y el fondo de sus orejas color rosa ,este mismo color lo llevará en la nariz
In our next step Once we have the head of our cat, we will continue cutting out the pieces to make our face, we will start with her blue and black eyes, her nose, the whiskers on the sides (hairs) and the bottom of her pink ears, this same color will be on her nose.

A continuación vamos a proceder a pegar el rostro de nuestra gata , comenzaremos con el fondo de sus orejas , continuamos con sus ojos ,procedemos con sus bellos ,nariz y por último boca ,en la parte de arriba pegue un pequeño lazo y por todo sus bordes lo resalte con lápiz color azul
Next we are going to proceed to glue the face of our cat, we will begin with the bottom of his ears, we continue with his eyes, we proceed with his hair, nose and finally mouth, in the part of above glue a small bow and for all his edges highlight it with pencil blue color.

En este siguiente paso amigos una vez que tengamos lista nuestra gata que es el tema principal vamos a proceder recortando una tira delgada de medio centímetros para decorar el cintillo
In this next step friends once we have our cat ready which is the main theme we will proceed by cutting a thin strip of half a centimeter to decorate the headband.

En este siguiente paso vamos a comenzar con la decoración de nuestro cintillo , tomaremos nuestra tira que recortamos anteriormente y procedemos a pegar desde abajo hacia arriba ,hasta restaurar todo nuestro viejo cintillo y convertirlo en uno nuevo
In this next step we are going to start with the decoration of our headband, we will take our strip that we previously cut and proceed to glue from the bottom upwards, until we restore all our old headband and turn it into a new one.

Tomaremos nuestra cartulina escarchada y recortaremos una flor , está flor debe ser más grande que el rostro de nuestra gata ya que debe quedar en todo el centro
We will take our frosted cardboard and cut out a flower, this flower must be bigger than the face of our cat because it must be in the center.

Una vez que tengamos listo nuestra flor vamos a continuar pegando el rostro de nuestra gata a la flor en todo el centro como lo pueden apreciar
Once we have our flower ready we will continue gluing our cat's face to the flower in the center as you can see

Luego vamos a continuar recortando dos pequeñas tiras de el mismo color con que decoramos nuestro cintillo y la enrollamos a un lápiz lo llevamos al calor de la plancha y enrollamos como lo pueden observar con la temperatura quedan bien enrollado
Then we will continue cutting two small strips of the same color with which we decorate our headband and roll it to a pencil we take it to the heat of the iron and roll as you can see with the temperature are well rolled.

Luego continuaremos tomando nuestro rostro de gatica ya listo y nuestros dos rollitos y lo pegaremos al cintillo ubicado exactamente en un lado que quede semi de lado, el rostro con la flor en una esquina y los rollitos bajo la flor
Then we will continue taking our ready kitty face and our two rolls and we will glue it to the headband located exactly on one side that is semi sideways, the face with the flower in one corner and the rolls under the flower.

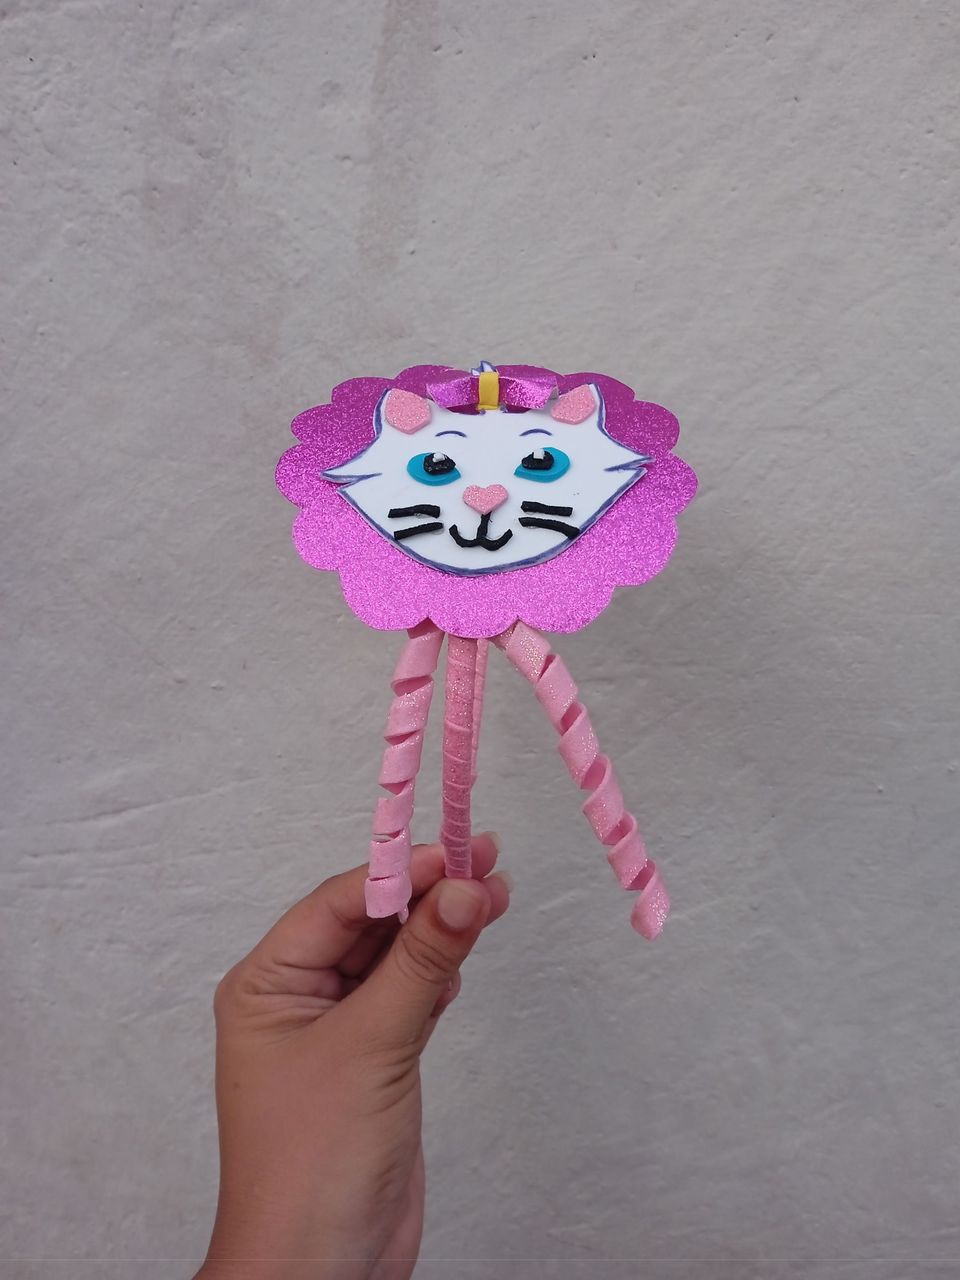
Este es el resultado final de mi hermoso cintillo inspirado en un rostro de gatica coqueta y hermosa , ideal para que nuestras niñas luzcan hermosas , estás fotos las tomé con mi teléfono Redmi 9C y los textos los traduje con el traductor DeepL ,que pasen bello día ,hasta la proxima
This is the final result of my beautiful headband inspired by a beautiful and flirtatious face, ideal for our girls to look beautiful, these photos were taken with my Redmi 9C phone and the texts were translated with the translator DeepL, have a nice day, see you next time.