¡Bienvenido a mi blog!
Welcome to my blog!
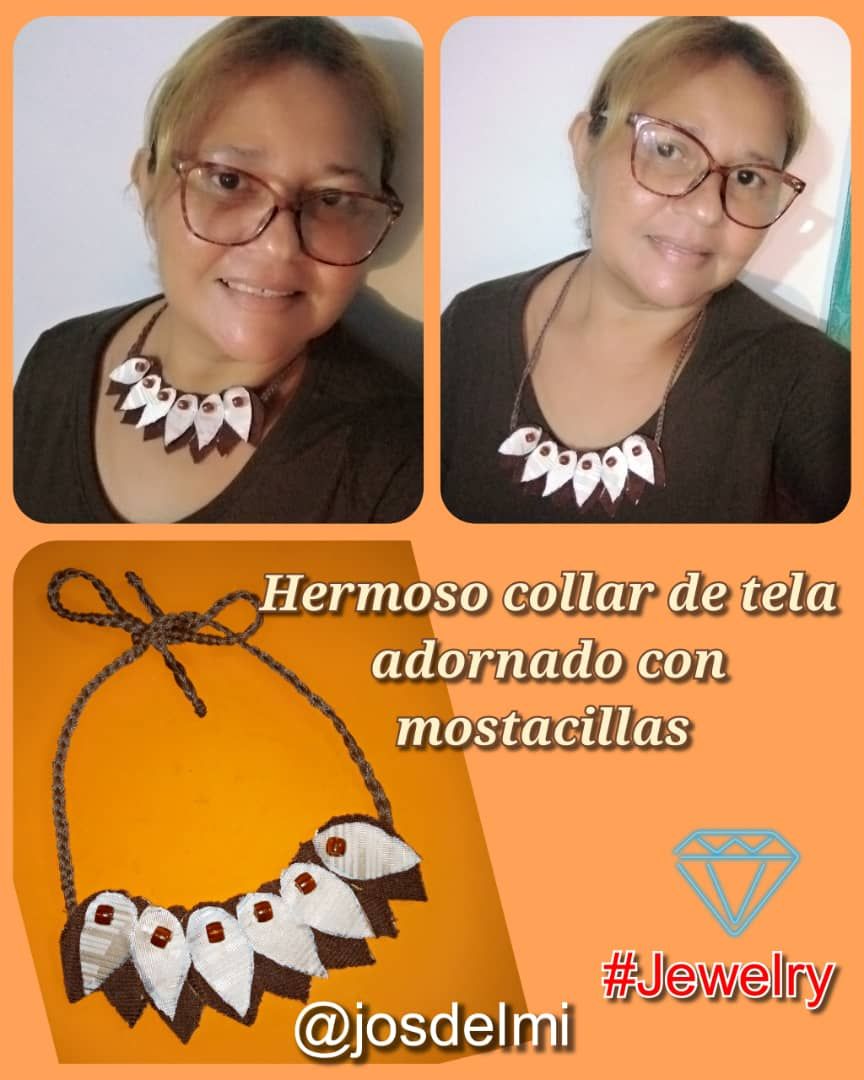
Hermoso collar de tela adornado con mostacillas, poniendo en práctica materiales reciclado como tela y cartón.
Beautiful fabric necklace adorned with beads, putting into practice recycled materials such as fabric and cardboard..

Hermoso collar de tela adornado con mostacillas.
Beautiful fabric necklace adorned with beads.


Para la realización del hermoso collar de tela se necesita:
- 1 pedazo d tela de color marrón
1 pedazo de tela de color beige. - Hilo de nylon color marrón
- Aguja con hilo color marrón .
- Pedazos de cartón en forma de gotas de agua , 6 pequeñas y 8 grandes.
- Lapicero.
- Tijeras.
- Silicona líquida.
- 6 mostacillas grandes de color marrón.
- 1 yesquero.
For the realization of the beautiful fabric necklace you will need:
- 1 piece of brown fabric
1 piece of beige fabric. - Brown nylon thread
- Needle with brown thread.
- Pieces of cardboard in the shape of water drops, 6 small and 8 large.
- Pencil.
- Scissors.
- Liquid silicone.
- 6 large brown beads.
- 1 tinder.


- Lo primero que haremos es marcar en la tela beige el cartón ya listo en forma de gotas de agua, después que hayamos marcado se procede a cortar con unas tijeras, en total son 6.
- The first thing to do is to mark on the beige fabric the cardboard in the form of water drops, after we have marked the cardboard we proceed to cut with scissors, in total there are 6.

Después de recortadas la tela en forma de gotas pequeñas de agua , se pegan al cartón con silicona líquida tratando de echar en los bordes para que no se despeguen.
After cutting out the fabric in the form of small drops of water, they are glued to the cardboard with liquid silicone trying to pour on the edges so that they do not peel off.

- Continuando con el siguiente paso: marcar las gotas de agua más grande sobre la tela marrón, de la misma forma que se hizo con la tela beige, Luego recortar con unas tijeras.
- Además con silicona líquida ir pegando cada una de las telas recortadas en los cartones.
- Aquí podemos observar ya listas las gotas de agua grandes y pequeñas pegadas a la tela.
- Continuing with the next step: mark the larger water drops on the brown fabric, in the same way that was done with the beige fabric, then cut out with scissors.
- Then, using liquid silicone, glue each of the fabrics cut out on the cardboard.
- Here we can see the big and small water drops already glued to the fabric.

- Para este siguiente paso : picar un cartón en forma de la mitad de un óvalo, marcar en ambos extremos hasta donde queremos que vayan pegadas las gotas de agua tanto las grandes como las pequeñas.
- Después ir pegando con silicona líquida con mucho cuidado , comenzamos con las grandes o marrones.
- For this next step: cut a piece of cardboard in the shape of half an oval, mark on both ends where we want the water drops to be glued, both large and small.
- Then glue with liquid silicone very carefully, starting with the big or brown ones.

- Aquí podemos apreciar que ya todos están pegado, ahora procedemos a recortar con unas tijeras el excedente o lo que sobra de los lados.
- Here we can see that they are all glued, now we proceed to cut with scissors the excess or what is left over on the sides.

- En este paso : enhebramos la aguja con hilo marrón para ir pegando cada una de las mostacillas tratando que el hilo no se vea por la parte de frente, haciendo un nudo por la parte de atrás para que no se suelte.
- Ya está listo la primera parte del collar .
- In this step: we thread the needle with brown thread to glue each of the beads trying that the thread is not visible on the front side, making a knot on the back side so that it does not come loose.
- The first part of the necklace is ready.

- Continuamos con la parte de donde se va a sujetar el collar, tomamos 35 centímetros de hilo nylon color marrón y esa misma medida colocamos 8 pedazos de hilos más . Con un pedazo de hilo damos vueltas al hilo y hacemos un nudo , recortamos lo que sobra dejando un poquito de hilo para quemarlos con el yesquero cuidando de no quemar el hilo que se va a tejer para el collar.
- We continue with the part where the necklace will be attached, we take 35 centimeters of brown nylon thread and that same measure we place 8 more pieces of thread. With a piece of thread we turn the thread and make a knot, we cut what is left over leaving a little bit of thread to burn them with the tinder taking care not to burn the thread that is going to be woven for the necklace.

- Ahora tejemos una trenza de tres hebras cuando lleguemos al final , hacemos lo mismo que al principio , tomamos un pedazo de hilo le damos vueltas , hacemos nudos y con el yesquero quemamos la punta.
- Así mismo hacemos con el pedazo del hilo para el otro lado del collar.
- Now we weave a braid of three strands when we get to the end, we do the same as at the beginning, we take a piece of thread, we spin it, we make knots and with the tinder we burn the tip.
- We do the same with the piece of thread for the other side of the necklace.

- Ahora último paso : procedemos a pegar en cada lado las trenzas de hilo nylon con una aguja con hilo tratando que el hilo no se vea en la parte del frente y por detrás hacer nudos para que no se deshagan.
- Now for the last step: we proceed to glue the nylon thread braids on each side with a needle and thread, trying not to let the thread show on the front side and tie knots at the back so that they do not unravel.

Aquí podemos observar el hermoso collar de tela adornado con mostacillas.

     Las fotos son mías tomadas con teléfono Infinix, editado con incollage y bitmoji, traducido por DEEPL.

     The photos are mine taken with Infinix phone, edited with incollage and bitmoji, translated by DEEPL.