
Buenas, buenas por aquí, gente linda de 
El dia de hoy les voy a compartir un lindo paso a paso, de la confeccion de una hermosa tiara fruncida en el medio, accesorio creado y diseñado para complementar un outfits y darle vida a tu peinado.
Hello, hello here, lovely people of
Today, I'm going to share with you a lovely step-by-step guide on how to make a gorgeous center-ruffled tiara, an accessory created and designed to complement an outfit and liven up your hairstyle.

Debo decir que amo hacer este tipo de trabajos, pues su composición no es muy compleja, y con cualquier retacito de tela, de preferencia elastizada, se puede desarrollar. Asi fue como emprendi y comence a amar la costura, con pequeños accesorios para el cabello.
Este trabajo se lo realice a unas clientas de cabello rizado, estas son muy fans a los accesorios extra anchos, pues con su cabello suelto lucen como diosas. Ya en otras ocasiones le había confeccionado varios diseños, asi que tocaba sorprenderlas con uno nuevo.
I must say I love doing this type of work, as its composition isn't very complex, and it can be created with any scrap of fabric, preferably stretchy. That's how I started and began to love sewing, with small hair accessories. I made this work for some curly-haired clients; they are big fans of extra-wide accessories, because with their hair down, they look like goddesses. I had made several designs for them before, so it was time to surprise them with a new one.


Aquí les dejo un minitutorial, con un pequeño collage de fotos, mostrando el paso a paso del mismo y los materiales que utilice para recrear esta prenda. Para los amantes del reto y la costura, espero que les sirva y ayude en sus creaciones futuras.
Here is a mini tutorial, with a small collage of photos, showing the step by step and the materials I used to recreate this garment. For those who love the challenge and sewing, I hope it will help you in your future creations.
❤️❤️❤️❤️❤️❤️❤️❤️❤️❤️❤️❤️❤️❤️
Materiales / Materials
fabric
Scissors
Thread and needle
Measuring tape
Pins
Sewing machine
❤️❤️❤️❤️❤️❤️❤️❤️❤️❤️❤️❤️❤️❤️
Procedimiento:
1er paso:
Tome un liston de tela que me diera para el ancho exacto de la cabeza, al no tener la tela suficiente, tome otra porcion de tela que fuese de una textura parecida a la seleccionada antes, la coloque encima, y sujete ambas cara por el reves con ayuda de alfileres.
Una vez picado procedi a coser todo el contorno de cada pieza, en el caso de la cinta la deje abierta por sus dos puntas, pues debia de voltearla al derecho.
Procedure:
1st step:
I took a strip of fabric that was the exact width of the headband. Since I didn't have enough fabric, I took another piece of fabric that was a similar texture to the one I selected earlier, placed it on top, and secured both sides together with pins. Once cut, I proceeded to sew around the entire perimeter of each piece. In the case of the headband, I left it open at both ends, as I had to turn it right side out.

2do paso:
Antes de voltearlo al derecho lo doble por la mitad y realice una marca con lineas discontinuas para colocar un elastico justo en el centro, dandole asi el efecto fruncido que deseaba.
2nd step:
Before turning it right side out, I folded it in half and made a mark with dashed lines to place an elastic right in the center, giving it the gathered effect I wanted.

3er paso:
Para colocar el elástico, coloque el mismo encima de la marca y lo fui estirando poco a poco a medida aje iba realizando cada puntada, luego lo voltee al derecho.
Step 3:
To place the elastic, I placed it on top of the mark and stretched it little by little as I made each stitch, then I turned it right side out.

4to paso
Por ultimo uni las dos puntas, colocandolas derecho con derecho y cosiendo por el reves de la tela, dejando un pequeño orificio para poder voltearlo al terminar, y luego cerrando ese pequeño orificio con una puntada recta.
Step 4:
Finally, I joined the two ends, placing them right sides together and sewing on the wrong side of the fabric, leaving a small hole so I could turn it over when I finished, and then closing that small hole with a straight stitch.

✨✨✨✨❤️❤️❤️✨✨✨✨
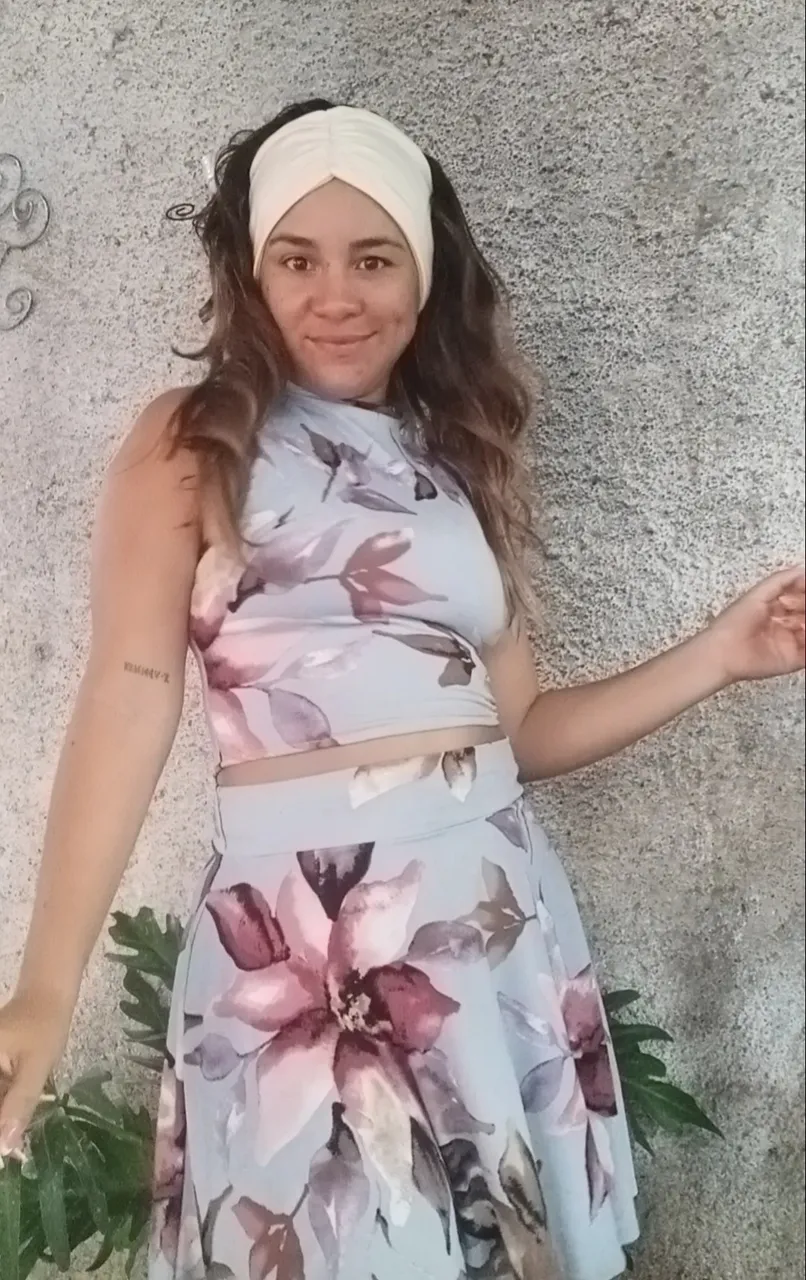
Resultado/Result
✨✨✨✨❤️❤️❤️✨✨✨✨

Espero que les alla gustado y les sirva de alguna ayuda este pequeño minitutorial. Pido disculpas si no se entiende bien alguna informacion, pues no soy muy buena explicando estos procedimientos. Gracias de antemano, espero y os guste mi contenido, y agradeceria que dejaran sus lindos comentarios y se aventuraran conmigo en este proyecto. Bendiciones y lindo dia.
I hope you liked it and I hope this little mini tutorial will be of some help to you. I apologize if some information is not well understood, because I am not very good at explaining these procedures. Thank you in advance, I hope you like my content, and I would appreciate if you could leave your nice comments and venture with me in this project. Blessings and have a nice day.
El texto o resumen es totalmente de mi autoria.
The text or summary is entirely my own.