
Hola,💞 ¿Como están amigos? les saludo con gran aprecio, deseandoles logros y éxitos en esta semana que recién inicia, hoy vengo a contarle de esta idea que me gusta mucho, la cual, viene dada en realizar unos zarcillos tejidos en ocasión de que combinara con una blusa que me encanta, ésta tiene algún tiempo conmigo, siendo algo un poco notable, pero la conservo por tener en la parte delantera una aplicación tejida, que es lo que se resalta en esta pieza, en estos días quise usarla y este accesorio le otorgo un bonito efecto a su particular diseño.
Asi que mi inspiración viene dada por esta blusa, lo cual fue algo muy motivador en crear una zarcillos con el mismo estilo. Por suerte entre los materiales que guardo encontré un hilo multicolor con los tonos parecidos que hace juego con su tejido. Que bien que lo tenía y ni idea cuando lo adquirí que pudiera servirme para estos accesorios además, consegui unos adornos con técnica envejecida que me habían quedado de una pulsera en desuso y la aguja de tejer por supuesto la principal en esta manualidad.
En realidad mis conocimientos son básicos en la técnica del tejido o macrame, ya que aprendí algunos pasos de pequeña, donde más que todo me dedicaba a tejer carpeticas para decorar las mesas, lo que aprecio es que estos me han sido de gran ayuda en diferentes manualidades que eventualmente he realizado y esta es otra oportunidad para retomarlo.
Ahora, continuo diciéndoles lo que vamos a necesitar

💎Hilo para tejer
💎Aguja de tejer
💎Adornos pequeños
💎Silicon liquido
💎Alambre
💎Dos cuentas redondas
💎Dos Topo puyas para zarcillos

Antes de iniciar con el procedimiento debo decir que me disculpo por la ausencia de palabras técnicas propias de este arte, pero les traje unos videos que están más adelante para ilustrarlos.
Empiezo realizando cinco cadenetas y las cierro con la del inicio para formar un arito.

Continuó realizando tres Cadenetas con el fin de determinar el alto de la pieza, se sigue tomando hilo con la aguja y se pasa por dentro del aro, el cual se tomará hilo nuevamente y se lleva al alto de la cadeneta, se sigue tomando hilo, y este se pasa por los dos primeros hilos que están en la aguja, se toma hilo otra vez y se pasa por los que quedan en la aguja. Este punto es lo que se denomina Punto Alto, así lo encontré en videos tutoriales, el cual deberá repetirse por todo el aro hasta completarlo. Aquí le muestro el siguiente video a modo describirle este paso.


Se realiza otra vuelta deslizando hilo por dentro del aro, seguido de varios puntos altos hasta completarlo, a modo que vaya aumentando en tamaño y el tejido quede mejor conformado.


Se le pegan con el silicon líquido los adornos a cada uno de ellos, considero que estos en particular lucen en el tejido.
Luego se corta un pedacito de alambre y se le realiza una argollita en uno de su extremos, se le inserta la cuenca redonda que ya hemos seleccionado, sugiriendoles que combinen con los adornos que van a la pieza, para un mejor resultado.

Se continúa realizando otra argollita en el otro extremo del alambre y se corta el sobrante. Esta es la que se inserta en el tejido, cuidando que quede centrado.
Luego se adicionan a los zarcillos los topos puyas o si lo prefieren unos ganchitos tipos anzuelo para colocarselos.

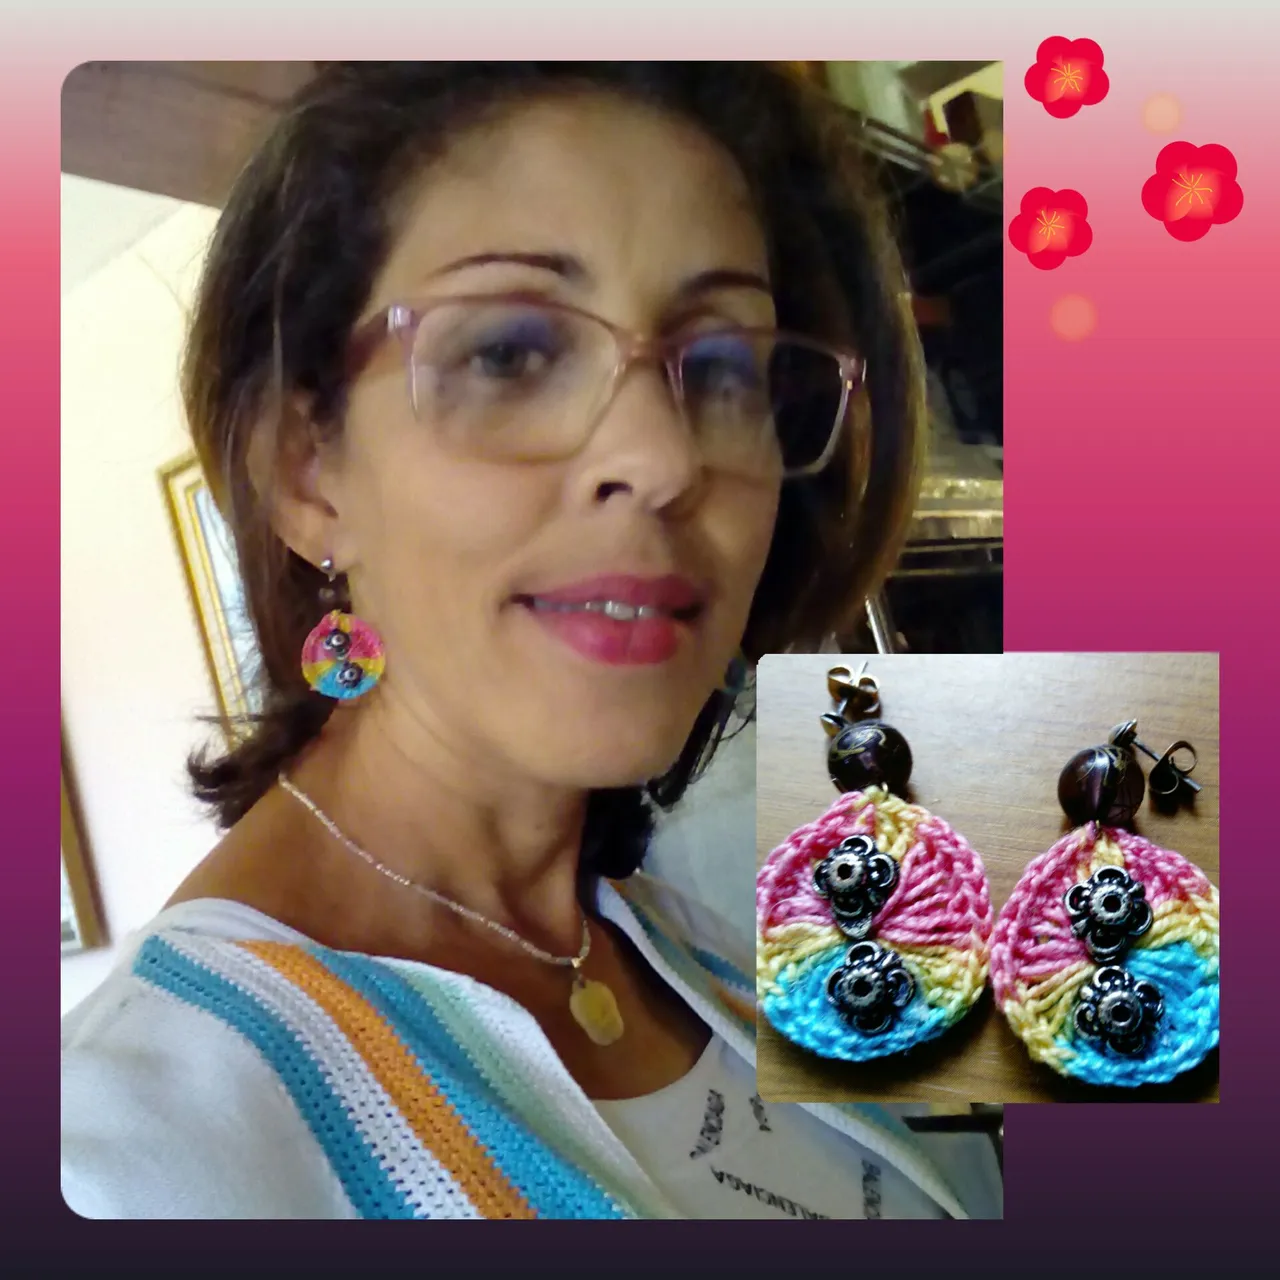
El resultado me encantó, percibi que realzo esta blusa y le dio otra imagen, como estaba entusiasmada aproveche de realizar otro par en hilo blanco, con unos adornos que en mi búsqueda inicial había encontrado, estos si me quedaron más largos por los ganchitos anzuelo que les coloque.

Esta es una buena idea apreciados hivers, en fijarse de detalles significativos de las prendas de vestir para materializarlas en los accesorios, seguramente los resultados serán muy favorecedores. Hasta otra oportunidad, no sin antes desearles que estén bien 💞💞 Bendiciones
💎💎 Content in English 💎💎
Creating woven tendrils 🍃
Hello, how are you friends? I greet you with great appreciation, wishing you achievements and success in this week that has just begun, today I come to tell you about this idea that I like very much, which is given in making some woven tendrils on the occasion that combined with a blouse that I love, this has some time with me, being something a little noticeable, but I keep it for having in the front a woven application, which is what stands out in this piece, these days I wanted to use it and this accessory gave a nice effect to its particular design.
So my inspiration came from this blouse, which was something very motivating in creating a tendril in the same style. Luckily among the materials I kept I found a multicolored thread with similar tones that matches its fabric. I had no idea when I acquired it that I could use it for these accessories, I also got some ornaments with antiqued technique that I had left from a bracelet in disuse and the knitting needle of course the main one in this craft.
Actually my knowledge is basic in the technique of weaving or macrame, since I learned some steps as a child, where I was mostly dedicated to weave carpets to decorate the tables, what I appreciate is that these have been of great help in different crafts that I have eventually done and this is another opportunity to resume it.
Now, I continue to tell you what we are going to need
💎Knitting yarn
💎Knitting needle
💎Small ornaments
💎Liquid silicon
💎Wire
💎Two round beads
💎Two Topo earrings for tendrils
Before starting with the procedure I must say that I apologize for the absence of technical words of this art, but I brought you some videos that are below to illustrate them.
I start by making five chains and close them with the one at the beginning to form a hoop.
He continued making three chain stitches in order to determine the height of the piece, continue taking thread with the needle and pass it through the inside of the hoop, which will take thread again and take it to the height of the chain stitch, continue taking thread, and pass it through the first two threads that are on the needle, take thread again and pass it through the remaining threads on the needle. This stitch is called High Stitch, as I found it in video tutorials, which should be repeated throughout the ring until it is completed. Here I show you the following video to describe this step.
Another round is made by slipping yarn inside the hoop, followed by several high stitches to complete it, so that it increases in size and the fabric is better shaped.
The ornaments are glued with the liquid silicone to each one of them, I consider that these in particular look good on the fabric.
Then cut a small piece of wire and make a small ring at one of its ends, insert the round basin that we have already selected, suggesting that they combine with the ornaments that go to the piece, for a better result.
Continue making another loop at the other end of the wire and cut off the excess. This is the one to be inserted into the weaving, making sure it is centered.
Then add to the tendrils the puyas moles or, if you prefer, some hooks to place them.
I loved the result, I perceived that it enhanced this blouse and gave it another image, as I was enthusiastic I took the opportunity to make another pair in white yarn, with some ornaments that I had found in my initial search, these were longer because of the hooks I put on them.
This is a good idea dear hivers, in taking notice of significant details of the garments to materialize them in the accessories, surely the results will be very flattering. Until another opportunity, not before wishing you well 💞💞 Blessings.
Fotos tomadas por | Photos taken by

Dispositivo | Device | SONY XPERIA
Fotos editadas en: |Photos edited in | App InShot
Gig creado en| Gif created in |Adobe Express
Traducción con | Translation with| DeepL