Por aquí seguimos creando, haciendo cositas lindas y disfrutando de mi momento de relax del día, porque la verdad es algo que disfruto hacer, y ver el resultado me gusta mucho más!
Hoy fue día de experimento, así que probé combinando distintos materiales y piezas y el resultado me gustó muchísimo, aunque también estuve pensando si no se veía un poco recargado, pero eso se lo dejo a ustedes, así que recuerden dejarme en los comentarios su opinión.
Over here, we’re still creating, making lovely little things and enjoying my moment of relaxation each day, because honestly, it’s something I really enjoy doing – and I love seeing the end result even more!
Today was an experimental day, so I tried combining different materials and pieces and I really liked the result, although I did wonder if it looked a bit over the top, but I’ll leave that up to you, so please remember to leave your opinion in the comments.

Se trata de un brazalete de corazones, en el que quise combinar dos tipos de cadena diferente además de incorporar en la parte del cierre perlas y balines, ya que me gustó mucho cómo se veían en la pulsera que les compartí hace poco, así que como ven hay muchas cositas juntas, y por eso estuve preguntándome si no sería demasiado, pero la verdad me gustó bastante así que por aquí les comparto la idea.
It’s a heart-shaped bracelet where I wanted to combine two different types of chain, as well as incorporating pearls and beads into the clasp, as I really liked how they looked on the bracelet I shared with you recently. So, as you can see, there are quite a few little details all together, and that’s why I found myself wondering if it might be a bit too much, but to be honest I quite liked it, so here I am sharing the idea with you.

Materiales
2 dijes de corazones
Balines mini, medianos y pequeños
Alfileres de ojo
2 perlas pequeñas
Un dije rectangular
Argollas pequeñas
Cerrador
Tenaza
Pinza plana
Pinza redonda
Materials
2 heart-shaped charms
Mini, medium and small Bali beads
Eye pins
2 small pearls
A rectangular charm
Small jump rings
Closure
Pliers
Flat-nose pliers
Round-nose pliers
Paso a paso/Step by step
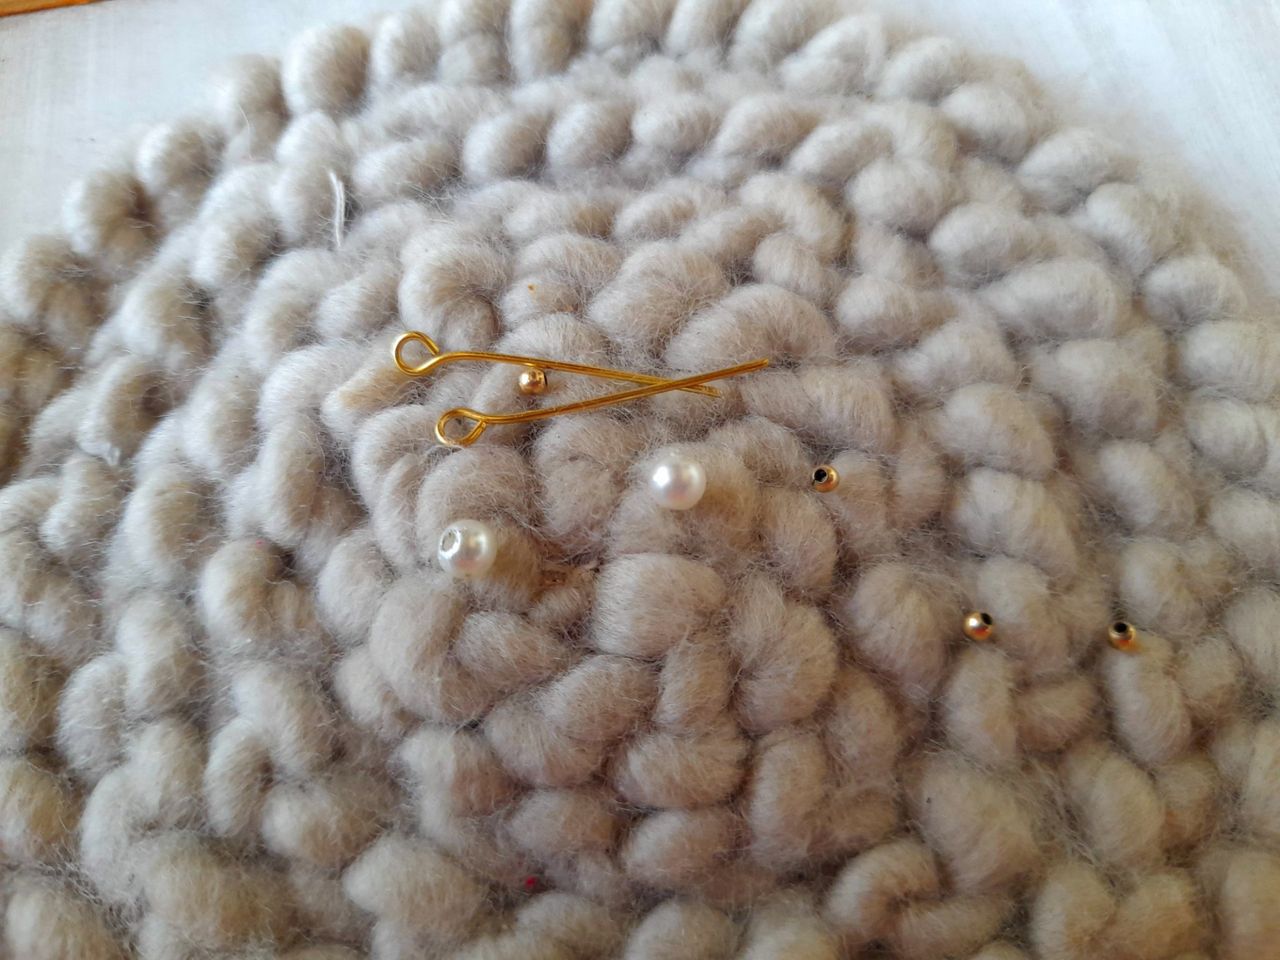
Para la elaboración de este brazalete vamos a realizar tres piezas diferentes, y la primera está formada por dos corazones y balines mini, además de un pequeño dije decorativo, y para su armado lo que haremos es pasar por un alfiler de ojo un balín, seguido de un corazón, otro balín, otro corazón y finalizamos con un balín.
Para cerrar nuestra pieza cortamos el excedente del alfiler de ojo y con ayuda de la pinza redonda creamos un "ojito" igual al del otro extremo, y lo que hacemos es ubicar la pinza en el extremo del alfiler y girar sobre sí misma hacia el balín, creando se esta forma el ojito que vamos a necesitar para poder conectar las piezas que forman parte de nuestro brazalete.
To make this bracelet, we’re going to create three different sections. The first consists of two hearts and mini beads, as well as a small decorative charm. To assemble it, we’ll thread a bead onto an eye pin, followed by a heart, another bead, another heart, and finish with a bead.
To close the piece, we cut off the excess length of the eye pin and, using the round-nose pliers, create a "small eye" just like the one at the other end. We position the pliers at the end of the pin and twist them towards the bead, thus creating the small eye we’ll need to connect the pieces that make up our bracelet.


Para complementar esta pieza decidí incorporar un pequeño dije colgante, y para esto le coloqué una argolla pequeña y la hice pasar por uno de los ojitos de los corazones, cerré con la pinza plana, y listo, la pieza focal está terminada.
To complement this piece, I decided to add a small pendant charm. To do this, I attached a small ring and threaded it through one of the tiny holes in the hearts, secured it with a flat-nose pliers, and there you have it – the centrepiece is finished.


La segunda pieza que vamos a necesitar es una de las que conectaremos hacia la parte final de nuestro brazalete y para ello vamos a utilizar un alfiler de ojo, una perla y dos balines mini, y para su armado hacemos pasar un balín, seguido de una perla y finalmente otro balín, y para cerrar nuestra pieza procedemos de la misma manera que con la pieza anterior, cortamos el excedente del alfiler y creamos nuestro ojito.
De esta pieza vamos a elaborar dos, una para cada lado de la pulsera.
The second piece we’ll need is one that we’ll attach to the end of our bracelet, and for this we’ll use an eye pin, a bead and two mini seed beads, To assemble it, we thread on a bead, followed by a pearl and finally another bead, and to close our piece we proceed in the same way as with the previous piece: we cut off the excess pin and create our little loop.
We are going to make two of these pieces, one for each side of the bracelet.


La última pieza en la que vamos a trabajar está formada por dos balines de diferentes tamaños y lo que haremos será pasar por el alfiler de ojo los dos balines y cerrar como ya les mostré arriba, y de esta pieza también crearemos un par.
The last piece we’re going to work on consists of two beads of different sizes. We’ll thread both beads onto the eye pin and fasten them as I showed you earlier, and we’ll make a pair of these as well.

Lo que sigue es cortar las cadenas que vamos a usar para este brazalete, y como les comenté arriba decidí utilizar dos diseños diferentes, una muy finita de un lado y del otro una de eslabones largos y separados.
En cuanto al largo, esto depende de ustedes.
Next, cut the chains you’re going to use for this bracelet. As I mentioned earlier, I decided to use two different designs: a very fine chain on one side and a chain with long, widely spaced links on the other.
As for the length, that’s entirely up to you.

El siguiente paso es unir todas las piezas para armar nuestra pulsera, y lo que haremos es conectar las dos cadenas, en cada extremo de la pieza de corazones, y para esto abriremos un poco los ojitos de los extremos, hacemos pasar la cadena y cerramos con la pinza plana.
Listo este paso al final de cada cadena vamos a conectar una de las perlas y la pieza de balines, y las uniremos abriendo uno de los ojitos y cerrando nuevamente, para de esta forma tener casi listo el brazalete.
The next step is to join all the pieces together to assemble our bracelet. We’ll connect the two chains to each end of the heart-shaped piece. To do this, we’ll open the small loops at the ends slightly, thread the chain through, and close them using the flat-nose pliers.
Once this step is complete, at the end of each chain we’ll attach one of the beads and the ball chain piece, joining them by opening one of the small loops and closing it again, so that the bracelet is almost ready.

Para finalizar simplemente agregamos el cerrador, que en este caso es en forma de gancho, así que lo único que hice fue conectar a una de las piezas de los extremos y listo. Nuestro brazalete está terminado.
To finish off, we simply add the clasp, which in this case is hook-shaped, so all I did was attach it to one of the end pieces and that’s it. Our bracelet is finished.


Como pueden ver es igual de sencillo que todas las piezas que he estado creando últimamente, el toque especial se lo da cada quién según su gusto y creatividad.
As you can see, it’s just as simple as all the pieces I’ve been creating lately; everyone adds their own special touch according to their taste and creativity.
📷Photography by|Fotografía por: