Ayer luego de terminar mi brazalete de cristales de swarovski quedé con ganas de más, porque la verdad el brillo y delicadeza de estos cristales me gusta muchísimo, así que estuve pensando y buscando algunas ideas en Pinterest, y aunque no encontré una pieza que me gustara tal cual estaba vi varias cositas que me sirvieron de inspiración y fusionando ideas terminé con un brazalete del que estoy totalmente enamorada.
Yesterday, after finishing my Swarovski crystal bracelet, I was left wanting more, because I really do love the sparkle and delicacy of these crystals, so I spent some time thinking and looking for ideas on Pinterest, and although I didn’t find a piece I liked exactly as it was, I saw a few things that inspired me and, by combining ideas, I ended up with a bracelet that I’m absolutely in love with.


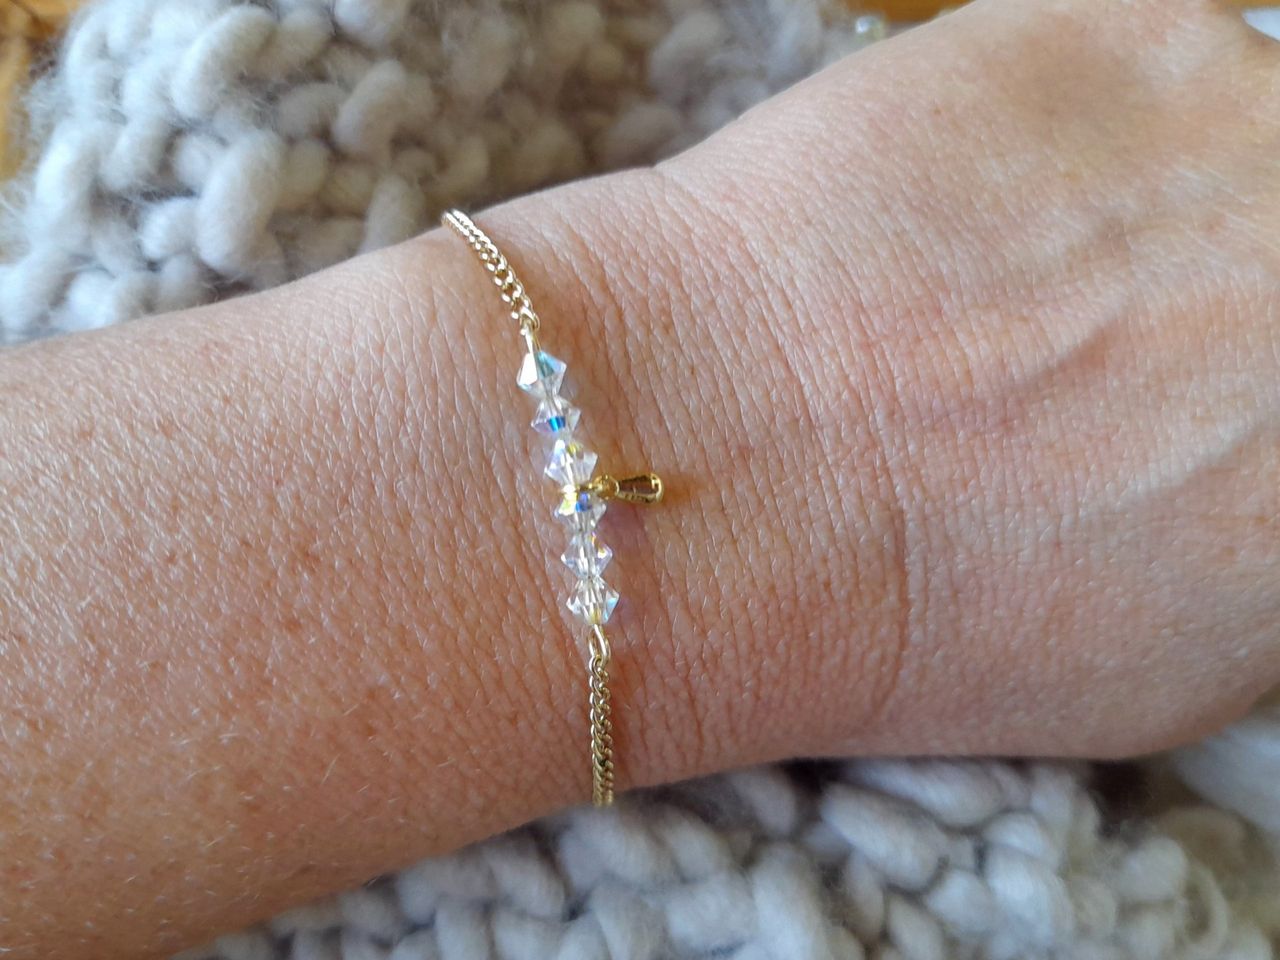
Se trata de una pulsera súper linda que tiene como elemento principal una especie de placa al frente elaborada con cristales de swarovski y un pequeño dije, que se conectan a una cadena delgada con un tejido bastante delicado, y para complementar esta pieza agregué un detalle en cristales justo en la zona de cierre del brazalete, y como pueden ver, todo el conjunto luce no solo lindo y delicado, sino muy armonioso, así que sin más, vamos con los materiales y el paso a paso.
This is a really lovely bracelet featuring a central panel at the front made from Swarovski crystals and a small charm, which are attached to a thin chain with a very delicate weave. To finish off the piece, I’ve added a crystal detail right at the clasp, and as you can see, the whole design looks not only pretty and delicate, but also very harmonious, So, without further ado, let’s get on with the materials and the step-by-step guide.
Materiales
Cristales de swarovski
Cadena fina
Alfileres de ojo
Dije pequeño
Tenaza
Pinza de punta plana
Pinza de punta redonda
Materials
Swarovski crystals
Thin chain
Eye pins
Small pendant
Pliers
Flat-nose pliers
Round-nose pliers
Paso a paso/Step by step
Para la elaboración de este brazalete o pulsera, vamos a crear dos piezas, una que será nuestra pieza principal, compuesta por cristales y un dije, y la otra solo compuesta por cristales de swarovski, y para comenzar con nuestro trabajo, vamos a elaborar la pieza focal de este brazalete, y para ella necesitamos un alfiler de ojo, 6 piezas de cristales de swarovski y un dije.
El armado de esta pieza es en realidad muy sencillo, y lo que debemos hacer es pasar por el alfiler de ojo 3 cristales, seguidos por el dije, que como pueden ver se trata de un dije pequeño, y seguidamente tres cristales más, y como siempre cortamos el excedente del alfiler de ojo y cerramos la pieza creando un arito u "ojo" en el otro extremo, ya que necesitamos conectar la cadena en ambos lados.
De esta forma ya tenemos lista la pieza principal.
To make this bracelet, we’re going to create two sections: one will be our centrepiece, made up of crystals and a charm, and the other will consist solely of Swarovski crystals. To begin, we’ll start by making the centrepiece of the bracelet, for which we’ll need an eye pin, six Swarovski crystals and a charm.
Assembling this piece is actually very simple. All we need to do is thread 3 crystals onto the eye pin, followed by the charm – which, as you can see, is a small charm – and then three more crystals. and, as always, we cut off the excess from the eye pin and close the piece by creating a loop or "eye" at the other end, as we need to attach the chain on both sides.
And there we have it – the main piece is now ready.


La segunda pieza que vamos a necesitar la vamos a utilizar para darle un toque especial a la zona donde incorporamos los cerradores, y para esto vamos a necesitar un alfiler de ojo y un cristal de swarovski, y lo que haremos es pasar el cristal por el alfiler de ojo, cortar el excedente del mismo y crear un aro de la misma forma que lo hicimos en la pieza anterior.
De esta pieza vamos a crear dos, una para cada extremo del brazalete.
The second piece we’ll need is going to be used to add a special touch to the area where we attach the clasps. For this, we’ll need an eye pin and a Swarovski crystal. We’ll thread the crystal onto the eye pin, trim off the excess wire, and form a loop in the same way as we did with the previous piece.
We’re going to make two of these pieces, one for each end of the bracelet.


Con nuestras piezas listas el siguiente paso es ensamblarlo todo, y lo que haremos es cortar dos piezas de cadena para incorporarlas a cada extremo de nuestra pieza principal, y para esto, solo debemos abrir el aro en cada extremo y hacer pasar la cadena, para luego volver a cerrar el aro con ayuda de la pinza plana, asegurándonos que quede muy bien sellada.
Now that our pieces are ready, the next step is to put everything together. We’ll cut two lengths of chain to attach to each end of our main piece. To do this, simply open the ring at each end, thread the chain through, and then close the ring again using the flat-nose pliers, making sure it’s securely fastened.


En este punto ya estamos listos para agregar la siguiente pieza que serán nuestros cristales individuales que conectaremos en cada extremo de las cadenas, y para esto solo debemos abrir uno de los aritos de la pieza de cristal, hacer pasar la cadena y cerrar con la pinza plana.
Hacemos esto de ambos lados y estamos listos para colocar el cerrador.
En este caso lo que hice fue abrir el arito de uno de los extremos y hacer pasar el aro del broche para cerrar, y el otro extremo lo dejé tal cual estaba, pero si lo desean pueden incorporar una argolla pequeña. En mi caso no lo hice porque esta pieza adicional alargaría un poco más la pulsera y no la quería tan larga, pero esto depende de ustedes y de cómo deseen su brazalete.
At this point, we are ready to add the next component: the individual glass pieces that we will attach to each end of the chains. To do this, simply open one of the loops on the glass piece, thread the chain through, and close it using the flat-nose pliers.
We do this on both sides, and we are ready to attach the clasp.
In this case, what I did was open the loop at one end and thread the clasp through to fasten it, whilst leaving the other end as it was; however, if you prefer, you can add a small ring. I didn’t do this because the extra piece would have made the bracelet a bit longer, and I didn’t want it to be that long, but it’s up to you and how you’d like your bracelet to look.


Al agregar los cerradores ya nuestro brazalete está listo, y como ven es una pieza absolutamente bella y delicada, sin dudas la cadena delgada le da un toque muy especial, y ni hablar de los cristales en la base de la zona para cerrar nuestra pulsera, para mí esto la hace lucir mucho más linda. Ustedes qué opinan?
Once we’ve added the clasps, our bracelet is ready, and as you can see, it’s a truly beautiful and delicate piece. The delicate chain certainly adds a very special touch, not to mention the crystals at the base of the clasp – for me, this makes it look even prettier. What do you think?
📷Photography by|Fotografía por: