
Hello, Jewelry friends. I'm very happy to be here today to share with you one of my favorite crafts: the Miyuki bracelet. For some time now, I've been practicing to perfect this technique, and I want to tell you about my experience. The Miyuki bracelet has a peculiar way of being made, which makes it unique and special. Although it may seem somewhat complex at first, I assure you that the effort is truly worth it. Today I spent almost four hours working on it, and although at times it became a little tedious, my enthusiasm to see how it would turn out motivated me to continue until I finished it. The creation process is very rewarding. Every little detail counts, and seeing how the colors and shapes come together to create a beautiful design is an incredible experience. I love the idea that each bracelet I make is unique, reflecting my style and creativity. I invite you to join me for this opportunity.
I want to share with you the process I followed to make this bracelet, as it has been a very exciting and creative experience. To begin, I had to acquire a variety of materials, as this craft entails quite a bit of preparation. First, I obtained small pearls in silver and white. These pearls are perfect for giving the bracelet an elegant and contrasting touch. I also bought black seed beads, which are essential for the design I have in mind. I opted to buy a good quantity because the pattern I want to make is quite elaborate and requires several elements. The design I chose is rock-style, and I'm excited that it will have skull prints on a black background. Skulls are an iconic symbol in rock fashion, so I thought it would be an excellent choice for this bracelet. Not only are they eye-catching, but they also add an air of rebellion and originality. While searching for inspiration, I found a pixel template of the skull pattern on Pinterest that I loved. It really helped me visualize how the bracelet would look and plan the design in advance, which is crucial to ensure everything fits perfectly. In addition to the pearls and beads, I also purchased some silver-colored knot stoppers. These small details are important, as they help finish the bracelet in a polished and professional manner.Although I haven't started assembling the bracelet yet, I'm already anticipating how it will look and am very excited about the final result. For the thread, I chose a black knitting thread. This color not only complements the design but is also strong and durable, which is crucial for the bracelet to withstand daily use. I can't wait to see how all these elements will come together to create a unique and attractive piece. I hope that, if everything goes as I imagine, the bracelet will look spectacular and that you will really enjoy this art.

(Materiales:)||(Materials:)
- Hilo de tejer en color negro
- Tapanudos en color plateado
- Mostacillas de color negro
- Perlas pequeñas en colores plateado y blanco
- Tijeras
- Aguja de coser a mano
- Black knitting thread
- Silver knot covers
- Black seed beads
- Small silver and white pearls
- Scissors
- Hand sewing needle
(Procedimiento:)||(Procedure:)
Paso nro 1
Paso nro 1
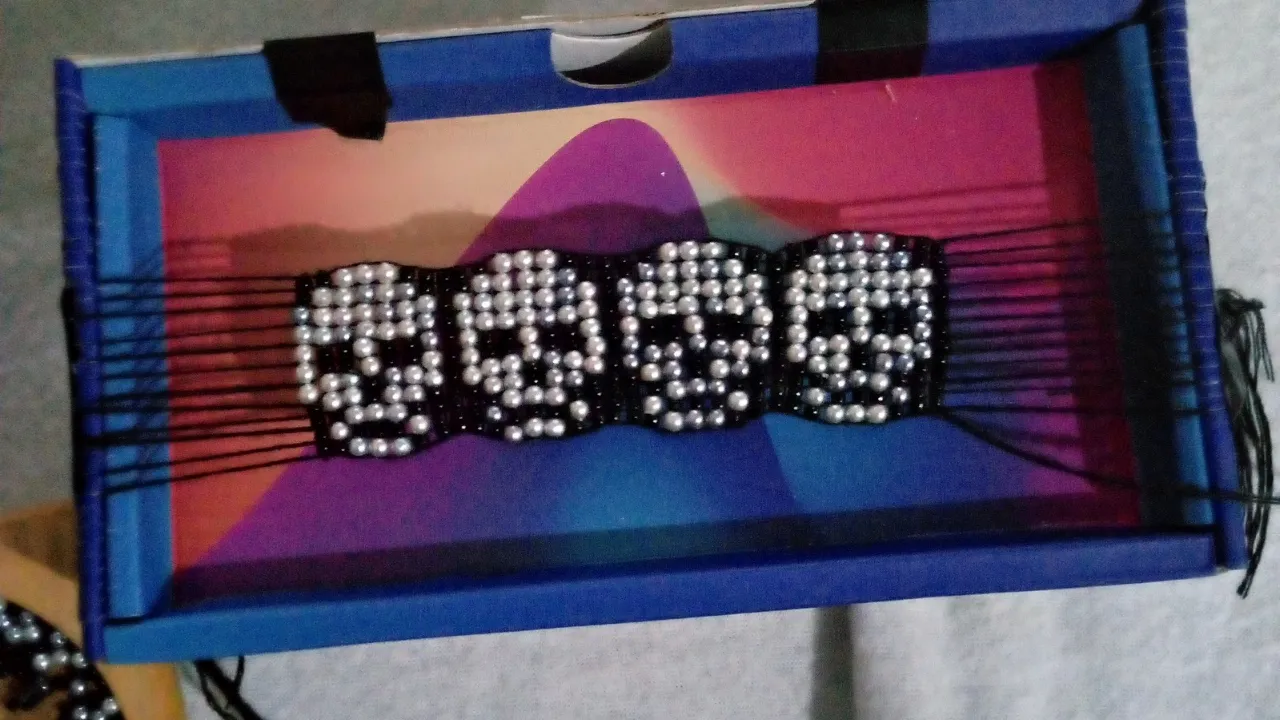
I'm going to start by preparing my loom, which, as you can see, is a telephone box. To make things a little easier, I made several openings in the edges of the box. I made sure to line them up properly, as this is crucial for placing the threads in each opening and keeping them secure. I laid out eleven rows of thread, which will give me enough space to work on my design. Also, to ensure the threads stay in place and don't come loose during the process, I held them in place with tape. This not only makes it more comfortable to work with, but also prevents them from getting tangled or disorganized.


Paso nro 2
Paso nro 2
To begin weaving, I'll use a pixel pattern as a guide. First, I prepare the needle with enough thread and join it to the thread of the first row. Make sure the thread is secure to prevent it from coming loose while you work. Then, I place the seed beads and pearls according to the order indicated in the pattern image. Weaving consists of placing the beads in each space left by the row. Then, I pass the needle over and then through the middle of each bead. This method ensures that the beads are securely fastened and aligned.


Paso nro 3
Paso nro 3
You can already see that the design will look very nice. My idea is to make four skulls and leave a row of seed beads between each skull. This will not only add a touch of style, but will also allow each skull to stand out in the overall design.


Paso nro 4
Paso nro 4
To close the bracelet, I continued to weave seed beads into each row, but I placed them in progressively smaller quantities. This way, when I finally go to add the knot cover, it will be the same size and fit perfectly. This method ensures that the bracelet closes properly and that the knot cover blends well into the design. After adding the knot covers, I added a small cord of the same thread on each side, as I realized I was missing something. So I solved the problem this way. I've seen bracelet designs that look great with this design, and I think it works perfectly in my creation as well.
(Resultado final:)||(Bottom line:)
And this is how this rocker-style bracelet turned out.The colors look so pretty, and I think it turned out great. However, like everyone, everyone has their own tastes. I loved being back here and being able to show you how I make woven bracelets. I hope you like it!


Las fotos de este blog son de mi propiedad|Las imágenes son editadas en canva|Fotografías tomadas en mi celular infinix Smart 7|El contenido está traducido en el traductor de Firefox.
Las fotos de este blog son de mi propiedad|Las imágenes son editadas en canva|Fotografías tomadas en mi celular infinix Smart 7|El contenido está traducido en el traductor de Firefox.