
Hello my dear friends 👋😊, today I felt motivated to create a bracelet for myself since I have some old rose or antique rose beads, as it is one of my favorite colors, and I just wanted to share the step-by-step process with you after being absent from the community for a while 🤭, and to think I had the materials set aside for so long to make this accessory for myself and I didn't realize I had all the materials and I said it was time to make this pretty bracelet 👍. And the design will feature flowers that will look so pretty in pink 🌸. The best thing about flower bracelets is that they add a natural and creative touch to match our outfits, bringing a natural feel to any occasion. I invite you to join me in this beautiful jewelry-making process, and I also invite you to follow my upcoming posts where I mostly share different bracelet and color combinations 😻.

(Materiales:)||(Materials:)
- 1 metro de hilo nilón
- Tijeras
- Alicate para bisutería
- Cuentas de color rosado envejecido
- Cuentas de color verde oliva
- Cuentas de color dorado
- Una argolla y un poco de loro
- 1 meter of nylon thread
- Scissors
- Jewelry pliers
- Antique rose beads
- Olive green beads
- Gold beads
- A jump ring and some parrot wire
(Procedimiento:)||(Procedure:)


Paso nro 1
Paso nro 1
To begin, take the nylon thread and place the parrot bead in the center of the thread. Then, place a green bead on each side of the thread. Next, take another green bead and place it so that each side of the thread passes through the center of the bead. Then, give a small pull to the thread to adjust the beads and create a triangle shape.


Paso nro 2
Paso nro 2
Then I continued doing the same but I alternated the bead that passes through the center of the thread, for that I placed pink beads, since my idea was to do this weaving three times to form a chain as if they were leaves and the flower bud 💐.


Paso nro 3
Paso nro 3
Once I had the little chain ready, it was time to start making the flowers. So I placed a pink bead and passed it through both sides of the thread, and then I placed two pink beads on each side of the thread, and then I placed a gold bead through the middle of the thread so that it was only joining the thread in the middle.


Paso nro 4
Paso nro 4
Continuing with the gold bead section, you simply had to pass both ends of the thread through the first two beads on the sides, then adjust it while gradually pulling the thread taut. Next, add a pink bead, intertwining it so that each end of the thread passes in the opposite direction. When you're ready to move on to the next flower, add a sequence of green beads to resemble leaves, and then begin with the following flower.


Paso nro 5
Paso nro 5
After I had already made some progress on the bracelet, it was time to measure it against my wrist to see if I needed more or if it was fine as it was. Well, I didn't need much more since it was fine, so I just made the chain again as I had at the beginning to finish it, and to give it the final touch I added the ring.
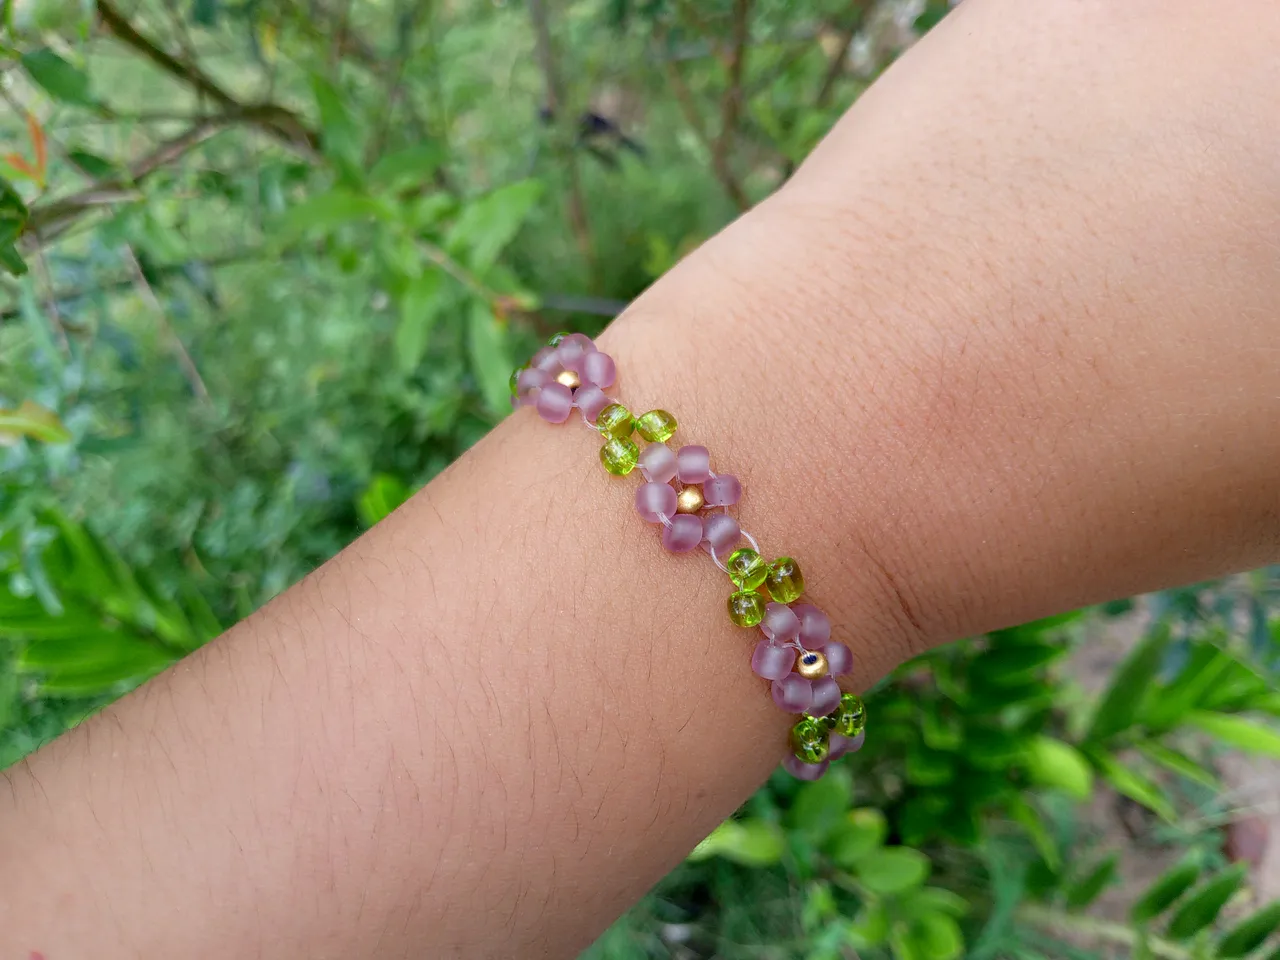
(Resultado final:)||(Bottom line:)
And so, dear friends, I made this lovely thing, and to finish up all this work, all that's left is to try it out and that's it! I hope you liked it and enjoyed the step-by-step process. Thank you for joining me today, and I'll see you again soon.

Las fotos de este blog son de mi propiedad|Las imágenes son editadas en canva|Fotografías tomadas en mi celular infinix Smart 7|El contenido está traducido en el traductor de Firefox.
The photos on this blog are my property | The images are edited in Canva | Photos taken on my Infinix Smart 7 cell phone | The content is translated in Firefox Translate.