Hola amigos, ¡bienvenidos a mi mundo!
Cómo están ? Yo bien porque tuvimos 4 días libres y me puse a hacer unas cosas para mi cuarto que quedaron bien bonitas y les voy a reseñar una que hice hoy que es un shadow box de Twice, es como un collage de cosas de Twice y que son en 3D y además yo misma hice el marco y quedó bien fino y no es difícil.


Este shadow box lo vi con mi mamá en pinterest y lo guardamos para que yo lo hiciera porque no es bien fácil y yo lo quise hacer de Twice que es uno de mis grupos favoritos y quiero hacer como dos más de los otros grupos que me gustan porque yo soy multifandon.
Yo utilicé
💗 Cartulina blanca
💗 Regla
💗 Lápiz
💗 Silicón frío
💗 Tijera
💗 Impresiones de Twice en papel de fotos
💗 Esponja
💗 Pintura al frío rosada pastel
💗 Adhesivo doble faz
Ahora el paso a paso
Bueno, lo primero que yo hice fue buscar las imágenes de Twice pero png porque no tienen fondo y después en canva hice el cuadrito juntando las imágenes y además las saqué separadas para imprimirlas y pegarlas encima, entonces cuando hice eso lo descargué y mi papá me lo fue a imprimir y recorté todo por la orilla, menos el ticket y lo que dice "Twice" que le dejé una orillita blanca y el nombre azul.


Después que recorté todo les puse por detrás los cositos de adhesivo que vienen así cortados chiquitos y los pegué donde van y listo.


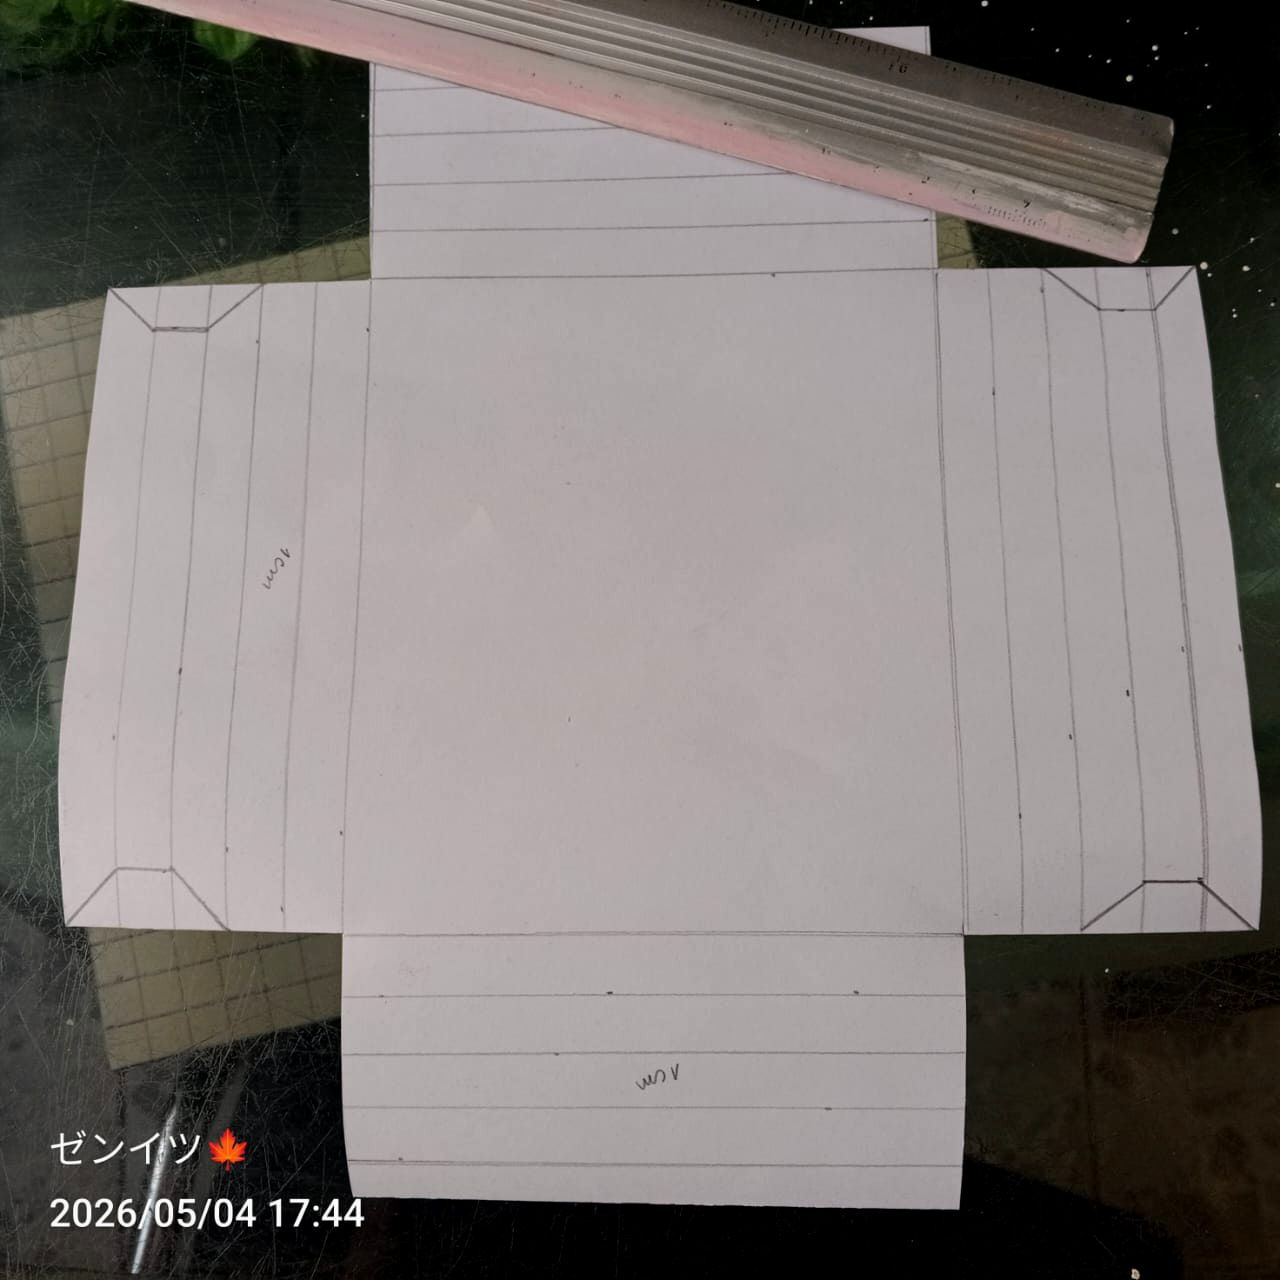
Como ya está listo el collage que es lo que va a ir en el cuadrito ahora tenía que hacer el marco y primero se marca en la cartulina el tamaño del collage, y después con la regla se mide un centímetro por todo alrededor y después se hacen 4 líneas de un centímetro también por todos los lados y se cortan las esquinas así como está en la foto, nada más 4 líneas.

Después en los lados se hacen las marquitas que están en las fotos, tienen que contar de afuera para adentro 3 cuadritos y en el del medio marcan un centímetro y lo cortan y después cortan para abajo de los dos lados como en diagonal así como está en la foto.
En eso mi mamá me ayudó porque lo cortó con el cortador para que quedara mejor.

Después de eso ahora hay que doblar todas las líneas hasta donde está la que hicimos alrededor del collage. Yo puse la regla en la línea y doblé la cartulina para que me quedara derecho y se tienen que doblar todas y eso es un poquito fastidioso porque hay que doblarlas derechitas y son un poco de líneas y hay que dejarlas bien planitas para que el marco se vea derechito.

Cuando ya doblamos bien todas las líneas vamos a agarrar y echar un poquito de silicón frio en la cartulina y doblamos los dos lados y queda un tubito cuadradito que es el marco de ese ladito, lo pegamos en el ladito que marcamos de 1 centímetro al lado de la marca para el collage.
Antes de que se pegue doblamos el marquito del otro lado y el de arriba y el de abajo de una vez porque los de arriba y abajo tienen entrar en los de los lados y así queda listo el marco, yo después pegué la foto y le pinté el marco de rosado que es uno de los colores de Twice y creo que voy a decirle a mi mamá para que me imprima otras cositas para ponerlas al rededor del marco y se vea más bonito.

Para que el marquito se pare agarré y marqué una tira de cartulina que era de 7 centímetros de largo y 6 de ancho y la doblé la parte que tiene 6 centímetros dos veces y quedó de 2 centímetros de ancho y le doblé una parte de 3 centímetros y lo pegué en la parte de atrás del marquito y así se podía parar y ya quedó listo.


Bueno amigos ojalá que les haya gustado este shadow box y que lo hagan de su casa de lo que a ustedes más les guste porque lo pueden hacer de lo que sea. Gracias por leer mi post. Chaoooo ❤❤💕💕

Hello friends, welcome to my world!
How are you all? I’m fine – we had four days off, so I got round to doing a few things for my room that turned out really nicely. I’m going to tell you about one I made today: a Twice shadow box. It’s like a collage of Twice-related items, all in 3D. I even made the frame myself – it turned out really neat and it wasn’t difficult at all.
My mum and I saw this shadow box on Pinterest and we saved it so I could make it because it’s not difficult. I wanted to make one featuring Twice, who are one of my favourite groups, and it’s not hard to do. I want to make about two more featuring the other groups I like because I’m a multifan.
I used
💗 White card
💗 Ruler
💗 Pencil
💗 Cold glue
💗 Scissors
💗 Twice photos printed on photo paper
💗 Sponge
💗 Pastel pink cold paint
💗 Double-sided tape
Now the step-by-step guide
Well, the first thing I did was look for Twice images in PNG format because they don’t have a background, and then in Canva I put the images together to make the little picture. I also saved them separately so I could print them out and stick them on top. Once I’d done that, I downloaded it and my dad printed it out for me. I cut everything out along the edge, except for the ticket and the bit that says " Twice", which I left with a little white border.
After I’d cut everything out, I stuck the little adhesive dots that come pre-cut onto the back and stuck them where they go, and that was it.
Now that the collage is ready – which is what’s going in the little frame – I had to make the frame. First, mark the size of the collage on the card, then use a ruler to measure one centimetre all the way round, then draw four one-centimetre lines on all sides and cut the corners as shown in the photo – just four lines.
Next, make the little marks on the sides as shown in the photos: count in from the outside three squares, mark one centimetre on the middle one, cut it, and then cut downwards from both sides at an angle, just as shown in the photo.
My mum helped me with that bit because she cut it with the cutter so it would look neater.
After that, you have to fold all the lines up to where the one we made around the collage is. I placed the ruler on the line and folded the card so it would be straight, and you have to fold them all, which is a bit of a faff because you have to fold them really straight and there are quite a few lines, and you have to make sure they’re nice and flat so the frame looks straight.
Once we’ve folded all the lines properly, we’ll take a bit of cold silicone and apply it to the card, then fold both sides to create a little square tube which forms the frame for that side. We stick it onto the side where we marked 1 centimetre next to the mark for the collage.
Before sticking it down, we fold the little frame over on the other side, and the top and bottom flaps all at once, because the top and bottom flaps need to tuck into the side flaps, and that’s how the frame is finished. I then stuck the photo in and painted the frame pink, which is one of Twice’s colours, and I think I’m going to ask my mum to print out some other bits for me to put around the frame so it looks nicer.
To make the little frame stand up, I took a strip of card that was 7 centimetres long and 6 centimetres wide, folded the 6-centimetre side twice so it was 2 centimetres wide, then folded a 3-centimetre section and stuck it to the back of the frame so it could stand up. And that was it – it was ready.
Well, friends, I hope you liked this shadow box and that you’ll make one at home featuring whatever you like best, because you can make it out of anything. Thanks for reading my post. Bye for now ❤❤💕💕

Photography/Fotografía: 