

English
The other day, a friend asked me to help her with some paper, cardboard and foami butterflies, for a party she is having for her daughter.
People usually ask me for this kind of help, as many know that I am good with art and crafts. Well, I gladly decided to help her on the condition that she would accompany me during the process...
The materials I used for this craft were the following:
Cardboard, shiny paper, foami, paint, paintbrush, silicone, wooden sticks.
Español
El otro día, una amiga me pidió que le ayudara con unas mariposas de papel, cartulina y foami, para una fiesta que le hará a su hija.
La gente suele pedirme este tipo de ayudas, pues muchos saben que soy bueno con el arte y las manualidades. Pues bien, yo encantado decidí ayudarla con la condición de que me acompañara durante el proceso...
Los materiales que utilicé para esta manualidad fueron los siguientes:
Cartulina, papel brillante, foami, pintura, hojilla, silicon, palillos de madera.

To make these butterflies, I made small squares of the same size, both on the cardstock and on the glossy paper.
I made squares of 6.5 cm x 6.5 cm. I managed to make 20 squares in total, 10 from the cardstock and 10 from the glitter paper.
Once each square was cut, I made the pattern I would follow for the butterfly.
Para hacer estas mariposas, hice pequeños cuadros del mismo tamaño, tanto en las cartulinas como en el papel brillante.
Hice cuadros de 6,5 cm x 6,5 cm. Logré hacer 20 cuadrados en total, 10 de la cartulina y 10 del papel brillante.Una vez cortado cada cuadrado, hice el patrón que seguiría para la mariposa.
 |  |
|---|
This pattern is simply a guideline that I will shape on the two squares that I cut out before.
You have to make the shape in both, because the cardboard will be the background color of the butterfly; the shiny paper will be what will give shine to the wings, one will be underneath and the other on top.
Este patrón simplemente es una guía que plasmaré en los dos cuadrados que antes recorté.
Hay que hacer la forma en ambos, porque la cartulina será el color de fondo de la mariposa; el papel brillante, será lo que dará brillo a las alas, uno estará debajo y el otro por arriba.
 |  |
|---|

After cutting out the shiny paper, turn it over on the non-glossy side and make the shapes that we are going to cut out, as shown in the image below.
In my case I used a blade to cut the shapes I drew with the pencil. In the image on the right you can see how one of the butterflies looks with the shapes cut out and another butterfly intact.
El papel brillante, después de recortarlo, hay que voltearlo por el lado no brillante y hacer las formas que vamos a recortar, tal como se aprecia en la imagen de abajo.
En mi caso yo utilicé una hojilla para cortar las formas que dibujé con el lápiz. En la imagen de la derecha pueden ver cómo se ve una de las mariposas con las formas cortadas y otra mariposa intacta.
 |  |
|---|
As I told you, the colored cardstock and the shiny paper make a butterfly, only the colored cardstock will go underneath and the shiny cardstock (with the shapes cut out) will go on top.
Here is an example of what I am talking about:
Como les dije, la cartulina de color y el papel brillante hacen una mariposa, solo que la de cartulina de color irá debajo y la cartulina brillante (con las formas cortadas) irá arriba.
A continuación un ejemplo de lo que les estoy mencionando:
 |  |
|---|
To glue them together, I used hot silicone to glue a wooden stick between the two sides of the butterfly, the wooden stick being what will be used to hold the stick.
Para pegarlas, usé silicón caliente para pegar un palillo de madera entre las dos caras de la mariposa, siendo el palillo de madera lo que se usará para sostener el palillo.
 |  |
|---|


The butterflies have little antennae, so I cut small sticks out of the shiny paper and glued them with the same silicone in the middle of the two wings, as shown in the image below:
Las mariposas tienen unas antenitas, así que corté pequeños bastoncillos del papel brillante y los pegué con el mismo silicón en medio de las dos alas, tal como se muestra en la imagen a continuación:
 |  |
|---|
For another butterfly, much larger, I used thinner cardboard, similar to paper but more resistant. These are the ones I show you in the images below.
From this cardboard I made the same shape of a butterfly, almost the size of a letter size sheet, almost...
Para otra mariposa, mucho más grande, usé cartulinas más delgadas, similares al papel pero más resistentes. Son las que les muestro en las imágenes de abajo.
De estas cartulinas hice la misma forma de una mariposa, casi del tamaño de una hoja tamaño carta, casi...
 |  |
|---|
 |  |
|---|
After cutting the cardboard, I cut the same shape but in foami. You can use any color you want, but in my case I used the one I had, a pink foami. As I said, it doesn't matter, because I'm going to paint this foami gold.
Of course, you can also use the shiny paper that was used for the other butterflies, but I preferred to use foami to give more relief to the shapes, since it is a bigger butterfly.
Después de cortar la cartulina, corté la misma forma pero en foami. Pueden usar el color que quieran, pero en mi caso yo usé el que tenía, un foami rosado. Como les digo, no importa, porque este foami lo voy a pintar de dorado.
Aclaro, también pueden usar el papel brillante que se usó para las otras mariposas, pero yo preferí usar foami para que se viera más relieve en las formas, ya que es una mariposa más grande.
 |  |
|---|
Notice that I did the same as the previous ones, only I made more holes in the wings.
First I drew them with a pencil and then I cut them out with a blade.
I also made some foami antennas, which I glued with hot silicone.
Fíjense que hice lo mismo que las anteriores, solo que hice más agujeros en las alas.
Primero los dibujé con un lápiz y luego los recorté con una hojilla.
También le hice unas antenitas de foami, que pegué con silicón caliente.
 |  |
|---|

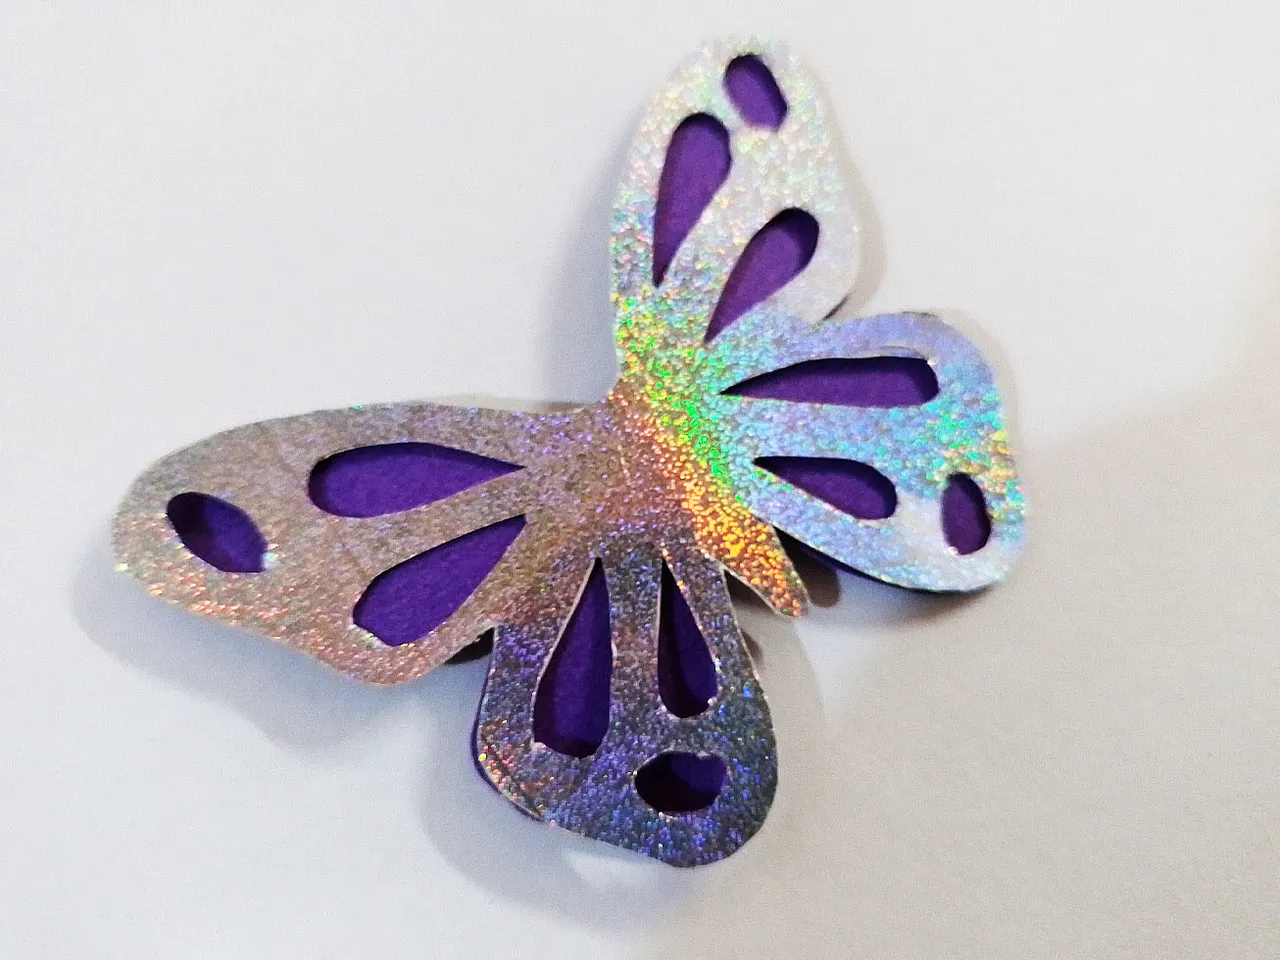
As I told you, I planned to paint the foami, for this I used silver paint. I used two coats of paint and then glued the foami on top of the purple cardboard.
The result is shown in the image below:
Tal como les dije, planeaba pintar el foami, para esto usé pintura color plata. Usé dos capas de pintura y luego pegué el foami encima de la cartulina morada.
El resultado se aprecia en la imagen a continuación:
 |  |
|---|
This butterfly was to be hung on a metal ring, but since it was to create a flying effect, I used masking tape to create a surface where the butterfly could be attached.
I attached it to the tape with hot silicone.
Esta mariposa iría colgada en un aro metálico, pero como debía crearse un efecto de vuelo, usé cinta adhesiva para crear una superficie donde pudiera fijarse la mariposa.
La pegué a la cinta con silicón caliente.
 |  |
|---|
Here is a series of pictures with the final result of all the butterflies I made.
A continuación les dejo una serie de fotografías con el resultado final de todas las mariposas que hice.


So friends, what did you think of this tutorial to make decorative butterflies? If you like, you can leave me your opinions below in the comments, as always I will be happy to read them.
Thank you very much for taking the time to read my post. With nothing more to add, I'll say goodbye then...
See you next time!
Y bien amigos, ¿qué les ha parecido este tutorial para hacer mariposas decorativas? Si gustan, pueden dejarme sus opiniones abajo en los comentarios, como siempre estaré encantado de leerlos.
Les agradezco mucho que se tomaran el tiempo de leer mi publicación. Sin más que agregar, me despido entonces...¡Hasta la próxima!
