
Saludos, hivers manualistas. Es un placer saludarlos nuevamente y compartir con ustedes un pedacito de mi pasión por el arte de los hilos.
Greetings, fellow crafters! It's a pleasure to greet you again and share with you a little bit of my passion for the art of threading.
Hoy deseo compartirles un pequeño proyecto de crochet elaborado con la técnica del amigurumi. Como muchos de ustedes saben, me encanta trabajar este estilo porque los resultados son realmente maravillosos; no solo por la pieza terminada, sino por todos los beneficios que genera el proceso de tejer y la satisfacción de crear algo nuevo desde cero con nuestras propias manos.
Today I want to share a small crochet project made using the amigurumi technique. As many of you know, I love working with this style because the results are truly wonderful; not only because of the finished piece, but also because of all the benefits that come with the crocheting process and the satisfaction of creating something new from scratch with our own hands.
En esta ocasión, el protagonista de mi trabajo es un lindo Stitch; hace algún tiempo tuve la oportunidad de realizar a su contraparte femenina, Angel, aunque en una posición distinta y con un nivel de detalle que requirió un poco más de trabajo. Sin embargo, ambos han quedado igual de tiernos y capturan la esencia de estos personajes que tanto gustan, especialmente a las niñas y jovencitas.
This time, the star of my piece is a cute Stitch; some time ago I had the opportunity to draw his female counterpart, Angel, although in a different pose and with a level of detail that required a bit more work. However, both turned out equally adorable and capture the essence of these beloved characters, especially popular with girls and young women.
Espero que disfruten viendo el resultado tanto como yo disfruté el proceso de creación y que les guste mucho mi trabajo
I hope you enjoy seeing the result as much as I enjoyed the creative process, and that you really like my work.

Materiales:
Hilo de crochet en colores azul, blanco y negro
Relleno
Agujas de crochet y lanera
Tijera
Materials:
Crochet yarn in blue, white, and black
Stuffing
Crochet and yarn needles
Scissors
Elaboración/Elaboration
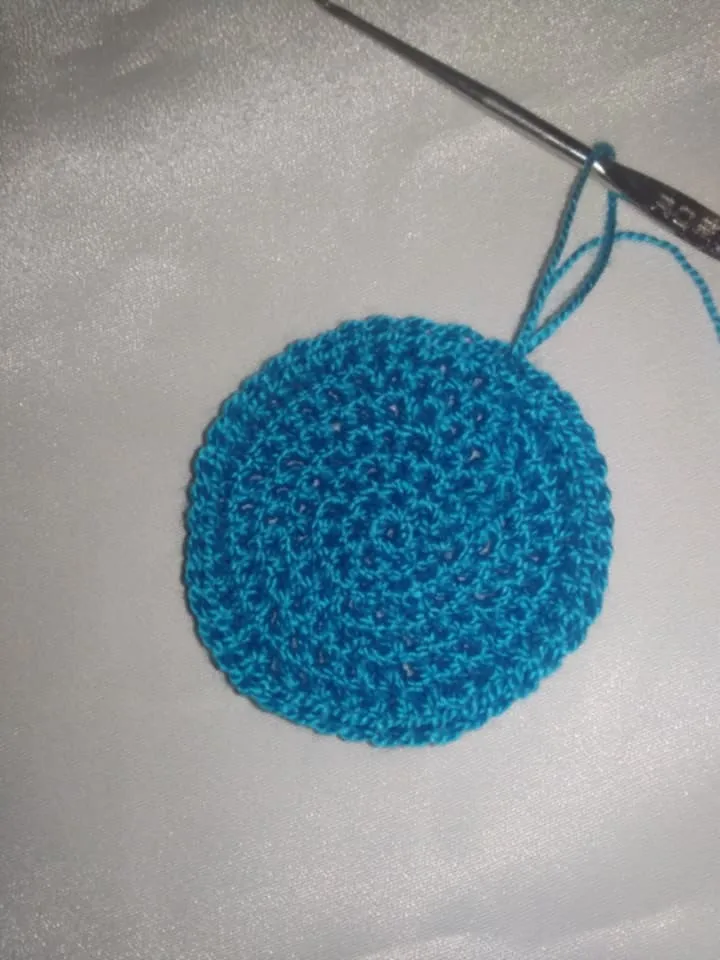
Cabeza (Color Azul)
AM de 6 pb: 6
6 aum: 12
1 pb, 1 aum (x6): 18
2 pb, 1 aum (x6): 24
3 pb, 1 aum (x6): 30
4 pb, 1 aum( x6): 36
5 pb, 1 aum( x6): 42
Head (Blue Color)
6 pb AM: 6
6 inc: 12
1 sc, 1 inc (x6): 18
2 sc, 1 inc (x6): 24
3 sc, 1 inc (x6): 30
4 sc, 1 inc (x6): 36
5 sc, 1 inc (x6): 42

6 vueltas: 42
6 laps: 42


Cambiar a hilo de color blanco
1 V: 42 BLO
5 pb, 1 dism (x6): 36
4 pb, 1 dism (x6): 30
3 pb, 1 dism (x6): 24. Rellenar firmemente.
2 pb, 1 dism (x6): 18 Cerrar y dejar hebra larga para coser.
Change to white yarn
Round 1: 42 stitches
5 sc, 1 dec (x6): 36
4 sc, 1 dec (x6): 30
3 sc, 1 dec (x6): 24. Stuff firmly.
2 sc, 1 dec (x6): 18. Fasten off and leave a long tail for sewing.

Cuerpo (Color Azul)
AM de 6 pb: 6
6 aum: 12
1 pb, 1 aum (x6): 18
2 pb, 1 aum (x6): 24
Body (Blue)
6 sc in a magic ring: 6
6 inc: 12
1 sc, 1 inc (x6): 18
2 sc, 1 inc (x6): 24

5V: 24
5V: 24

2 pb, 1 dism (x6): 18
1 pb, 1 dism (x6): 12 Rellenar y cerrar.
2 sc, 1 dec (x6): 18
1 sc, 1 dec (x6): 12 Stuff and close.

Brazos X2 (Color Azul)
AM de 5 pb
5 aum: 10
1V: 10 BLO
3 pb, 1 dism (x6): 8
2V: 8 Rellenar y cerrar.
Arms X2 (Blue Color)
AM of 5 sc
5 inc: 10
1R: 10 BLO
3 sc, 1 dec (x6): 8
2R: 8 Stuff and close.

Garras (Color Negro)
Entrar en la vuelta BLO con pd, pb, 2cdas, pto picot (en mismo punto). Repetir 2 veces mas para obtener las 3 garras
Claws (Black)
Enter the BLO round with a slip stitch, single crochet, 2 chain stitches, picot stitch (in the same stitch). Repeat 2 more times to make 3 claws.


Piernas X2 (Color Azul)
AM de 6 pb
5 aum: 12
1V: 12 BLO
1V: 12
4 pb, 1 dism: 10
1V: 10 Rellenar y cerrar.
Para las garras repetir el mismo proceso que se realizo con los brazos
Legs x2 (Blue)
6 sc in a magic ring
5 inc: 12
Round 1: 12 BLO
Round 1: 12
4 sc, 1 dec: 10
Round 1: 10 Stuff and close.
For the claws, repeat the same process as for the arms

Orejas (Hacer 2 en Azul y 2 en Blanco)
Realizar 14 cadeneta, iniciar a tejer en #3 haciendo 12pa, al llegar al final 1 aum, continuar tejiendo por el otro lado y al llegar al final nuevamente aum y cerrar. En la siguiente vuelta repetir el mismo proceso pero esta vez con pma.
Ears (Make 2 in Blue and 2 in White)
Chain 14, start crocheting in #3 making 12 dc, at the end make 1 inc, continue crocheting on the other side and at the end make another inc and fasten off. In the next round repeat the same process but this time with dc.
Unir una pieza azul con una blanca tejiendo puntos bajos por todo el borde con el color blanco.
Join a blue piece with a white one by crocheting single crochet stitches all around the edge with the white color.

Para darle forma a las orejas, tomar uno de los extremos, unir haciendo 5pd.
To shape the ears, take one of the ends, join by making 5 stitches.

Ojos (Hacer 2 en Blanco y 2 en Negro)
Parte blanca:
AM de 6 pb
Aum: 12
3pb, 1 aum: 18
Eyes (Make 2 in white and 2 in black)
White part:
6 sc in a magic ring
Inc: 12
3 sc, 1 inc: 18
Pupila negra:
AM de 4 pb
Aum: 8
Black pupil:
4 bp AM
Inc: 8

Coser la cabeza al cuerpo con ayuda de la aguja lanera.
Sew the head to the body using a tapestry needle.

Coser la parte blanca de los ojos al rostro del personaje, justo en la última vuelta de color azul, y sobre la parte blanca con hilo blanco y aguja lanera, unir ambas piezas, haciendo solo una puntada larga.
Sew the white part of the eyes to the character's face, right on the last blue round, and on the white part with white thread and a tapestry needle, join both pieces, making only one long stitch.

Ubicar las orejas a los costados de la cabeza y coser con la aguja lanera.
Position the ears on the sides of the head and sew them on with the yarn needle.

Para la nariz, lo que hice fue tomar hilo azul y negro para realizar un anillo mágico, el cual pegué con finas puntadas entre ambos ojos, como se muestra en la imagen.
For the nose, I took blue and black thread to make a magic ring, which I glued with fine stitches between both eyes, as shown in the image.

Ubicar los brazos a los costados, justo donde inicia el cuerpo y coser.
Place the arms at the sides, right where the body begins, and sew.

Ubicar las piernas en la parte inferior del cuerpo para coser de manera que la posición del personaje quede de pie.
Position the legs at the bottom of the body to sew so that the character is standing upright.

Aquí el resultado final.
Here's the final result.

Todas las fotografías de esta publicación son completamente de mi propiedad/All photographs in this publication are entirely my property.
Translated with DeepL.com (free version)
