
Warm greetings to everyone, Merry Christmas! The month has begun where we rush around preparing for trips, tidying up the house, and doing everything we can to welcome the new year. Since I'm planning a trip to visit my family, who live 4 hours from my new place, I've been busy making new travel organizer bags, like this toiletry bag I'm showing you today.
Last week I used a material I love: red faux leather. I had enough left over, so I decided to watch a video to make a larger toiletry bag that would be big enough to carry several personal items I'll need when I'm with my family. It's always good to be prepared with your most important personal items so they don't get damaged in your suitcase. Besides, I like how it matches the smaller toiletry bag I made last week; now I'll be much more organized with all my personal essentials.
The photos you'll see below were taken with my Tecno Spark Go phone.
¡Saludos con mucho cariño para todos, feliz Navidad! Comenzó el mes donde nos ponemos a correr con los preparativos para viajar, arreglar la casa, y cuanta cosa podamos hacer para recibir el nuevo año. Así que como estoy pensando viajar a visitar a mi familia, que vive a 4 horas de mi nueva residencia, me he dedicado a hacer nuevos bolsos organizadores viajeros, como es este neceser que les vengo a mostrar hoy.
La semana pasada utilicé un material que me encanto, es un cuero sintético rojo. Me quedaba material suficiente, así que me propuse ver un video para hacer un neceser más amplio, donde pudiera llevar varias cosas personales, que necesitaré donde mi familia, siempre es bueno ir preparado con las cosas personales más importantes, sin que se dañen en la maleta de viaje, Además, me gusta cómo combina con el neceser más pequeño que hice la semana pasada; ahora estará más tranquila organizando mis diferentes útiles de uso personal.
Las fotografías que verán a continuación, fueron tomadas con mi teléfono modelo TECNO SPARK GO.

 |  |
|---|

For this project, I used 50 cm of red faux leather, a 21 cm zipper, a measuring tape, a pencil, tweezers, red thread, a sewing machine, and scissors.
Lay the faux leather fabric, or any thick and slightly stiff fabric you have on hand, on the table to help it hold its shape.
You'll need 45 cm of fabric, 21 cm wide. Make sure the zipper length matches the width of the fabric. Mark the guide points with a pencil. If your fabric is longer, like mine (which is 50 cm), simply trim it to the correct size. This will give you a rectangle measuring 45 x 21 cm.
Para este trabajo utilicé 50 cm de cuero sintético rojo, 1 cierre, o cremallera, de 21 cm, cinta métrica, lápiz, pinzas, hilo rojo, máquina de coser, tijera.
Coloca sobre la mesa la tela de cuero sintético, o de la que tengas a la mano que sea de textura gruesa y un poco rígida para que te quede una mejor forma.
vas a necesitar 45 cm de largo de tela, por 21 cm de ancho de tela, comprueba que el largo de cierre sea del ancho de la tela, marca con el lápiz los puntos guías, y si tu tela es más como en este caso que mi tela es de 50 cm, solo recortas y llévala a la medida. Para lograr un rectángulo de 45X21
 |  |
|---|

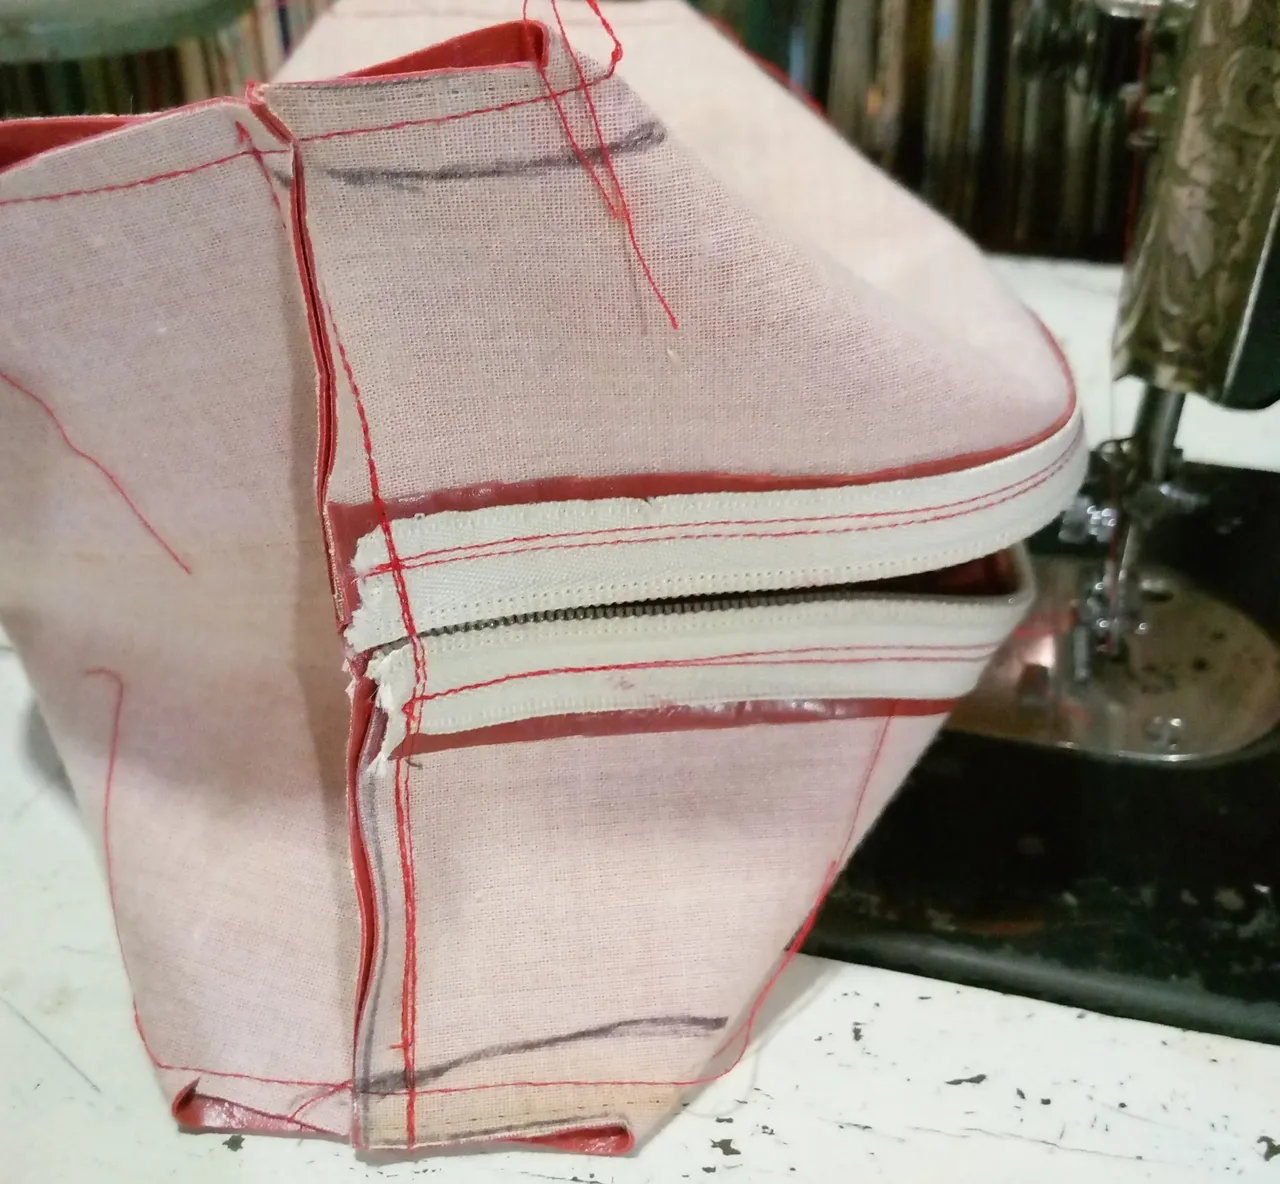
Once the rectangle is cut, separate the zipper into two pieces for easier sewing. Place the two zipper pieces on each side of the 21 cm rectangle and secure them with clips to prevent movement. Position the zipper pieces right sides together with the right side of the fabric. Sew them on your machine with a straight stitch. Alternatively, you can sew them by hand. With right sides facing, sew a topstitch between the zipper and the fabric for added strength and a more aesthetically pleasing finish.
Cortado el rectángulo, vas a separar el cierre en 2 lados, para coser con más facilidad, coloca las 2 piezas del cierre por cada lado del rectángulo de 21 cm sostén las piezas con pinzas de los lados para que el cierre no se mueva, colocando las piezas de cierre por sus lados derechos, junto con el derecho de tela, luego coser en tu máquina, con costura recta, también puedes coserlo a mano de ser el caso, enfrenta los derechos y pasa una costura superior entre cierre y tela, para dar mayor firmeza y estética al cierre.
 |  |
|---|---|
 |  |
After sewing the zipper pieces together, insert the zipper pull and slide it closed. Then, center the zipper, place darts on both sides, and sew a straight stitch with your machine.
Once you have sewn the sides, you will make a 3x3 cm square of paper or cardboard to cut at the corners of the toiletry bag, to give it shape, depth and volume. Cut with this, guide each square, fold making a straight line, and pass straight stitching.
Después de coser las piezas del cierre, coloque el deslizador del cierre, y deslice para cerrar, seguidamente centra el cierre, coloque pinzas en ambos lados, luego pase costura recta con su máquina.
Cuando hayas cosido los lados, vas a realizar un cuadro de papel o cartón, de 3x3 cm, para hacer cortes en las esquinas del neceser, para darle forma, profundidad y volumen, corta con esta, guía cada cuadro, dobla haciendo línea recta, y pasa costura recta.
 |  |
|---|

Sew it, and then to give it more shape at the top of the toiletry bag, draw a semi-curved line with the pencil and sew it, then cut it and you will notice that the corners have a softer shape, it is not straight, it has a semi-curve.
Cose, y luego para darle más forma en la parte superior del neceser, pasa una línea semi curva con el lápiz y cose, después corta y notaras, que las esquinas quedan con una forma más suave, no queda recta queda con semi curva.
 |  |
|---|---|
 |  |
Turn your toiletry bag over, and you can now consider this useful accessory finished, for organizing and protecting your personal items. However, this project included a hanging strap that I had forgotten to attach during the process, so I unstitched it and attached it without any problem. With this step, it's ready to carry things if you're going to travel, or for any other use you can think of.
Dale la vuelta a tu neceser y ya puedes considerar este útil accesorio listo para organizar y proteger tus objetos personales. Sin embargo, este proyecto incluía una correa para colgar que olvidé colocar durante el proceso, así que la descocí y la coloqué sin problema. Con este paso, está listo para llevar cosas si vas de viaje o para cualquier otro uso que se te ocurra.

 |  |
|---|
I hope you enjoyed this brief introduction to toiletry bag design.
Thank you for always being there for me in each of my projects. I appreciate you all so much.
Espero que hayan disfrutado de esta breve introducción al diseño de neceser.
Gracias por estar siempre ahí para mí en cada uno de mis proyectos. Los aprecio mucho.

social networks / redes sociales

Traductor Deepl
Translated Deepl
Ediciones Canva
Editions Canva

