Today I will be making jewelry box, and the box is for my sister because I noticed that she doesn't know how to organize her jewelry and she always looks for them anytime she is going out.

I decided to make her the box so that she can just drop her jewelry inside anytime she is back from work instead of dropping it somewhere that she wouldn't remember later when she needed it.
Material used are
Carton of my sister's new fridge
Cardboard, old butterfly from my jewelry box.
Scissors, super glue and gum.
Watercolor, red pen, blue pen.
The procedure
Making the jewelry box took a lot of time, I spent almost 4 hours and I will just share the steps down there, I hope you like it.
Step 1
I cut the carton into the shapes I need which are two pentagons for top and base, and five rectangle cards for the side.


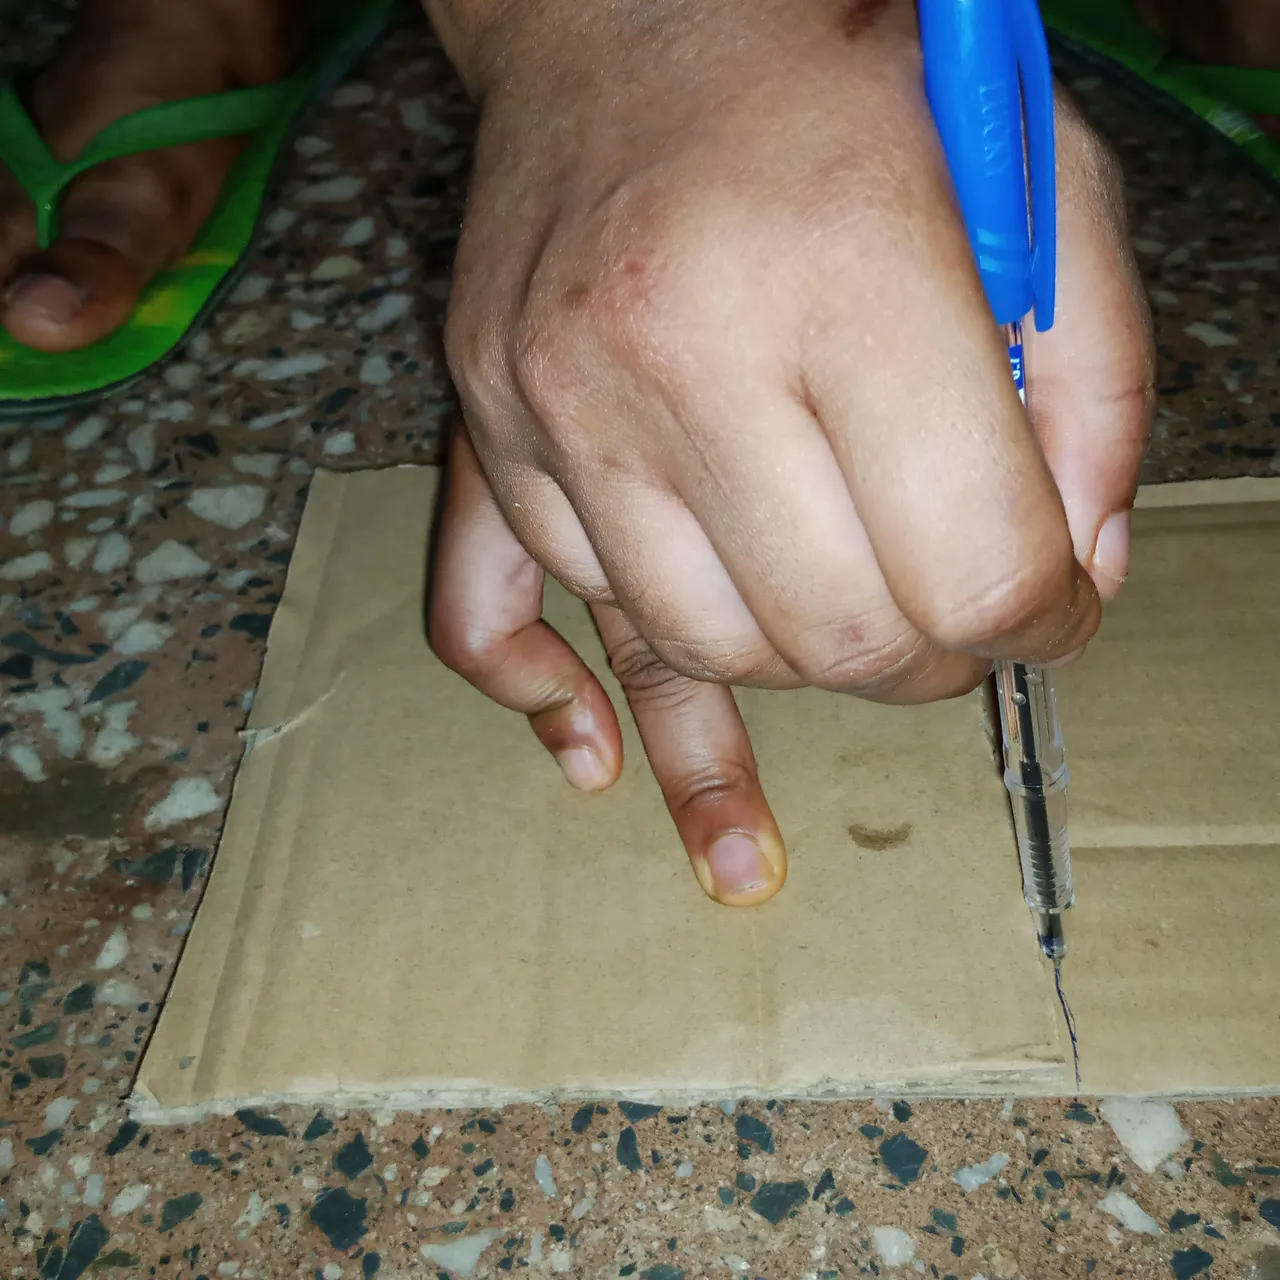


Step 2
I coupled the carton together with super glue and the reason why is because the carton is very strong so ordinary gum can't hold it together. I arranged the rectangle cards carefully and glued them to the Pentagon cut-out that would serve as the base and the cover.


Step 3
After coupling the cut outs, I cut the cardboard into the shapes I made with the carton earlier.
The purpose is to beautify the carton so after cutting the shapes out, I gum it on the surface of their respective shape that made the box.


Step 4
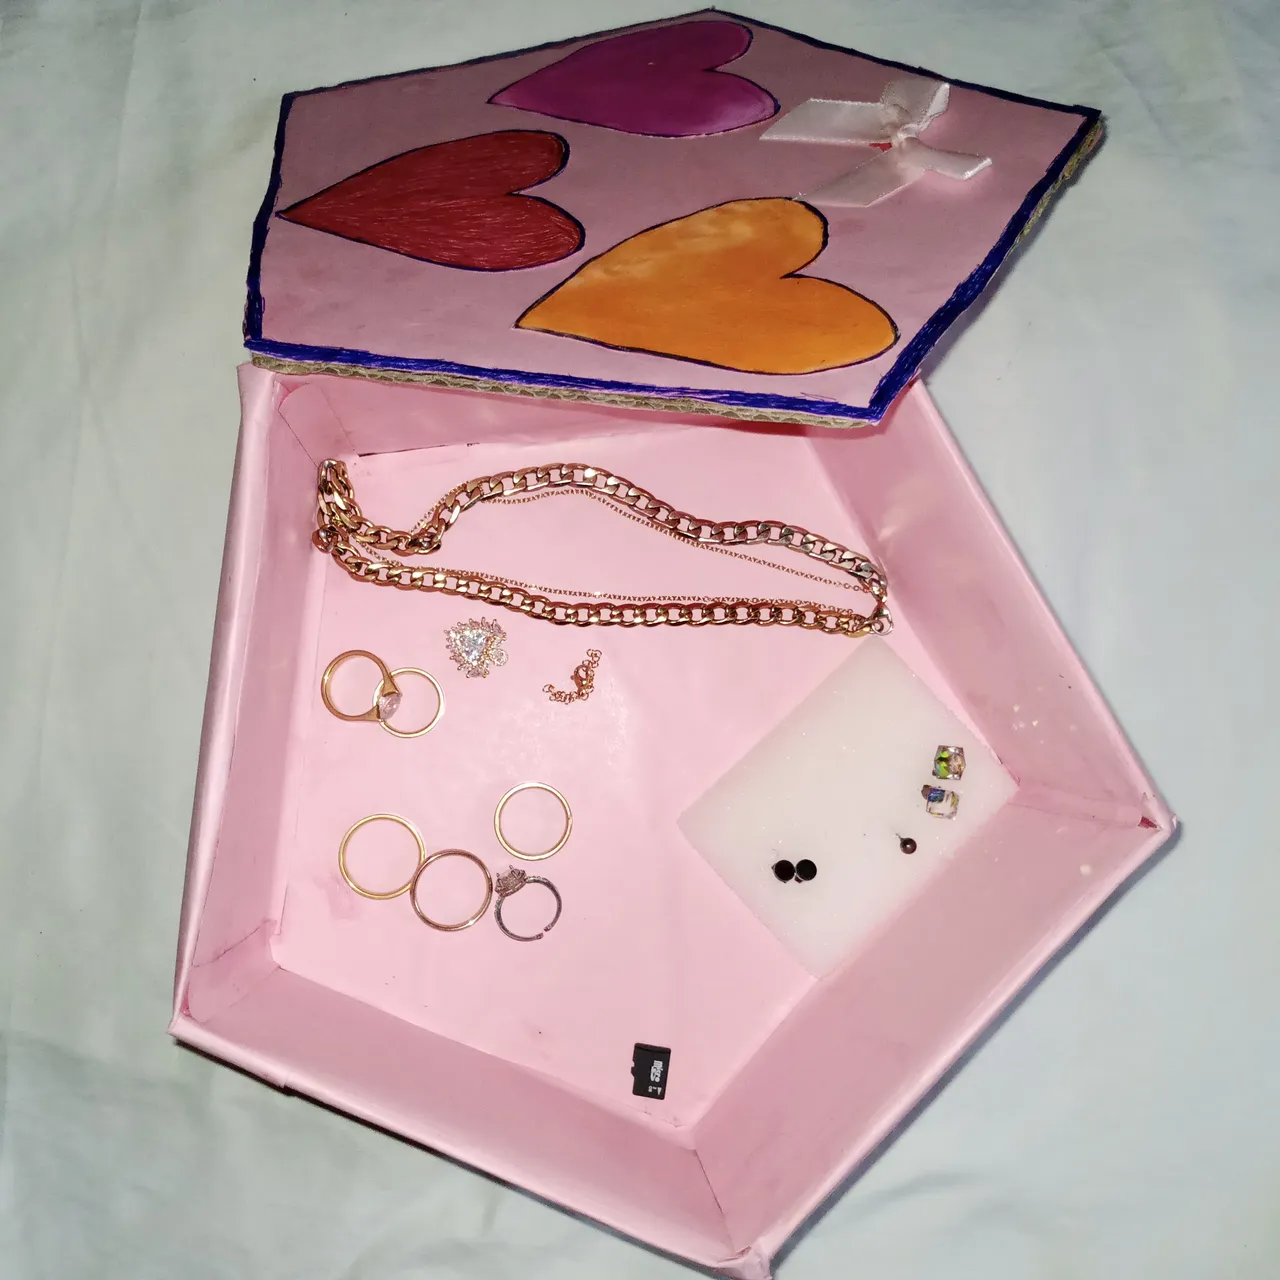
To beautify it further, I cut out the love shape, colored it and glue it to the cover of the box.
I love how it turned out, it gave the cover a completely new look.


I have a butterfly made from ribbon from one of my old boxes, I glued it on the cover as well and it was perfect.
Step 5
I helped her to put all the jewelry I found inside her room into the box so that when she comes she won't look for all the jewelry around the house.


I hope you like my DIY jewelry box