
Hello friends, I am very happy to show you how I made this little house for small chickens using simple and some reusable materials.
Materials
- Chicken wire
- Wooden sticks
- Reusable boards from an old piece of furniture
- Log
- Nails
- Hammer
- Wire
- Zinc sheet
Step by step
1

The first thing my dad and I did was build the wooden house. We used a square base and four sticks buried vertically to make the foundation of the house. Then we used pipe joints to make the base of the roof. Next, we nailed the boards to the sides.
2

We left a door at the base of the wood to make an entrance for the chicks, but as you can see, my cat comfortably settled down to sleep in the new house.
3

This is the shape of the base of the house. We will make the chicks' house with a rectangular base.
4
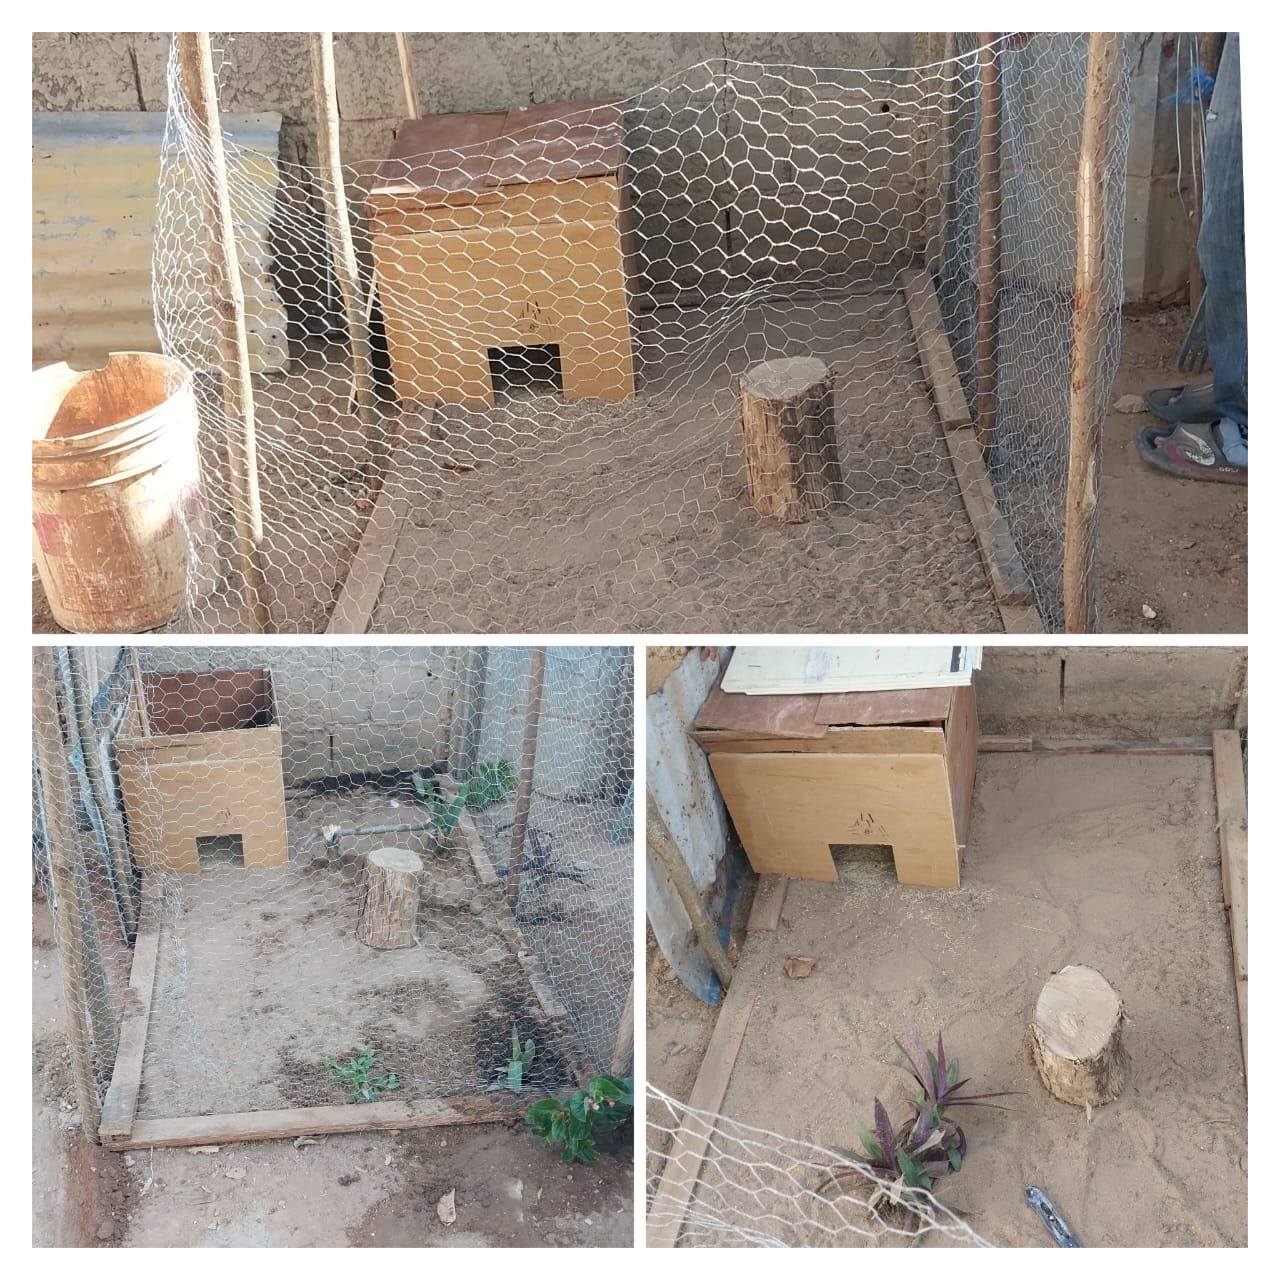
Then, with the help of six sticks inserted and buried in the rectangular base, we reinforced it, then added the mesh to create the fence!
5

Then we added logs, wood, and bases for our chicks to play on.
6
Then I made the roof with a base of sticks and wood.
7

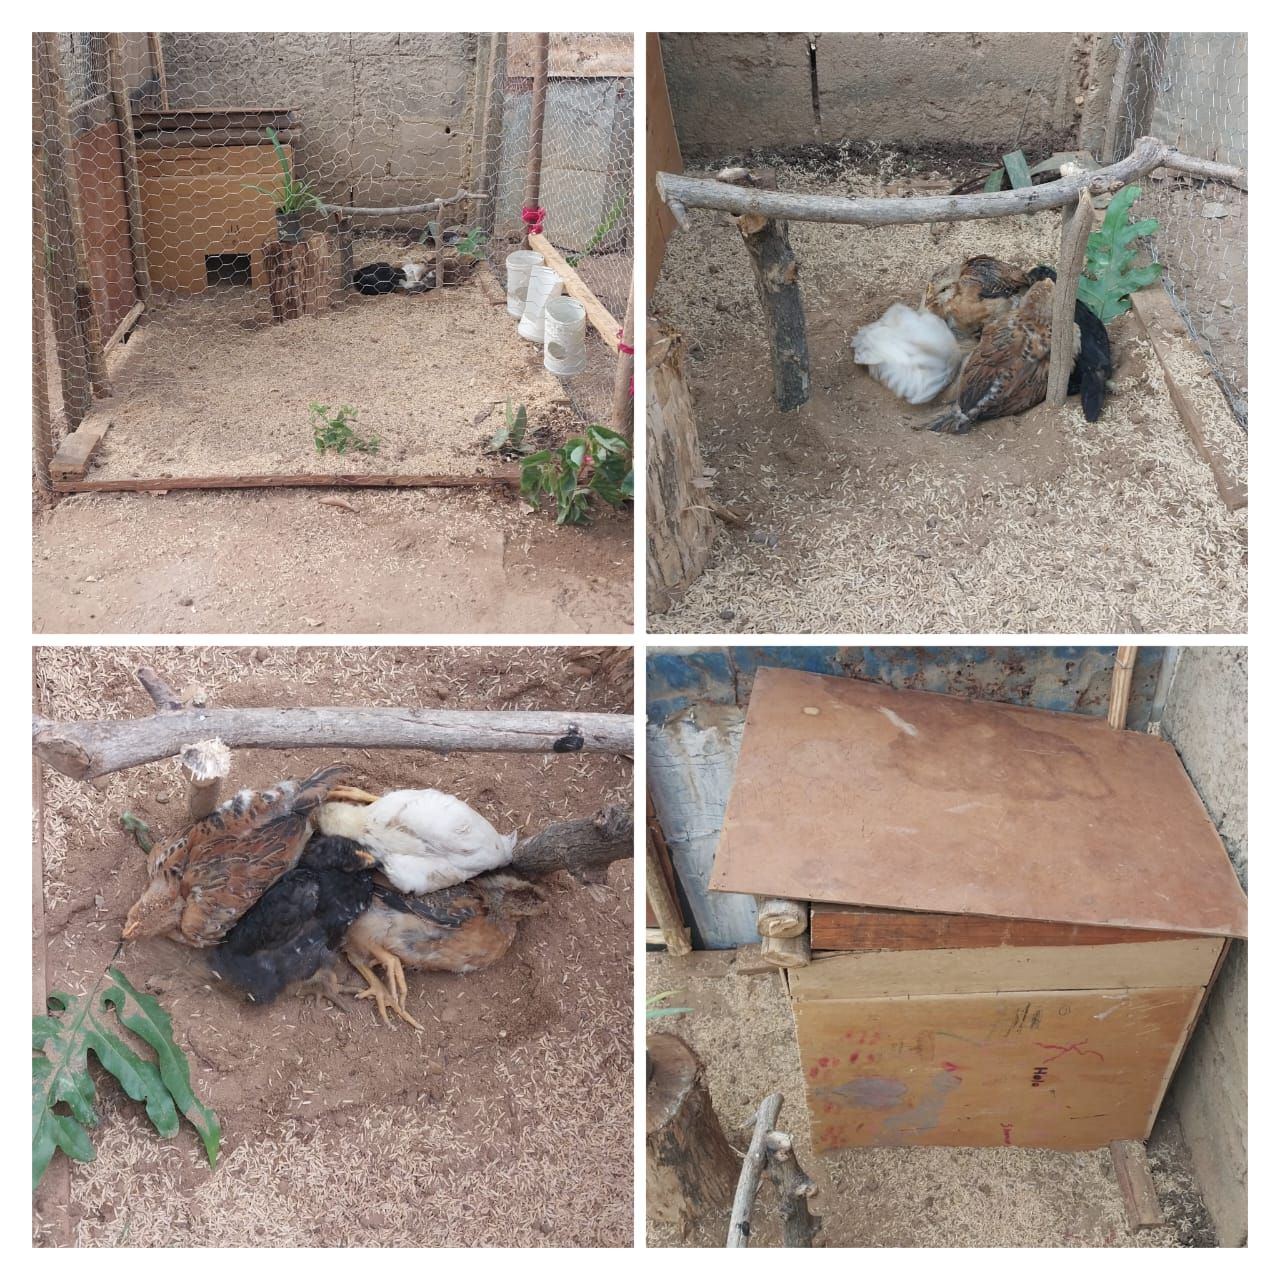
The chicks loved the area and were taking a dust bath. Greetings and thank you very much, my dear friends at Hive! Greetings and thank you very much.
Hola amigos, estoy muy contento de poder mostrarles como hice con materiales simples y algunos reutilizables esta pequeña casa para pollos pequeños.
Materiales
- Tela metálica de malla de pollito
- palos de madera
- Tablas reutilizables de un mueble viejo
- Tronco
- Clavos
- Martillo
- Alambre
- Lamina de Zinc
Paso a Paso
1
Lo primero que hicimos mi papá y yo fue hacer la casa de madera, para ello usamos una base cuadrada y 4 palos enterrados de forma vertical para hacer las base de la casa, Luego usamos tunos de tuberia para hacer la zona de la base del techo. Luego pagamos las tablas a los lados.
2
Dejamos una puerta en la base de la madera para hacer la entrada de los pollitos, pero bueno pueden ver que mi gato cómodamentese metio a dormir en la casita nueva.
3
Esta es la forma de la base de la casa, con una base rectangular hacemos la casa de los pollitos.
4
Luego Con la ayuda de 6 palos introducidos y enterrados en la base rectangular hicimos el refuerzo, luego añadimos la malla para crear el cercado!
5
Luego añadimos troncos, madera y bases para la recreacion de nuestros pollitos.
6
Luego hice el techo con una base de palos y de madera.
7
A los pollitos les encanto la zona y ellos estaban tomando un baño de tierra. Saludos y Muchas gracias mis queridos amigos de Hive! Saludos y muchas gracias
- Images belong to me
- Translator: Deepl Traslator
- Editing: Canva
- Las imágenes me pertenecen
- Traductor: Deelp traslator
- Edicion: Canva