Greetings, DIYHub community! Today I want to share with you a craft project I made using cans of various types and materials. It's a set of organizers, ideal for storing crayons, pencils, and other school or office supplies. Let's take a look at the materials and step-by-step instructions.
¡Saludos, comunidad de DIYHub! El día de hoy deseo compartir con ustedes una manualidad que realicé con latas de diversos tipos y materiales. Se trata de uno organizadores en conjunto, ideales para guardar creyones, lápices, entre otros artículos escolares o de oficina. Veamos los materiales y el paso a paso.

We will need / Vamos a necesitar:
- Different types of recycled cans / Diversos tipos de latas recicladas
- Scraps of jute fabric and printed fabric / Retazos de tela de yute y tela estampada
- Corrugated cardboard / Cartón corrugado
- Liquid silicone and scissors/ Silicón líquido y tijeras
- Toilet paper roll, paints, and paintbrush / Rollo de papel higiénico, pinturas y pincel


We started by cutting out pieces of both types of fabric, calculating that each piece of fabric would cover about half of the cans. I decided to place the burlap fabric on the bottom and the patterned fabric on top.
Iniciamos recortando los retazos de ambos tipos de tela, calculando que cubra más o menos la mitad de las latas cada corte de tela. Yo decidí colocar la tela de yute en la parte inferior y la tela estampada en la parte superior.

We then cover the can with white bond paper. I do this so that the design on the bottom of the can is not visible, as both fabrics are quite transparent. You can also choose to apply a few coats of white paint as a base.
Pasamos a forrar la lata con papel bond blanco, esto lo hago para que no se note el diseño del fondo de la lata, ya que ambas telas transparentan bastante. También se puede optar por darle unas capas de pintura blanca como base.

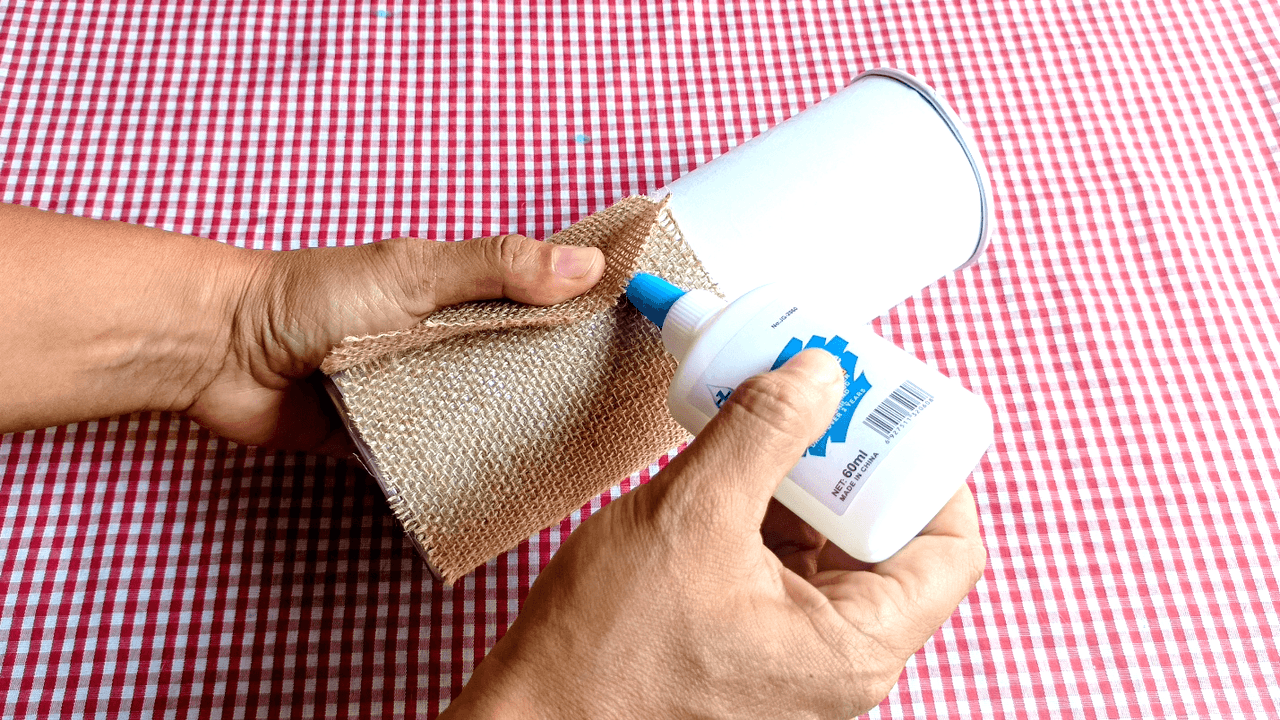
Place the jute fabric on the bottom of the can, using white glue or silicone. Do the same with the printed fabric on the top. In this case, I chose a pretty blue fabric with flowers that I had on hand. Stretch the fabric well so that there are no wrinkles on the surface.
Vamos a colocar la tela de yute en la parte inferior de la lata, podemos usar pega blanca o silicón. Hacemos lo mismo con la tela estampada en la parte superior, en este caso yo elegí una bonita tela azul con flores que tenía a la mano. Estiramos bien la tela para que no queden arrugas en la superficie.

To make the flower decoration that goes in the center of the can, cut out some patterns from toilet paper rolls, as shown in the images. We will need three pieces per flower. Then we paint the pieces. In this case, I chose blue to match the color of the fabric.
Para realizar el adorno de flor que va en el centro de la lata cortamos unos patrones en cartón de rollo de papel higiénico como vemos en las imágenes. Necesitaremos 3 piezas por flor. Ahora pintamos las piezas. En este caso elegí el color azul para que combinara con el tono de la tela.


We will overlap the pieces and form the flowers. As a finishing touch, I placed a decorative bead in the center and glued the flowers to the cans of different sizes.
Vamos a superponer las piezas y lograremos formar las flores. Como toque final le coloqué una cuenta decorativa en el centro y pegué las flores a las latas de diferentes tamaños.


For the base of our organizer, we are going to cut a circle out of cardboard that is as thick as possible. We can glue two pieces together to make it thicker. Then we cover it with the printed fabric and all that's left is to glue the cans to this base with silicone.
Para la base de nuestro organizador vamos a cortar un círculo de cartón que sea lo más grueso posible. Podemos pegar dos piezas para lograr un mayor grosor. Liego lo forramos con la tela estampada y solo faltaría pegar las latas en esta base con la ayuda de silicón.

And that's how our pencil and school supplies organizer turns out, a craft made with recycled materials and a little creativity. I hope you liked this project and that you feel inspired to make one yourself. Thank you for joining me. See you later!
Y así queda nuestro organizador de lápices y artículos escolares, una manualidad realizada con materiales reciclados y algo de creatividad. Espero que les haya gustado este proyecto y que se animen a realizarlo ustedes también. Gracias por acompañarme. ¡Hasta luego!


Pictures taken with my Redmi Note 10 5G / Fotos tomadas con mi Redmi Note 10 5G
Translation by Deepl