
Ever since we started raising goats in July, I have wanted to build a free standing hay feeder. However, with other priorities, I am just now getting to it. The reason I chose this hay feeder was because it met my needs. I needed something large enough to meet the needs of my flock. I wanted something that weighed heavy enough the winds out here wouldn’t topple it easily, but I wanted it light enough that 2 people could easily move it. I ended up using most of my scrap wood on other projects so I had to purchase the materials I used for this project. The cost came down to ~$150 USD.
Materials Used
- 6 - 2 x 4 x 10’s Exterior
- 4 - 1 x 4 x 10’s Exterior
- 1 - 2 x 4’ x ¾” Exterior Plywood Panel
- 3” Exterior Screws
- 1-¾” Exterior Screws
- 9 x 1” Roofing Screws w/ Rubber Washer
- 9 x 2” Roofing Screws w/ Rubber Washer
- 1 Ondura Corrugated Asphalt Roof Panel
- 1 Ondura Ridge Cap
- 4’ Fencing

First, I started by cutting 4 - 5’ long 2 x 4’s and 4 - 18” long 2 x 4’s.


I then placed the 18” pieces over the bottom of the 5’ pieces and screwed them together on both sides using the 3” screws.

Pro Tip:
Have a goat hold the board still while you put the screws in.

That gives us the 4 posts for the feeder.

Next, I framed out the piece of 2’ x 4’ plywood panel using 2 x 4’s. I used the 1-¾” screws for attaching the plywood to the 2 x 4’s and 3” exterior screws in the corners.


Then, I attached the framed out piece of plywood to the posts using the 3” exterior screws.

Once I attached the posts, I set the structure upright and did the “goat test” to check for stability. I felt like it needed some more stability so I cut some scrap 2 x 4 pieces for corner angles and used the smaller exterior screws to attach 2 to each corner.


Next, I built a frame around the top. Starting with the shorter side, I went end to end with a piece of 2 x 4. Then I cut and attached the long sides going end to end again. I used the 3” exterior screws for this step.


Then, I cut 2 - 1’ long pieces of 2 x 4 and placed them vertically and on center for the top. I then added a piece of 2 x 4 on top of that to make a ridge (I don’t have the measurement for this one). I used the 3” exterior screws for this step.


I cut 4 - 43” long pieces of 1 x 4 to make the “V” on either end. I centered the piece at the bottom and used a sharpie to draw a line at the top to mark my angle cut. I made the necessary cut and attached it using the smaller exterior screws.


Then I cut 1 - 4’ long piece of 1 x 4 and measured down 10-½” from the top frame and screwed this piece in so the top of it was at the 10-½” mark. I used the smaller exterior screws for this step. This will allow a slot for me to add in the hay.


Next, I cut 8 - 23” long pieces of 1 x 4 for the roof and attached them using the smaller exterior screws.


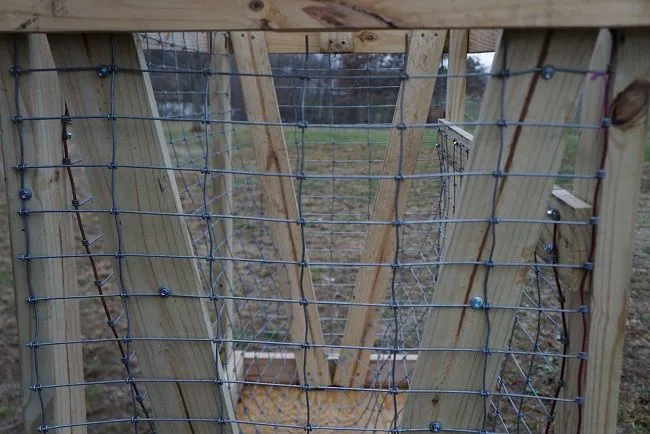
I trimmed up a piece of 4’ tall fencing and placed it inside the feeder. I trimmed as necessary to get a good fit. I used the 9 x 1” roofing screws to attach the fencing to the frame.


Next, I cut pieces of fencing for the ends and used the same roofing screws to attach the fencing to the frame.


Next, I used a jigsaw to cut 2 - 4’ x 25” pieces of the roofing material. I attached these to the roof using the 9 x 1” roofing screws.


Next, I cut the piece for the ridge. This was cut at 53” long. I attached it using the 9 x 2” roofing screws.

Lastly, I filled it with hay!


Completed free standing hay feeder.
Now that this project is completed, is there anything I would do differently?
Yes, there is. I would not use this type of roofing panel. I felt it wasn’t as durable as other options that were available. I have one spot I will have to patch where the screw went right through.

