
Although it may look as an apron or a pocket, it's a pennant to display pins and badges. 
I shall show you the process I followed to create it :
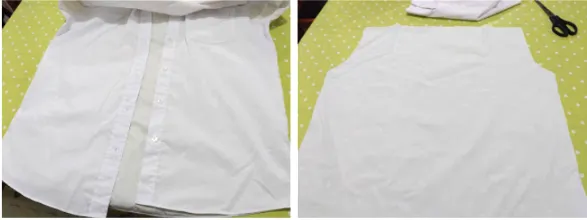
1 - I ‘upcycled’ an old white shirt - the collar didn’t look nice any more.
2 - I cut the back of the shirt and laid it flat on the table. I can use the buttons, sleeves and so on other projects.

3 - I drew the design on a piece of paper. In order to make it symmetrical I just folded the paper. As explained above this is the actual shape that
4 - I then folded the back of the upcycled shirt in half and pinned the ‘pattern’.

5 - I drew around in pencil a broken line following the paper shape. I needed to have the correct shape because I did all the sewing by hand so I had to have a clear guide so my stitching was straight. A sewing machine would have been easier :D

6 - I used back stitch to mimic the sewing machine stitching so it was secure. It was hard to see what I was doing because I used white thread.

7 - I marked a slit where I stopped sewing so I could then turn the work to the right side.
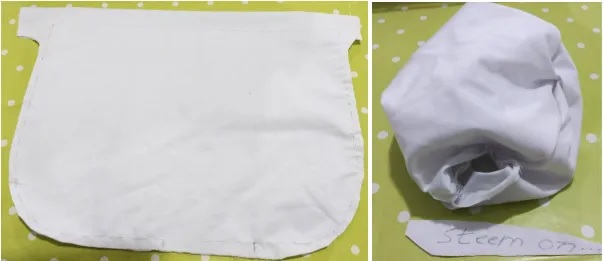
8 - The photo above shows you the shape of the work once finished and trimmed. The other photo shows you the project being turned inside out… It was a bit difficult to turn.

9 - After ironing the work carefully to make sure it kept the shape, I put a knitting needle where the stick to hang the pennant is going to go -
I found some ‘vintage’ badges for the photo and while I was positioning them, 

By coincidence this month’s ‘free gift’ in the magazine Mollie Makes (which I love) is a kit to make and embroider a mini pennant… I wonder whether
