Saludos amigos de DiyHub, espero que estéis disfrutando de un maravilloso día, tarde o noche, hoy quiero dejar mi primera Participación para el Concurso: 🥣 Mayo: Trucos y manualidades para la cocina 🧼❤️
La cocina es esa parte importante de nuestro hogar en la cual pasamos una gran parte de nuestro tiempo, sobre todo cuando tenemos hijos y somos amas de casa, en lo personal me gusta mucho tener artículos que me faciliten la vida y es por eso que hoy quiero mostrarles esta idea para hacer un lindo envase porta cubiertos 🥄 , acompáñame a realizar esta linda manualidad:
Greetings, DiyHub friends, I hope you're enjoying a wonderful day, afternoon, or evening. Today I want to submit my first entry for the Contest: 🥣 May: Kitchen Tricks and Crafts 🧼❤️
The kitchen is that important part of our home where we spend a lot of time, especially when we have children and are housewives. Personally, I really like having items that make my life easier, and that's why today I want to show you this idea for making a cute cutlery holder 🥄 . Join me as I make this lovely craft:

MATERIALES
MATERIALS
En mi cocina me gusta tener variedades de utensilios para hacer la vida más práctica y cuidar de mis cosas, desde hace días he observado muchas moscas y odio que se poseen sobre mis cubiertos, este mes de Mayo lo llaman el mes de las moscas y en mi hogar hay momentos que no encuentro la manera de combatir este desagradable insecto, entonces pensé en buscar la forma de idear un envase para guardarlos y proteger mis cubiertos 🥄 de estos insectos y por supuesto me gustó mucho la idea de utilizar un envase de refresco.
Este tipo de material me encanta ya que son transparentes, resistentes y duraderos, aparte para esta manualidad me gustó mucho la idea ya que así podemos ver con facilidad lo que hay dentro del envase y no puede faltar hacerle una bonita decoración, por acá les dejo la lista de materiales a utilizar:
- Envases de refresco preferiblemente grandes
- cartón
- foamy
- Silicon
- Tijeras
- lápiz
In my kitchen, I like to have a variety of utensils to make life more practical and take care of my things. For days now, I've been noticing a lot of flies and they hate them settling on my cutlery. This month of May is called Fly Month, and in my home, there are times when I can't find a way to combat this nasty insect. So, I thought about finding a way to create a container to store and protect my cutlery 🥄 from these insects. Of course, I really liked the idea of using a soda container.
I love this type of material because they're transparent, resistant, and durable. I also really liked the idea for this craft because it allows us to easily see what's inside the container, and it's also a nice decoration. Here's the list of materials to use:
- Soda containers, preferably large
- Cardboard
- Foam
- Silicone
- Scissors
- Pencil

PASO A PASO
STEP BY STEP
ᑭᗩᔕᗝ 1 (ᔕ丅ᗴᑭ 1)
Para nuestro primer paso vamos a comenzar definiendo el alto de nuestro envase, yo le quitaré de la parte superior y me quedará de 21cm aproximadamente, luego tomaremos la medida de la circunferencia de la parte superior, con esta medida nos vamos a guiar para hacer un círculo en cartón dejándolo medio centímetro más ancho, esta rueda de cartón la vamos a pegar sobre foami y cortamos el excedente por toda la orilla, así comenzaremos la decoración.
For our first step we are going to start by defining the height of our container, I will remove the top part and it will be approximately 21cm, then we will take the measurement of the circumference of the top, with this measurement we will guide ourselves to make a circle in cardboard leaving it half a centimeter wider, we will stick this cardboard wheel on foam and cut the excess along the entire edge, thus we will begin the decoration.
 |  |
|---|
ᑭᗩᔕᗝ 2 (ᔕ丅ᗴᑭ 2)
Para el segundo paso haremos la orilla para hacer la tapa de nuestro envase, para esto utilizaré un retazo de cartulina dorada, vamos a cortar un rectángulo con las medidas de 29,5cm de largo, por 5cm de ancho, le hacemos piquetes doblando medio centímetro para poder pegar y darle la forma circular, colocamos alrededor de la parte superior de nuestro envase, pegamos formando un aro y luego pegamos el círculo que tenemos ya listo sobre este, con esto formaremos la tapa.
For the second step we will make the edge to make the lid of our container, for this I will use a scrap of gold cardboard, we will cut a rectangle with the measurements of 29.5cm long, by 5cm wide, we make pints by folding half a centimeter to be able to glue and give it the circular shape, we place it around the upper part of our container, we glue forming a ring and then we glue the circle that we already have ready on it, with this we will form the lid.
 |  |
|---|---|
 |  |
ᑭᗩᔕᗝ 3. (ᔕ丅ᗴᑭ 3)
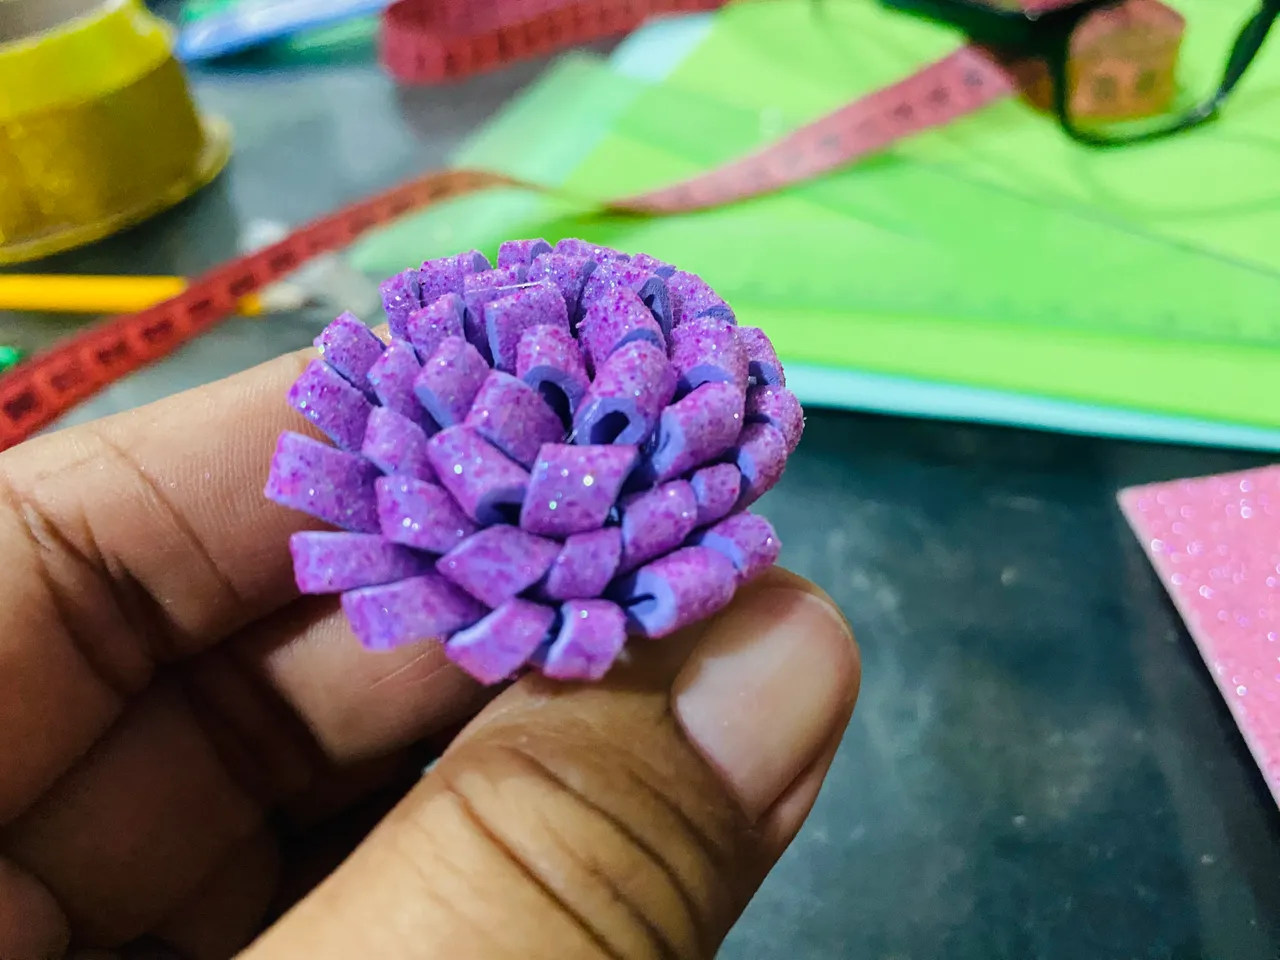
Para mi tercer paso voy a hacer una linda flor para colocársela en la tapa, para esto cortaremos un rectángulo en foami rosado de 17 cm de largo por 5 cm de ancho, a este lo vamos a doblar a la mitad y le vamos a hacer cortes De Extremo a Extremo, en mis imágenes les muestro como debe de quedar, luego pegamos y enrollamos esto le dará una linda forma.
 |  |
|---|---|
 |  |
ᑭᗩᔕᗝ 4 (ᔕ丅ᗴᑭ 4)
En el paso número 4 vamos a hacerle las decoraciones al envase, cortaré tiras en foami rojo de 2 cm de ancho, le colocaré dos franjas una en la parte de abajo del envase y otra aproximadamente en el centro, sobre esta le haré pequeños corazones en foami dorado y en rosado y los pego sobre cada franja.
 |  |
|---|---|
 |  |
ᑭᗩᔕᗝ 5. (ᔕ丅ᗴᑭ 5)
Para este paso número 5 y para finalizar vamos a hacer un círculo en foami verde, este será un poco más grande que el contorno de nuestra flor, le damos forma como pequeñas hojas y pegamos por debajo de la flor, luego pegamos sobre la tapa de nuestro porta cubiertos, para finalizar la decoración le pegué pequeños corazones rosados sobre la tapa y así ya está listo para utilizar.
For this step number 5 and to finish we are going to make a circle in green foam, this will be a little bigger than the outline of our flower, we give it a shape like small leaves and glue it underneath the flower, then we glue it on the lid of our cutlery holder, to finish the decoration I glued small pink hearts on the lid and so it is ready to use.
 |  |
|---|---|
 |  |
Este práctico utensilios protegerá mis cubiertos del sucio y de los insectos desagradables, me gustó mucho el resultado y es una bonita decoración para nuestra cocina, espero les haya gustado, de antemano estoy muy agradecida de qué hayas visitado mi Publicación, me despido deseándoles muchos éxitos y bendiciones, hasta otra oportunidad.😊❤️
This practical utensil will protect my cutlery from dirt and nasty insects. I really liked the result and it is a nice decoration for our kitchen. I hope you liked it. I am very grateful in advance that you have visited my publication. I say goodbye wishing you much success and blessings, until another opportunity.😊❤️
 |  |
|---|---|
 |  |

las fotos aquí compartidas son de mi propiedad tomadas con mi teléfono iPhone 11, la edición fue hecha en Canva, para la traducción del inglés utilice el traductor de Google