Felices días, navideños, queridos amigos de DIYHUB! 🎅🎄❤️
Hoy me dirijo a esta gran comunidad para compartir otro aporte al Concurso de este mes y quiero compartir con ustedes una linda idea para decorar bolsas de papel con motivos navideños, personalizándolas a nuestro gusto y nuestro estilo, acompáñame y te comparto el paso a paso
Happy holidays, dear DIYHUB friends! 🎅🎄❤️
Today I'm reaching out to this great community to share another entry for this month's contest. I want to share a lovely idea for decorating paper bags with Christmas motifs, personalizing them to our own taste and style. Join me as I share the step-by-step instructions.

MATERIALES
MATERIALS
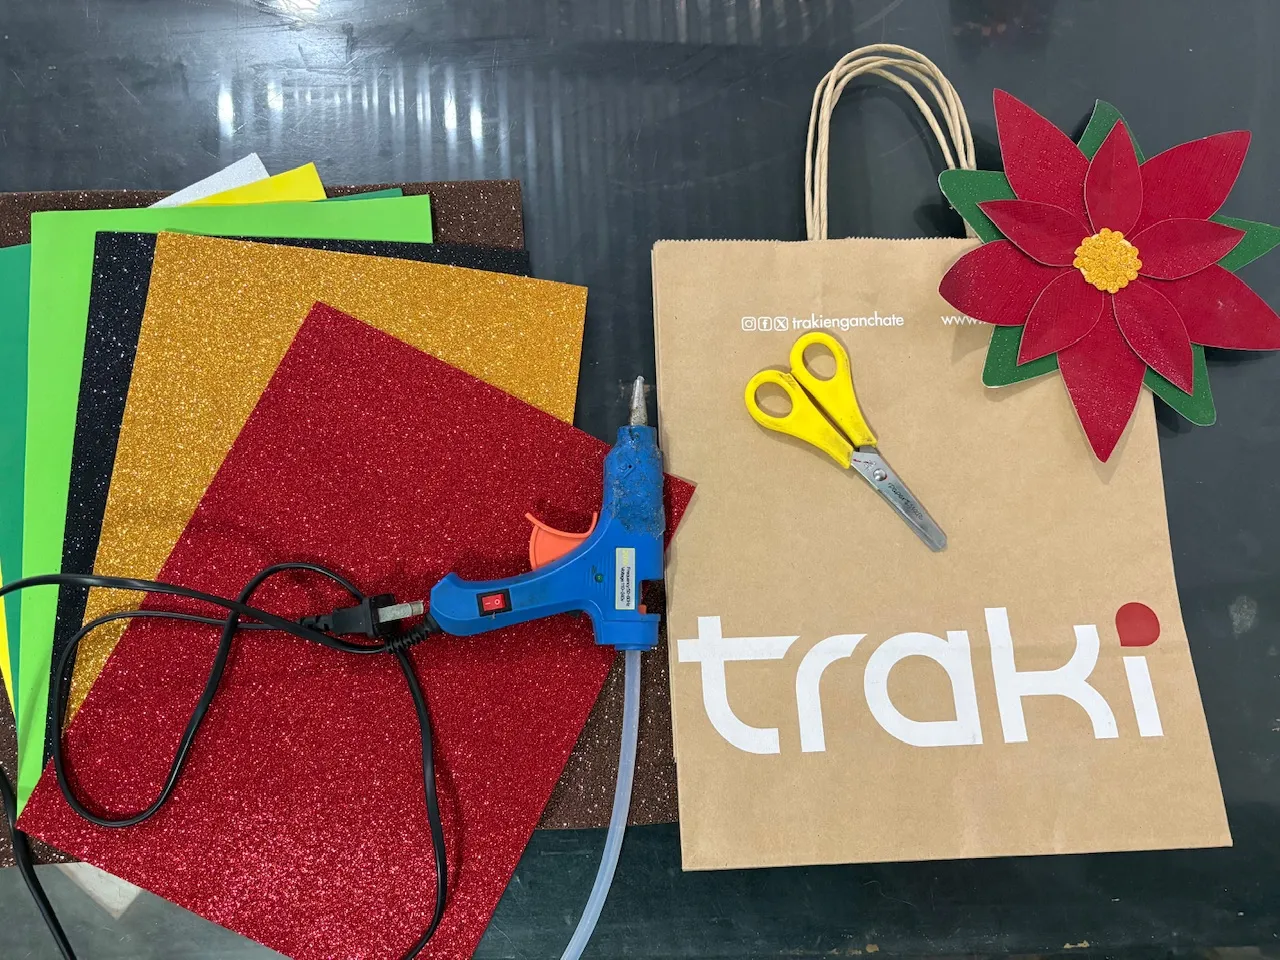
En una de las tiendas famosas de mi ciudad, la cual frecuento mucho, siempre nos dan unas lindas bolsas de papel al hacer alguna compra, estas bolsas me gustan muchísimo y pensé en reutilizarlas de una manera muy original, ellas tienen el logotipo de la tienda, y la idea principal es cubrir este nombre con alguna decoración, entonces pensé en una linda idea para decorar estas lindas bolsas y que se vean navideñas, con ellas podemos colocarlas debajo de nuestro árbol y decorar o también podemos darlas con los obsequios en estas hermosas fiestas, así que manos a la obra, aquí les comparto la lista de materiales a utilizar:
- bolsas de papel
- foami de colores variados
- tijeras
- lapiz
- silicone
At one of the popular stores in my city, which I frequent, they always give us cute paper bags when we make a purchase. I really like these bags and thought about reusing them in a very original way. They have the store's logo, and the main idea is to cover the name with some decoration. So I came up with a nice idea to decorate these cute bags and make them look festive. We can place them under our tree as decoration, or we can give them out with gifts during the holidays. So let's get started! Here's the list of materials you'll need:
- paper bags
- colored craft foam
- scissors
- pencil
- glue
PASO A PASO
STEP BY STEP
Vamos a comenzar, definiendo la decoración de nuestras bolsas de papel , en Navidad, hay una gran cantidad de ideas con las que podemos decorar, entre ellas, las más emblemáticas es la figura de Santa Claus, la figura de una bota navideña, la figura de velas, renos, muñecos de nieve, arbolitos, entre otros, no encontraba, por cual decidirme, así que pensé en decorar la primera bolsa con un lindo árbol navideño.
Para hacer esta decoración, vamos a dibujar la figura principal en papel para hacer el molde, lo voy a hacer en tres capas, al tener listo mi molde voy a cortar la figura de abajo y la de arriba en foami verde oscuro, la figura del Centro del árbol la voy a cortar en foami verde más claro, luego en foami color marrón voy a hacerle la base del árbol.
Para marcar el foami, les doy un tips, podemos usar el descosedor de costura, este tiene una punta bien afilada y marca perfectamente el foami
Let's begin by deciding on the decoration for our paper bags. At Christmas, there are so many ideas for decorating, among them the most iconic are Santa Claus, a Christmas stocking, candles, reindeer, snowmen, and little trees. I couldn't decide which one to use, so I thought I'd decorate the first bag with a cute Christmas tree.
To make this decoration, we'll draw the main shape on paper to create a template. I'll make it in three layers. Once my template is ready, I'll cut out the top and bottom shapes from dark green foam. I'll cut out the center of the tree from lighter green foam, and then I'll make the base of the tree from brown foam.
To score the foam, here's a tip: you can use a seam ripper. It has a very sharp point and scores the foam perfectly.
 |  |
|---|---|
 |  |
Una vez cortadas las piezas para nuestro árbol, vamos a proceder a pegarlas con Silicon en nuestra bolsa, aquí la imaginación es infinita, podemos hacerle las decoraciones que más nos gusten, yo le hice ayudándome con un utensilio de cocina para cortar frutas el cual tiene una figura redondeada, la forma de las bambalinas de colores, también le hice una estrella dorada.
Sentí que le faltaba decoración así que le agregué otras figuras como bastones, figura de caramelo, muñeco, de jengibre, y una linda bota navideña con todas estas figuras pude tapar el diseño original de la bolsa, me faltaba tapar en la parte superior al lado de la estrella, en la cual tiene unas letras, así que pensé en hacerle como especie de una cinta y colocarle feliz Navidad, aquí les dejo el resultado de esta decoración.
Once the pieces for our tree are cut out, we'll proceed to glue them onto our bag with silicone. Here, the possibilities are endless; we can add any decorations we like. I used a kitchen utensil for slicing fruit, which has a rounded shape, to make colorful ornaments. I also added a gold star.
I felt it needed more decoration, so I added other figures like candy canes, a candy cane, a gingerbread man, and a cute Christmas stocking. With all these figures, I was able to cover the original design of the bag. I still needed to cover the top part next to the star, where there are some letters, so I decided to make a sort of ribbon and write "Merry Christmas" on it. Here's the result of this decoration.
 |  |
|---|---|
 |  |
| --- | --- |
 |  |
Ahora vamos a decorar nuestra segunda bolsa, para esta pensé en hacerle la forma de una bota navideña, no me quería gastar el foami color rojo, ya que se me hizo muy difícil conseguir este color y las decoraciones navideñas la gran mayoría llevan detalles en este hermoso color, así que pensé en hacerla en color marrón, hice la figura de bota, aparte en color blanco le hice la parte superior y en las esquinas inferiores le hice detalles en color rojo para decorarla, le coloqué un lazo en color dorado, luego pegué todas estas Decoraciones con Silicon y así ya está lista. Esta segunda bolsa decorada con motivos navideños.
Now we're going to decorate our second bag. For this one, I thought I'd make it in the shape of a Christmas boot. I didn't want to use up the red foam, since it was very difficult to find that color, and most Christmas decorations have details in this beautiful color. So I decided to make it in brown. I made the boot shape, then made the top part in white, and added red details to the bottom corners for decoration. I added a gold ribbon, then glued all the decorations on with silicone, and there you have it! This second bag is decorated with Christmas motifs.
 |  |
|---|---|
 |  |
| --- | --- |
 |  |
Qué tal le pareció esta idea amigos?, en lo personal me encantó, quien pensaría que estas bolsas tienen el emblema de una tienda, ja ja, me gustaron mucho para colocarlas de decoración debajo de mi árbol y que santa me deje allí muchos obsequios 🎁, eso es todo por hoy amigos, me despido deseándoles unos días llenos de mucho amor y felicidad .
What did you think of this idea, friends? Personally, I loved it! Who would have thought these bags have a store logo on them, haha. I really liked them for decorating under my tree so Santa can leave me lots of presents there 🎁. That's all for today, friends. I'm signing off wishing you days full of love and happiness.
 |  |
|---|

las fotos aquí compartidas son de mi propiedad tomadas con mi teléfono iPhone 11, la edición fue hecha en Canva, para la traducción del inglés utilice el traductor de Google