Hola! Holaaa! Saludos vecinos de la maravillosa comunidad hivediy; por supuesto que pasaron un día tranquilo todavía hay muchos que trabajan pero la cosa está más suave, yo pendiente que solo me faltan cuatro días para tener un nuevo año, porque hasta que no llegue el día tengo los mismos; este año me tocó santa hay que seguir la tradición y portarse bien jajaja.
Hoy no tuve muchas exigencias pues las chicas decidieron hacer conejitos de pascua en forma de iman para neveras y repartirlos como souvenirs, como hay que hacer varios modelos escogí el más sencillo para empezar. Así que sigan leyendo y vean como con pocos pasos y utilizando foamis lo hice:
Hello! Hellooo! Greetings neighbors of the wonderful hivediy community; of course they spent a quiet day there are still many who work but things are smoother, I am aware that I only have four days left to have a new year, because until the day comes I have the same ones; This year I got a saint, you have to follow the tradition and behave well hahaha.
Today I did not have many demands because the girls decided to make Easter bunnies in the form of magnets for refrigerators and distribute them as souvenirs, as there are several models to make, I chose the simplest to start with. So keep reading and see how with a few steps and using foamis I did it:

Materiales que usé para su elaboración:
Foamis: naranja decorado, verde oscuro, verde tierno, blanco, negro, rosado escarchado.
Tijeras.
Marcador.
Lápiz.
Pintura al frío negra.
Pintura al frío blanca.
Cinta naranja.
Moldes.
Silicón frío.
Materials I used to make it:
Foamis: decorated orange, dark green, soft green, white, black, frosty pink.
Pair of scissors.
Marker.
Pencil.
Black cold paint.
White cold paint.
Orange ribbon.
molds.
Cold sylicon.

Comenzamos con su elaboración;
PRIMER PASO,: en el foamis blanco marco con el molde que dibujé con anterioridad la imagen de un conejito y cortó con las tijeras. Cómo aparece en las fotos.
We start with its elaboration;
FIRST STEP: in the white foamis I mark with the mold that I previously drew the image of a bunny and cut with scissors. How it appears in the photos.

SEGUNDO PASO:una vez cortadas la imagen en el foamis, con rosado escarchado corto el centro de las orejas, luego con foami negro escarchado hago la nariz, con pintura al frío negra pinto los ojos y la boca con pintura al frío blanca pongo puntitos de luz en los ojos, terminando así la imagen del conejito. Todo lo pegué con silicón frío como en las fotos.
SECOND STEP: once the image is cut in the foamis, with frosty pink I cut the center of the ears, then with frosty black foami I make the nose, with black cold paint I paint the eyes and the mouth with white cold paint I put dots of light in the eyes, thus finishing the image of the bunny. I glued everything with cold silicone as in the photos.

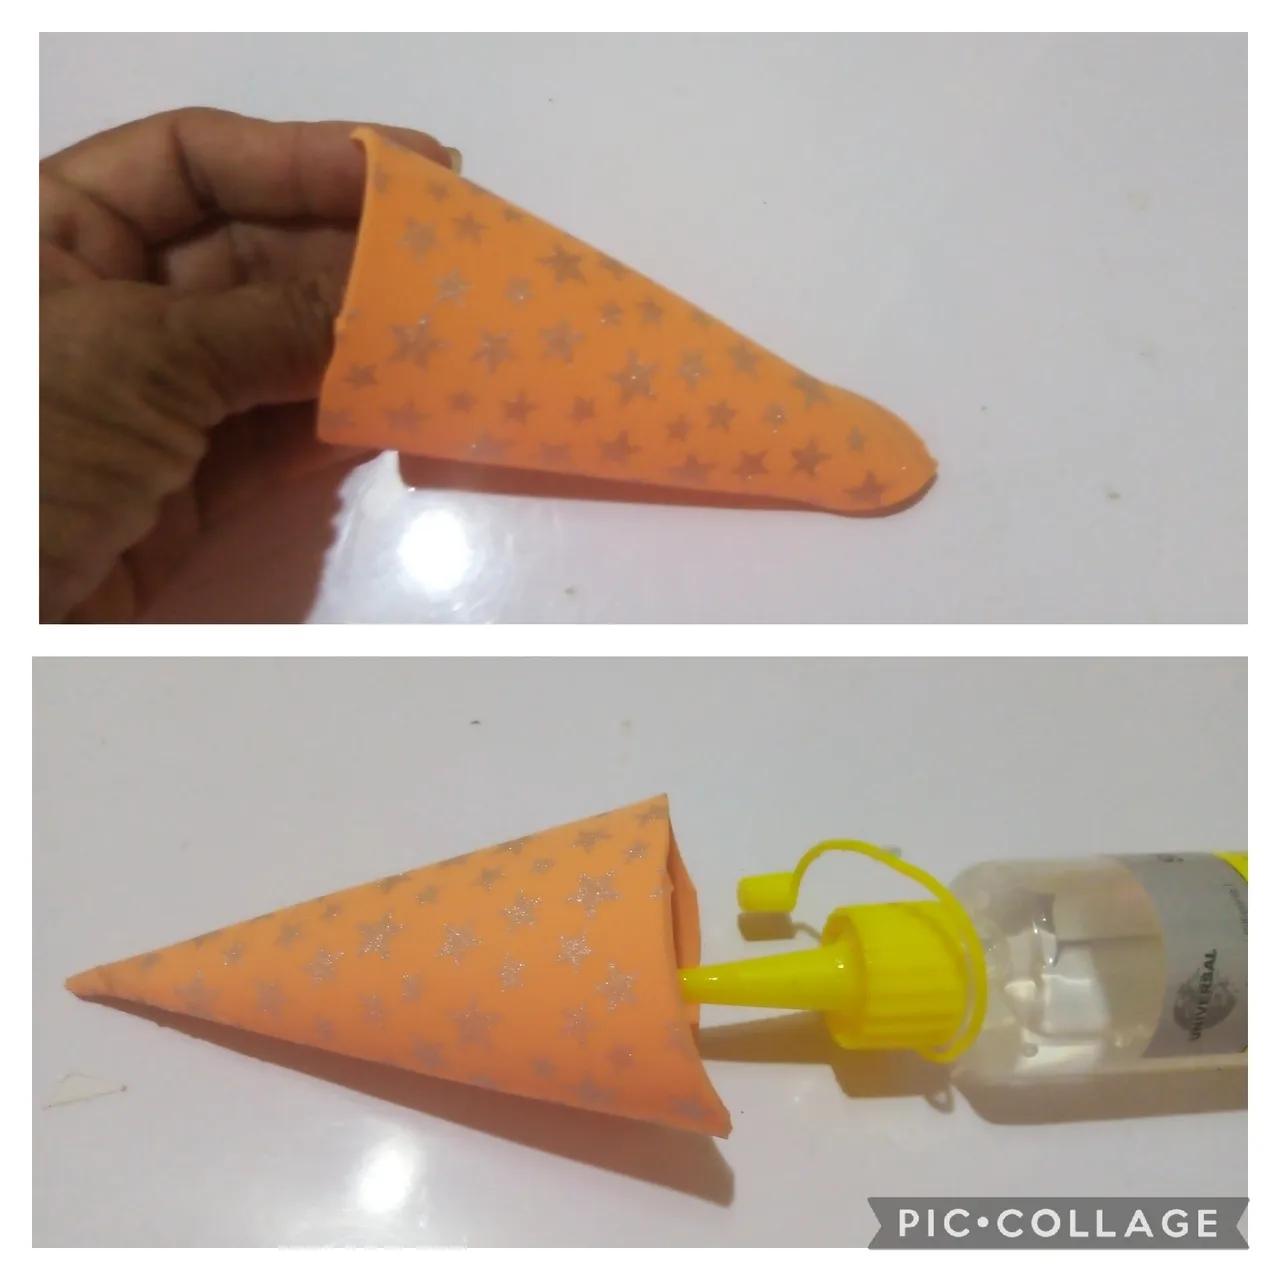
TERCER PASO:
Ahora con foamis naranja hago un cono que será el cuerpo de la zanahoria dónde va el conejo; con foamis verde oscuro y foamis verde tierno corto las hojas todo lo pegó con silicón frío.
THIRD STEP:
Now with orange foamis I make a cone that will be the body of the carrot where the rabbit goes; With dark green foamis and soft green foamis, I cut the leaves and glued everything with cold silicone.

QUINTO PASO:
En este paso uno el cuerpo y las hojas de la zanahoria con el silicón frio, después coloco el conejito encima de la misma como muestra la foto por último pongo un lazo realizado con la cinta naranja y así va quedando.
FIFTH STEP:
In this step I join the body and the leaves of the carrot with the cold silicone, then I place the bunny on top of it as the photo shows, finally I put a bow made with the orange tape and that is how it looks

Artistas Creativos este es el resultado final de mi manualidad creativa del día de hoy un bonito y decorativo imán para nevera con temática de conejito de pascua, espero que les guste esta idea para realizar sus propios conejitos de pascua, las chicas están contentas y les pondrán bombones para simular huevos . Agradecida por el apoyo de todos los que leen y ven mis publicaciones. Nos vemos en la próxima manualidad.
Creative Artists this is the final result of my creative craft today, a nice and decorative Easter bunny themed fridge magnet, I hope you like this idea to make your own Easter bunnies, the girls are happy and they will put chocolates to simulate eggs. Grateful for the support of everyone who reads and views my posts. See you at the next craft.

Las imágenes de este tutorial son de mi propiedad las fotos las tomé con mi celular Motorola E6 y las edite con una aplicación gratis del mismo.
Para traducir texto usé geogle traduuctor.
The images in this tutorial are my property, the photos were taken with my Motorola E6 cell phone and I edited them with a free application of the same.
To translate text I used geogle translator.
