Hello gente! Qué tal todo? Por estos lados del mundo todo bien gracias a Dios, trabajando en casa en diferentes proyectos manuales y hoy justamente les vengo a compartir uno de ellos que por supuesto es para la habitación de Miranda y se trata de un corazón con palitos de altura o brochetas que vi en una de mis múltiples visitas a Pinterest y que me pareció súper lindo para el cuarto de mi niña.
Hello everyone! How are you all getting on? Over here, thank goodness, everything’s fine. I’ve been working from home on various craft projects, and today I’m here to share one of them with you – it’s for Miranda’s bedroom, of course. It’s a heart made from tall sticks or skewers that I spotted during one of my many visits to Pinterest, and I thought it would look absolutely lovely in my little girl’s room.

Este corazón es netamente un proyecto decorativo, aunque si lo haces mucho más grande que el que yo hice puede ser utilizado para exhibir fotografías y la verdad es que queda muy lindo, ya que también vi esa versión.
Como les dije está elaborado con palitos de altura cortados en diferentes tamaños los cuales se unen con silicón caliente creando figuras geométricas dentro del mismo lo que lo hace bastante llamativo además de una decoración bastante original y por supuesto lo quería para la habitación de mi muñeca. Y ahora sin más vamos con el paso a paso.
This heart is purely a decorative project, although if you make it much bigger than the one I made, it can be used to display photographs, and to be honest, it looks really lovely – I’ve seen that version too.
As I said, it’s made from tall sticks cut to different lengths, which are joined together with hot glue to create geometric shapes within it, making it quite eye-catching as well as a rather original decoration – and of course I wanted it for my doll’s room. And now, without further ado, let’s get on with the step-by-step guide.

Materiales
Palitos de altura (brochetas)
Pintura al frío blanca y lila
Esponja
Pincel
Pistola de silicón
Materials
Skewers
White and lilac cold-set paint
Sponge
Paintbrush
Hot glue gun
Paso a paso/ Step by step
Para la elaboración de este proyecto decidí hacer uso de algunas imágenes que puedes encontrar en pinterest para guiarme sobre la forma que le daría al corazón y la forma en que debía pegar los los palitos de altura y poder ir ensamblando el corazón, así que después de buscar un poco escogí una imagen y en base a esa, decidí trabajar y en mi caso decidí iniciar por la parte inferior del corazón mirando siempre la imagen referencial para guiarme en cuanto al diseño, aunque a medida que avanzaba, terminé creando mi propio diseño.
When working on this project, I decided to use some images I found on Pinterest to guide me on the shape of the heart and how to attach the vertical sticks so I could assemble the heart, So, after searching a bit, I chose an image and, based on that, decided to get to work. In my case, I decided to start at the bottom of the heart, always referring to the reference image to guide me with the design, although as I went along, I ended up creating my own design.

Este proyecto, aunque se ve sencillo, requiere bastante precisión al momento de cortar y ensamblar, sobre todo porque al trabajar con silicón caliente se forman pequeños bultos y realmente no queremos que todo esto se vea al momento de pintar la pieza, así que hay que trabajar con muchísimo cuidado cada vez que ensamblamos, o pegamos los palitos de altura, ya que además de tratar de ubicarlos correctamente tenemos que crear el menor desastre posible con la pega.
Although this project looks simple, it requires a fair amount of precision when cutting and assembling, particularly because working with hot silicone causes small lumps to form, and we really don’t want these to be visible once the piece is painted. So we need to take great care whenever we assemble the pieces or attach the height sticks, as not only do we have to position them correctly, but we also need to make as little mess as possible with the glue.

A medida que avanzamos es muy emocionante ver cómo el corazón ha tomado forma, aunque el mío está un poco gordito y lo deshice unas cuantas veces 🤣
As we go along, it’s really exciting to see the heart taking shape, although mine’s a bit chubby and I’ve had to redo it a few times 🤣

Una vez terminamos de unir todos los palitos de altura y tenemos la forma de nuestro corazón lista lo que yo hice fue tomar la pistola de silicón y la pasé por todos los bultos y porciones de pega que quedaron en los palitos de altura, todo esto con la finalidad de que la superficie se viese lo más prolija posible, así que con la punta de la pistola estando aún caliente fui alisando los pequeños bultos y derritiendo toda la pega que afeaba la superficie de nuestro corazón y una vez listo con ayuda de la esponja lo pinté de blanco, ya que usé palitos de altura que estaban pintados de negro y como Miranda quería el corazón de color lila lo más conveniente era pintar primero de blanco.
Once we’d finished joining all the vertical sticks together and had the shape of our heart ready, what I did was take the hot-glue gun and run it over all the lumps and bits of glue left on the vertical sticks, all with the aim of making the surface look as neat as possible, so, with the tip of the gun still hot, I smoothed out the small lumps and melted all the glue that was spoiling the surface of our heart. Once ready, I painted it white using a sponge, as I’d used black-painted sticks and, since Miranda wanted the heart to be lilac, it made most sense to paint it white first.

Una vez secó bien le di una segunda capa de blanco y en cuanto estuvo seco, con una lija fina traté de deshacerme de cualquier irregularidad en los palitos de altura y finalmente apliqué el color lila al corazón dándole 2 capas de pintura y de esta forma está listo este lindo corazón decorativo para la habitación de mi muñeca.
Once it was completely dry, I gave it a second coat of white and, as soon as that was dry, I used fine-grain sandpaper to smooth out any unevenness in the vertical slats. Finally, I painted the heart lilac, applying two coats of paint, and with that, this lovely decorative heart for my doll’s room is ready.

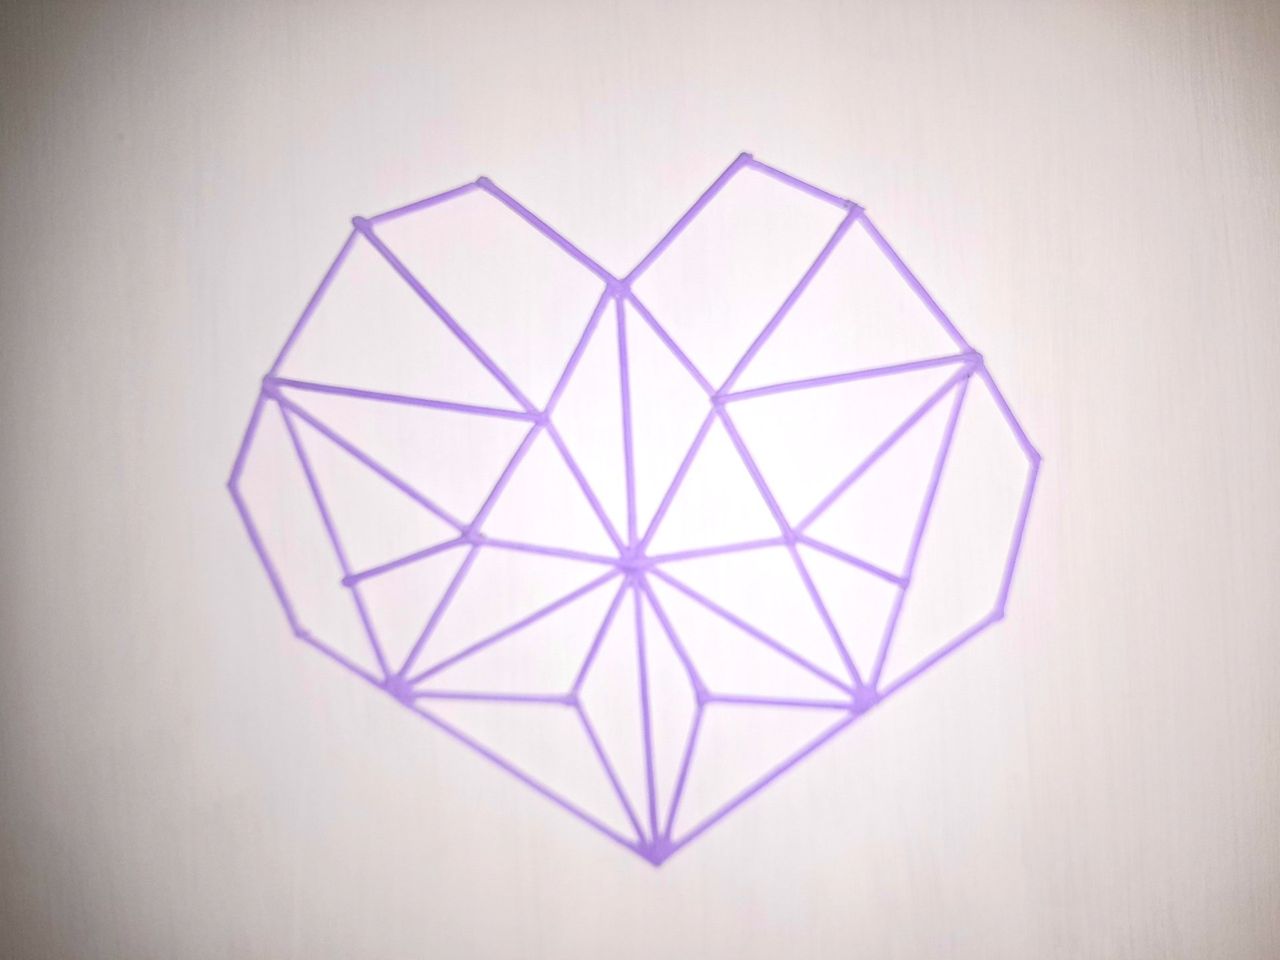

Como pueden ver, el resultado final es muy lindo, y aunque seguramente pudo quedar mejor, estoy conforme con el resultado, y lo más importante de todo es que a Miranda le gustó mucho espero que a ustedes también.
As you can see, the end result is really lovely, and although it could certainly have turned out better, I’m happy with how it turned out, and most importantly, Miranda really liked it – I hope you do too.
📷Photography by|Fotografía por: