✨¡Hola amigos amantes de la creatividad! Espero que estén todos bien.✨
 , la cual elaboró un bello diseño de vaquita en foami, dónde se pueden colocar los mecheros. Me pareció tan hermosa y práctica su idea, que me inspiré a crear algo lindo para mi cocina.
🔸Sin más que añadir, a continuación los dejo con el paso a paso:
✨¡Hello friends who love creativity! I hope you are all well.✨
Good afternoon, friends! I hope you are having a great week. For my part, I am happy to stop by here to share a new creation with you. On this occasion, I am sharing with you the step-by-step instructions for making a nice lighter organizer. For many months I have wanted to create this idea, I would dare to say that maybe a year has passed, but the thing is that this creation that I am sharing with you today is inspired by a beautiful creation by my beautiful friend
🔸Without more to add, then I leave you with the step by step:

♥️ESPERO QUE TE GUSTE,
¡Empecemos!
♥️I HOPE YOU LIKE IT,
Let's start!

✂️ MATERIALES | ✂️ MATERIALS
- Caja de cartón.
- Cartulina corrugada.
- Tela de color o diseño de preferencia.
- Foami escarchado dorado.
- Foami marrón y amarillo.
- Pinturas y marcadores.
- Pegamento.
- Tijeras.
- Lápiz.
- Cardboard box.
- Corrugated cardboard.
- Fabric of color or design of preference.
- Gold frosted foam.
- Brown and yellow foam.
- Paints and markers.
- Glue.
- Scissors.
- Pencil.
🌟 PROCEDIMIENTO | 🌟 PROCESS
✨PASO 1:
En primer lugar, tomé la caja que iba a estar utilizando, la cual fue reciclada de unas luces navideñas que se dañaron hace mucho. Por lo tanto, retiré con las tijeras las pestañas de los laterales y la tapa, con el fin de que la caja quedara abierta. Sin embargo, conservamos la tapa a la cual también le retiré la pestaña o doblez.
📌Por si desean saber, las medidas de la caja son: paredes más grandes de 12 cm x 8 cm y paredes laterales de 5.5 cm x 8 cm.
✨STEP 1:
First, I took the box I was going to use, which was recycled from Christmas lights that were damaged a long time ago. Therefore, I removed the tabs on the sides and the lid with scissors, so that the box would remain open. However, we kept the lid, from which I also removed the tab or fold.
📌In case you want to know, the measurements of the box are: larger walls of 12 cm x 8 cm and side walls of 5.5 cm x 8 cm.
 |  |
|---|
✨PASO 2:
Seguidamente, tomé la tela, recorté dejando exceso para forrar el exterior e interior de la caja con el mismo trozo de tela. Así que forré el exterior dejando 2 cm en la parte baja, ya que en esa parte irá otro material más adelante. Recorté en 4 partes el excedente y este mismo lo pegué a la parte interna de la caja. Además, también recorté un trozo de tela para forrar la pieza que reservamos de la tapa. Una vez lista, la pegué en el fondo de la caja para tapar las imperfecciones internas de la caja.
✨STEP 2:
Next, I took the fabric, cut it off, leaving excess to line the outside and inside of the box with the same piece of fabric. So I lined the outside, leaving 2 cm at the bottom, since that part will be used for another material later on. I cut the excess into 4 parts and glued it to the inside of the box. In addition, I also cut a piece of fabric to line the piece we reserved for the lid. Once ready, I glued it to the bottom of the box to cover the internal imperfections of the box.
 |  |  |
|---|
✨PASO 3:
Además, recorté un rectángulo de tela con las medidas de la base de la caja para cubrir y que quede mucho más prolijo. También, recorté una tira de cartulina corrugada de 36 cm x 2.5 cm y la pegué en todo el borde inferior que dejamos antes de pegar la tela que cubrió toda la caja.
✨STEP 3:
I also cut out a rectangle of fabric with the measurements of the base of the box to cover it and make it look much neater. I also cut out a strip of corrugated cardboard measuring 36 cm x 2.5 cm and glued it to the entire bottom edge that we left before gluing the fabric that covered the entire box.
 |  |
|---|
✨PASO 4:
Luego, comencé con las decoraciones, así que en este caso quise recortar en foami marrón una etiqueta con aspecto antiguo y a la cual le escribí “KITCHEN / COCINA”. También recorté 4 flores en foami amarillo y 2 círculos para el centro de las flores en foami escarchado. Al tener listas las piezas, di color a los bordes con pinturas que hicieran contraste; en el caso de la etiqueta utilicé marrón y para las flores pintura naranja.
✨STEP 4:
Then, I started with the decorations, so in this case I wanted to cut out an old-looking label in brown foam and to which I wrote “KITCHEN”. I also cut out 4 flowers in yellow foam and 2 circles for the center of the flowers in frosted foam. Once I had the pieces ready, I colored the edges with contrasting paints; in the case of the label I used brown and for the flowers, orange paint.
 |  |  |
|---|
✨PASO 5:
Con marcador negro remarqué las letras y con marcador naranja le di detalles a las flores. Pasé las piezas por la plancha para dar relieve y, en el caso de las flores, hundí solo dos en medio con la parte trasera de un pincel.
✨STEP 5:
With a black marker I highlighted the letters and with an orange marker I gave details to the flowers. I passed the pieces through the iron to give relief and, in the case of the flowers, I sunk only two in the middle with the back of a paintbrush.
 |  |  |
|---|
✨PASO 6:
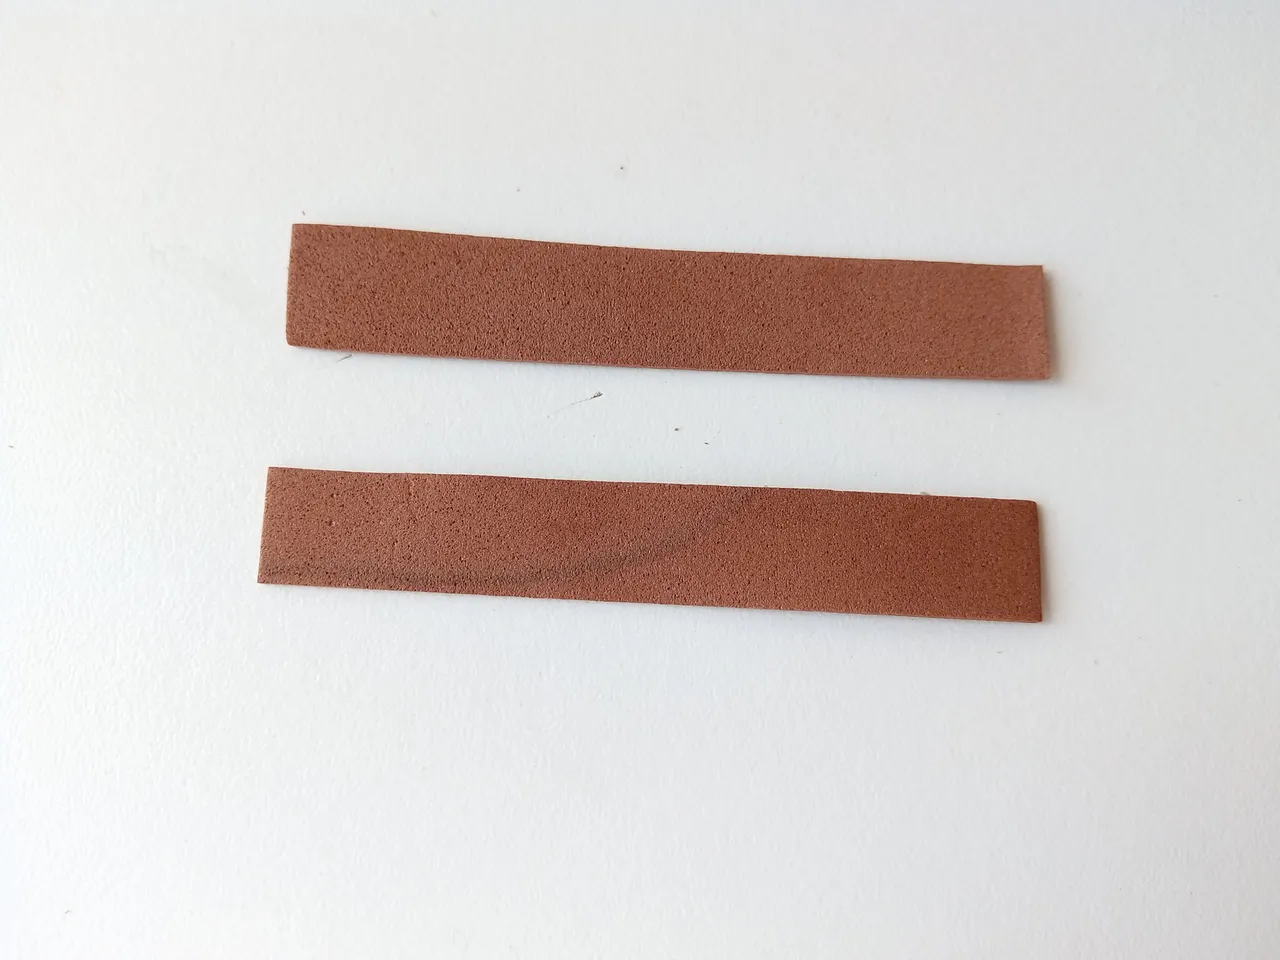
Pegué la etiqueta en medio a la cual también le di detalles de madera con marcador, porque sentía que le faltaba algo más. Luego pegué hasta formar las flores y pegué a los lados de la etiqueta. Además, recorté dos tiras de foami marrón, las pegué a los laterales como agarraderos y para cubrir las puntas, utilicé cartulina corrugada.
✨STEP 6:
I glued the label in the middle to which I also gave wooden details with a marker, because I felt that it needed something more. Then I glued until the flowers were formed and glued them to the sides of the label. In addition, I cut out two strips of brown foam, glued them to the sides as handles and to cover the tips, I used corrugated cardboard.
 |  |  |
|---|
✨This is how I made my cute organizer for the lighters. It is perfect because I have them all organized and at hand for when I need them. You can make them in many ways, using boxes as in my case, in my case with a recycled box or with pieces of fabric you can make a case. I hope you liked the step by step and are encouraged to make it.
❤️Until the next post.
✨RESULTADO: | ✨RESULT:

->🌼INSPIRACIÓN🌼<-

Todas las fotografías son de mi propiedad.
Separador y Fotos editadas en Canva
All photographs are my property.
Photos edited in Canva