
Hello friends of this great community of #DIYHub. The Christmas season is full of gifts and special moments shared with loved ones. If you intend to give a CD with music, why not add a magical touch to your gift with a uniquely and creatively decorated gift envelope? Today I want to show you how to make a CD gift envelope for Christmas. Follow these simple steps and you can surprise your family and friends with a gift that they will not only love, but will also convey the festive spirit of Christmas.
Hola amigos de esta gran comunidad de #DIYHub. La época navideña está llena de regalos y momentos especiales compartidos con seres queridos. Si tienes la intención de regalar un CD con música ¿Por qué no añadir un toque mágico a tu regalo con un sobre de regalo decorado de forma única y creativa? Hoy quiero enseñarte cómo hacer un sobre de regalo para CD con motivo navideño. Sigue estos sencillos pasos y podrás sorprender a tus familiares y amigos con un obsequio que no solo les encantará, sino que también les transmitirá el espíritu festivo de la Navidad.


Materials:
•Cartulina Kraft 30cmx45cm
•Cartulina color verde 12cmx24cm
•Tijera
•Lápiz
•Pega
•Aplique de árbol de navidad de foami escarchado rojo
•Pintura blanca
•Pincel
•Cinta 1/8 de pulgada (3 mm)
•Regla
•Moneda
•Perforadora de papel
Materiales:
•Kraft cardboard 30cmx45cm
•Green cardboard 12cmx24cm
•Scissors
•Pencil
•Glue
•Red frosty foam Christmas tree applique
•White paint
•Brush
•Ribbon 1/8 inch(3mm)
•Ruler
•Currency
•Paper hole punch
Step 1
Draw the pattern on the Kraft cardstock and then cut it out.
Paso 1
Dibuja el patrón sobre la cartulina Kraft y luego, recórtala.

Step 2
With the help of the ruler, make the folds as shown in the pattern to form the envelope.
Paso 2
Con ayuda de la regla realiza los dobleces como se muestra en el patrón para formar el sobre.

Step 3
Draw two circles on the Kraft cardstock, cut them out. Then, with the help of the paper hole punch, open a hole in the center.
Paso 3
Dibuja dos círculos en la cartulina Kraft, recórtalos. Luego, con ayuda de la perforadora de papel ábreles un orificio en el centro.

Step 4
Punch a hole in both the top and bottom tab. Place glue only on the central part of the circles. Then, stick one on the top tab and the other on the bottom tab, to which you must previously stick the ribbon.
Paso 4
Abre un orificio tanto en la pestaña superior como inferior. Coloca pegamento solo en la parte central de los círculos. Luego, pega uno en la pestaña superior y el otro en la pestaña inferior, al cual, previamente se le debe pegar la cinta.

Step 5
Take the green cardboard and fold it until you make an accordion. Then, fold it in half and secure it with the wire. Cut its tips as shown in the image and, finally, place glue to form the star.
Paso 5
Toma la cartulina color verde y ve doblándola hasta realizar un acordeón. Luego, dobla a la mitad y sujétalo con el alambre. Corta sus puntas como se muestra en la imagen y, por último, coloca pegamento para formar la estrella.

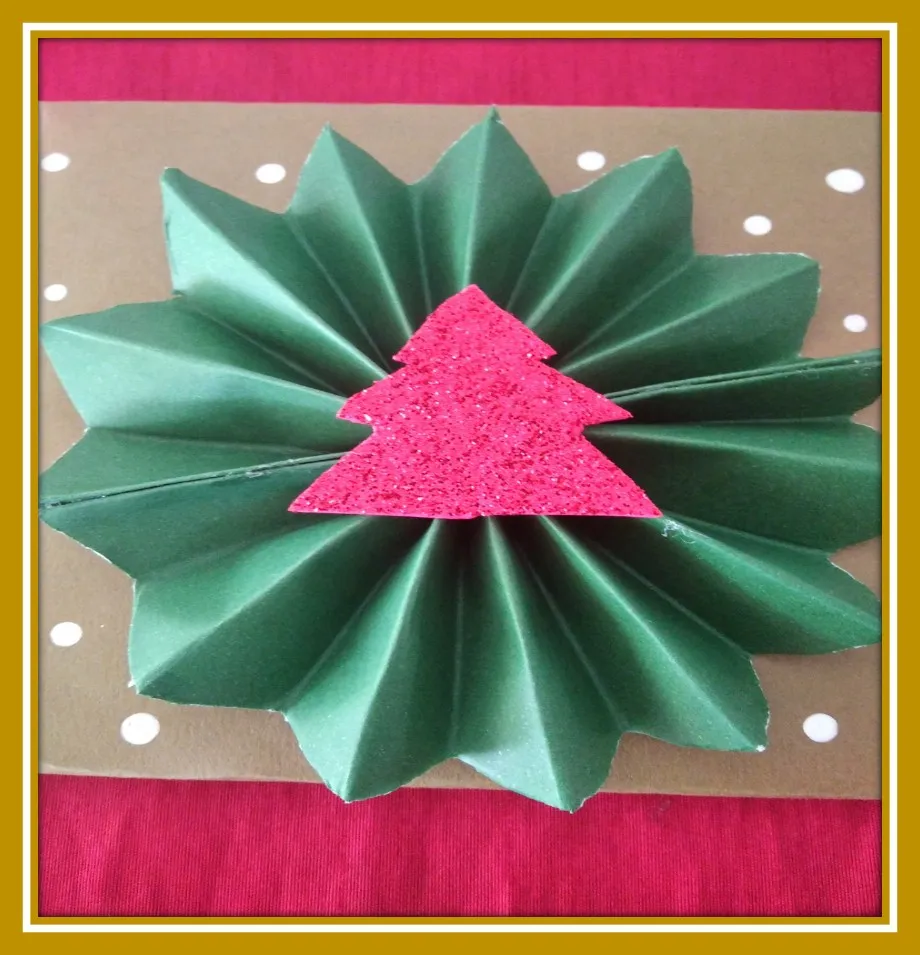
Step 6
Glue the star in the center of the envelope, then place the tree applique on top of it as shown in the image. Then, with the help of the brush, paint white dots. The decoration is finished; finally, insert the CD.
Paso 6
Pega la estrella en el centro del sobre, seguidamente coloca el aplique de árbol encima de esté como se muestra en la imagen. Luego, con ayuda del pincel pinta puntos blancos. Ya terminada la decoración; por último, introduce el CD.


And voilà!, the Christmas decorated CD gift envelope is ready to surprise your loved ones. Remember that this gift not only contains music, but also the love and dedication you put into creating it.
Dare to try this creative craft and enjoy the joy of gift-giving this Christmas season! Don't forget that the value of a gift lies in the attention and affection we put into it when making it. See you soon!
Y ¡voilà!, el sobre de regalo para CD decorado con motivo navideño está listo para sorprender a tus seres queridos. Recuerda que este regalo no solo contiene música, sino también el amor y la dedicación que pusiste al crearlo.
¡Anímate a probar esta manualidad creativa y disfruta de la alegría de regalar en la temporada navideña! No olvides que el valor de un regalo radica en la atención y el cariño que le ponemos al hacerlo. ¡Hasta una próxima oportunidad!
The images were taken by myself with my Redmi Note 8 cell phone.
Translation: Google Translation
I used the program Microsoft Power point
Las fotografías fueron tomadas por mí con mi teléfono celular Redmi Note 8.
Utilicé el programa Microsoft Power point
Traducción: Google Translation
