Hello steemians and fellow artist! This is my first time drawing realistic version of an anime character. It takes me some time to finish because visualizing every parts is a little bit harder specially when you don't have an actual reference. But that's when the fun part starts right? It helps me exercise and improve my visualization skills at the same time my drawing skills. I will probably do more Anime to Realism Drawing so you should try it too!

By the way who's Silvers Rayleigh?
He is the former first mate of the Roger Pirates led by the late Gol D. Roger. After his captain's execution, he retired from piracy and became a coating mechanic in the Sabaody Archipelago. He taught Luffy how to use the three forms of Haki over the timeskip.
Here's some additional information about the character.
https://comicvine.gamespot.com/silvers-rayleigh/4005-72490/
So here's the step by step procedure on my Rayleigh realistic drawing:
The materials I used:
- Canson Sketchpad
- HB, 3B, 5B, 7B, 8B Staedler Graphite Pencils
- Kneaded Eraser
- Ordinary Pencil Eraser
-Cotton/Cotton buds (for smudging/blending purposes) - Sharper (Because you will always need a pointy one)
First, study the reference well, memorize the trade marks of the character. In my case Rayleigh's long white hair, his unique beard, the glasses and the scar in his eyes.
Reference's Link Here

I start sketching some lines and shapes that will serve as guidelines for every parts of the face. This basic technique will help your drawing to be in proportion.

I always start drawing with the eye. The eye is the one that makes the drawing realistic.

I start with filling the iris 7b (any dark tones will do). Fill it carefully, darker tones are hard to erase so be careful. Using the 3B pencil, add shadows by cross-hatching pattern, do not press hard or it will ruin your work. Next is smudging/blending it with the cotton/cotton buds. I add highlights using kneaded eraser. I also use 7b pencil in the glasses so it will stand out and don't blend with the skin tone.


I started with the nose in the nose line. Add a very light tone that will serve as a base tone. Then add the darker shading to the places where shadow existed. Use Kneaded eraser for the details and highlights.

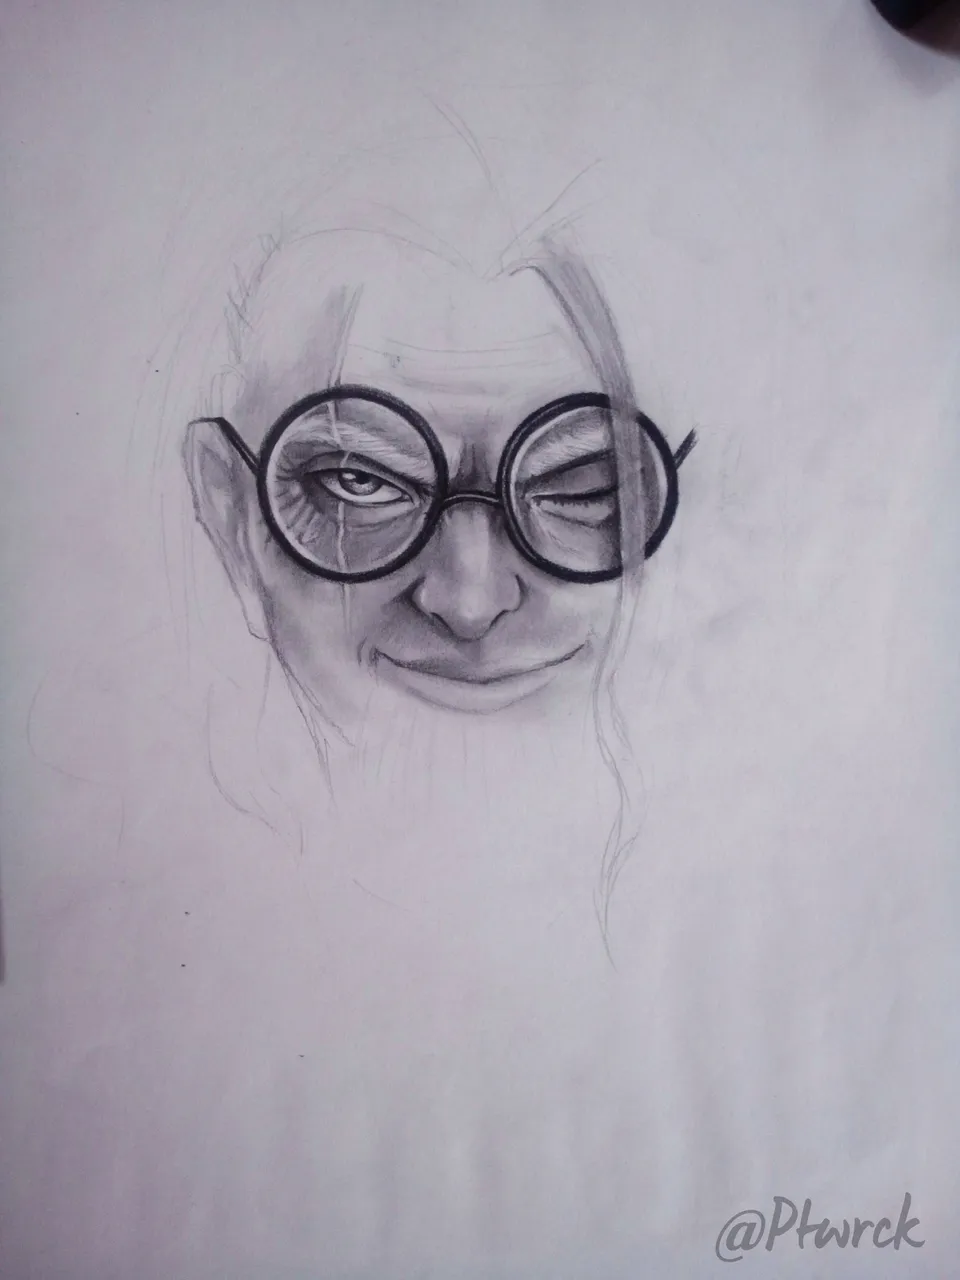
I continue shading the whole face. I also add ears retouch some shading to make it better.

Moving into the hair, I start sketching hair patterns. I'm not that good in drawing hairs but sketching patterns will help and guide you to make it more presentable. Since Rayleigh's hair is white, I add some rough shade in the background to highlight it.

Some retouch and finished the skintone part so that I can fully proceed in the hair.

Determine where the light source is coming. First I add a very light shading, this will be the base tone for the hair. When creating the first layer of the hair strokes, mix it up with variety of of line weight. You will need both of your dull and sharpened pencil in this. After that I use cotton/cotton buds to smudge the area. Follow the hair pattern when smudging to make a light to dark effect. After that I use an ordinary pencil eraser and cut it in a half with a blade/cutter. Use the pointy part of the eraser to make a strand through the shaded area. This will serve as the highlights of the hair. Repeat the steps until you reach the desired result.

A little overall retouch and here's the result.

That's all thank you!
This work is licensed under Creative Commons Attribution 4.0 International License.

3LbgdR47351w6rxRhjVDVVaffyvjKpB6TV
Bitcoin Wallet Address

Don't forget to support our mentor 

