
A mysterious journey to find an ancient temple of Wo-Owl .. deep in the jungle of Kurohaku. The adventure soon turns into a nightmare when emaki spirits trapped.

Hi to all steemians especially #steem-cartoon members. Today we are going to talk about Parallax Scrolling. What is it actually? How do we create a drawing that applies parallax scrolling?
Perennial's contest
In this post, we will try to illustrate a Fantasy theme for my entry to 
The contest is to celebrate the reveal of #steem-cartoon's new logo, The Wo-Owl!...

The contest link is here:
https://steemit.com/steem-cartoon/@perennial/steem-cartoon-introducing-wo-owl-announcing-our-1-challenge
And here is my entry drawing...👍

Parallax Scrolling
So ... What is parallax scrolling?
Parallax scrolling, also known as "Asymmetrical Scrolling", is a technique in computer graphics especially games, where images in different layers, move by the camera slower than closer images, creating an illusion of depth in a 2D scene.
For this project, I create a drawing and also HTML file using Malaybasic (http://www.malaybasic.com). To see the HTML version of this project click here. Move your mouse left and right to see the parallax effect. It looks like a game but there is no game to play 😉
In the above Parallax scrolling, we create 5 different layers. The layers are like this:

The frontest layer can be called as a front drop. The width of the image must be the longest one. This is because, it will move the most when the mouse moves.

Then, this is the second layer.
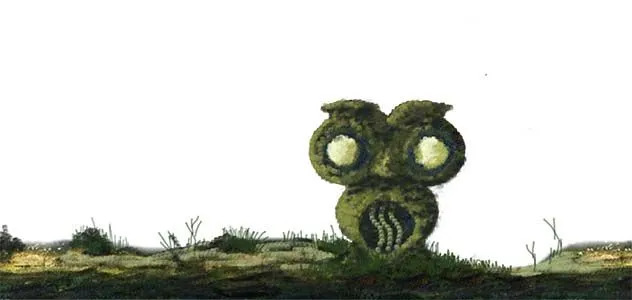
On the third layer, we put our main subject, which is our Wo-Owl temple.

Then we got 2 backgrounds. The idea here is to make the front background trees look in-front than the rest of the trees.

Coding
This is a Malaybasic code to produce the HTML version of the Parallax Scrolling above. If you know programming you can apply this line of code into your own programming language.
Aplikasi ("ParallaxScrolling",1200,740)
l#=LebarSkrin()
parallax1=SediaGambar("1a.png")
parallax1gap#=Lebar(parallax1)-l
parallax2=SediaGambar("2a.png")
parallax2gap#=Lebar(parallax2)-l
parallax3=SediaGambar("3.png")
parallax3gap#=Lebar(parallax3)-l
parallax4=SediaGambar("4a.png")
parallax4gap#=Lebar(parallax4)-l
parallax5=SediaGambar("5a.png")
parallax5gap#=Lebar(parallax5)-l
posPercent#=0.0
fungsi GelungUtama()
    CuciSkrin()
    posPercent=(SentuhX()/l)
    gambar parallax5,-parallax5gap*posPercent,0
    gambar parallax4,-parallax4gap*posPercent,0
    gambar parallax3,-parallax3gap*posPercent,0
    gambar parallax2,-parallax2gap*posPercent,0
    gambar parallax1,-parallax1gap*posPercent,0
tamat
Or you can download Malaybasic and try the above code yourself.
The process
First, I sketch all the drawings and put them all in one PSD file. I test move them to see the correct Parallax effect. This is very important. You want to get the correct size for each of the drawings

Then, after it looks good, I detail up the drawing.
Next, I create a code in Malaybasic and run into HTML for a test

Finally, I tweak here and there to create a proper lighting effect.

And this is an animated gif for the whole process...

Okay guys... Until next time!
See ya...
If you are still blur... 😉 CLICK THIS.


