
So today, I will teach you on how to convert your face to a vector art. A vector is an image wherein whenever you make it larger or smaller, its quality will remain the same, unlike normal photos when enlarged, you will see that it will pixelate since it is a raster image.
So the main software or applications that I used for this tutorial are these two:
Adobe Photoshop CC 2017
Adobe Illustrator CC 2015
- So to start the tutorial, open up your desired photo of your face in Adobe Photoshop CC.

- Change the color mode to grayscale. To change it go to Image > Mode > Grayscale.

- Then apply a threshold adjustment. Go to Image > Adjustments > Threshold.

- Apply a threshold level that you like. So for me I'll have 96.

- Then to selct only the black parts of the photo efficiently, Go to Select > Color Range.
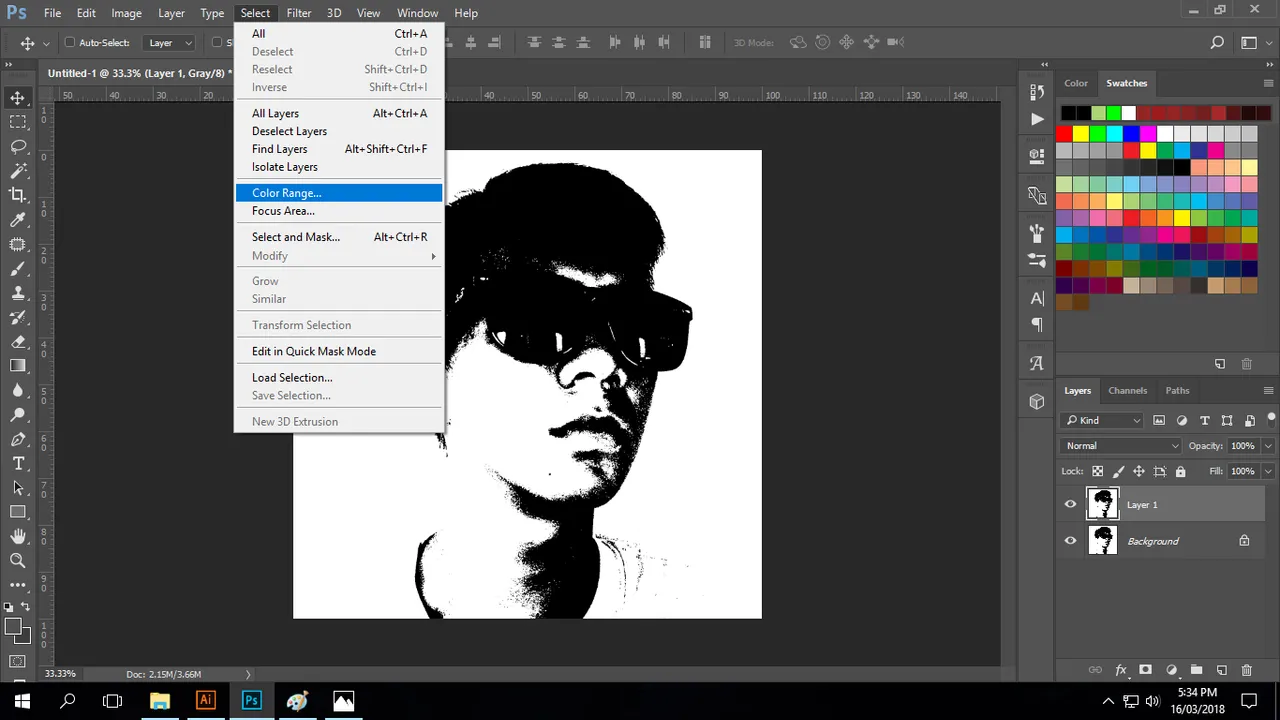
- Then on the option select "Shadows". Then press ok.

- Then select the marquee tool to have the selection then right click and choose "Layer via copy."
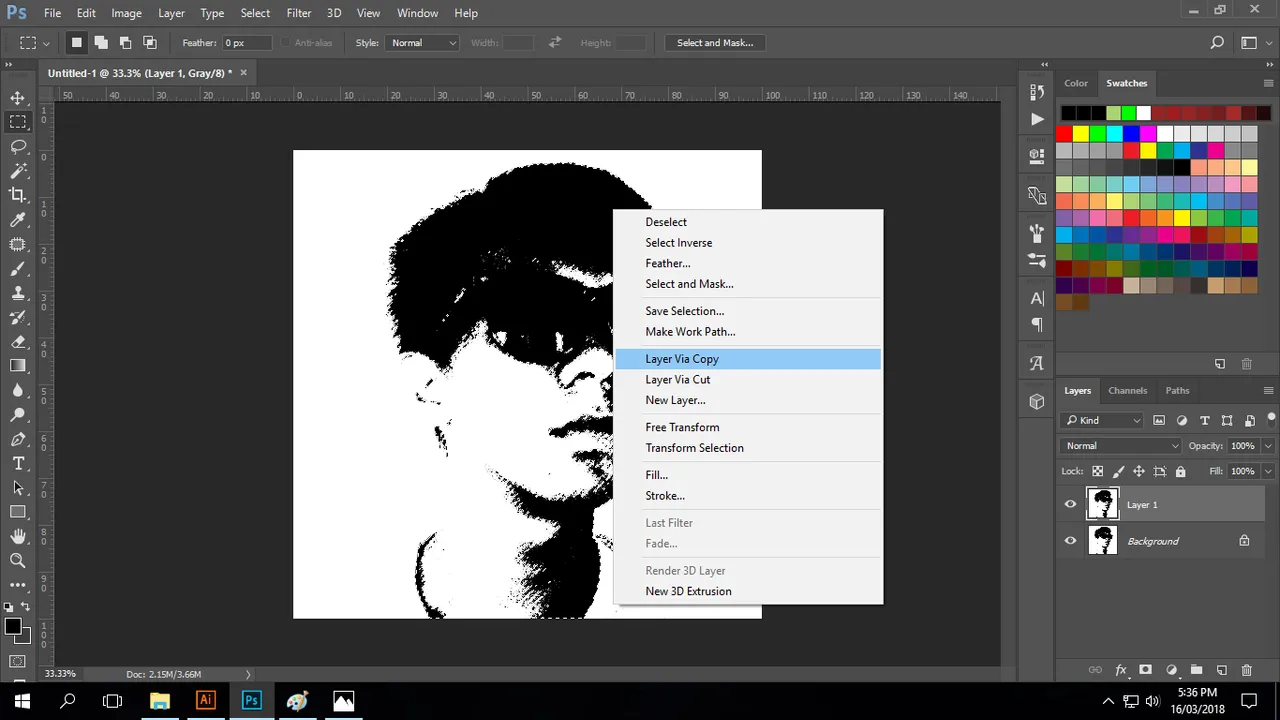
- Now turn off the other layers, leaving only the new selection to be ready for saving.

- Now save your photo as png and then click save.

- Now that you had saved a png file type of your face lets now open it with Adobe Illustrator for the vector conversion.

- This is how it will look like on Adobe Illustrator.

- As you can see this photo when zoomed in, pixelated squares will be visible.

- Now to remove this annoying pixels, or shall I say convert it to a vector,simply select the photo, then on the control panel, beside the Image Trace option select the drop down icon then more options will pop out, select High Fidelity Photo.

- Using this command usually takes time so please do be patient.

- Now when its done, this is how will it look like, when zoomed in even to the highest degree, no more pixelated squares will be seen as it is a vector now.

- You can now save your photo to any vector file type that you want eg. svg, eps, pdf.

So that's it, I hope you liked my tutorial, making a vector out of something is very useful as you will preserve the quality of the image even if its enlarged or reduced. More tutorials coming soon since I am now learning this new software Adobe Illustrator. Support me in my future tutorials.

