- Introduction
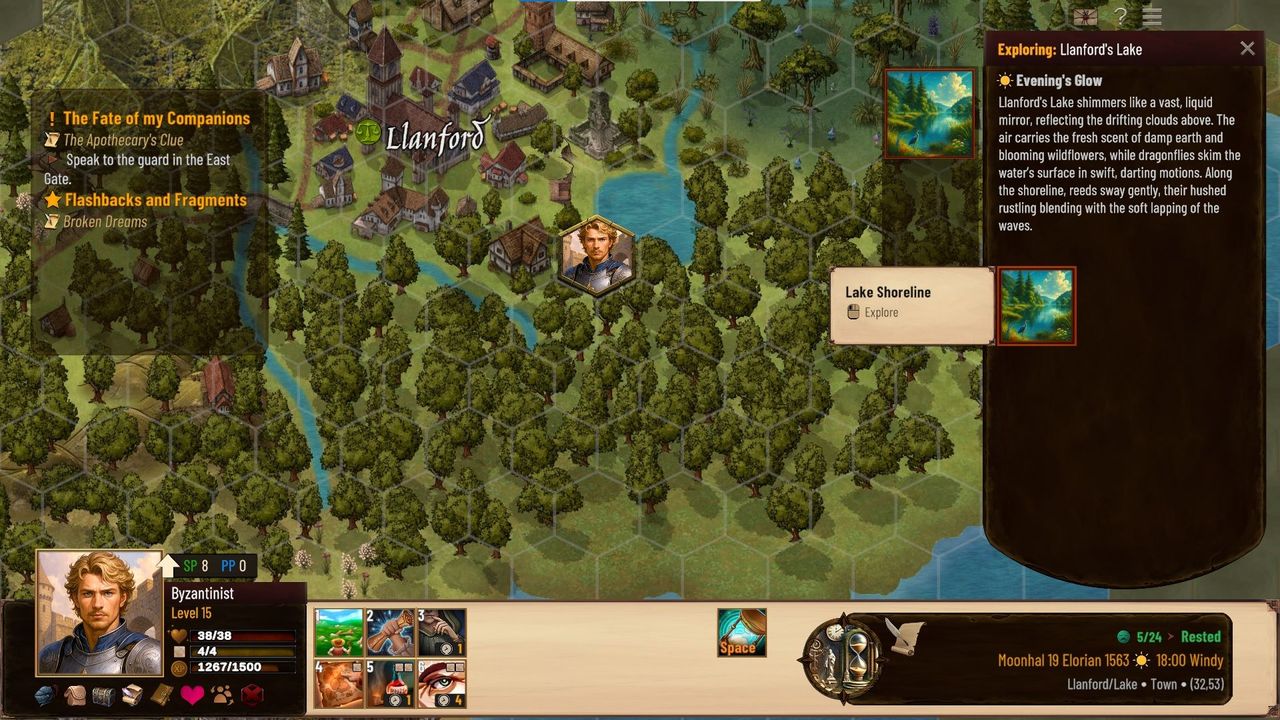
- Llanford Lake (32,53)
- Llanford's Windmill (31,46)
- Taymoor Hut (33,45)
- Narloch's Chasm (35,44)
- Shrine of Driedelon (33,41)
- Gloomreach (28,44)
- Shrine of Diana (24,40)
- Shrine of Aion (19,31)
- Shrine of Seraphine (12,31)
- Shrine of Neriene (4,32)
- Bedale Ruins & Shrine of Noctis (5,36)
- Shrine of Venilia (5,47)
- Shrine of Hyperion (14,44)
- Shrine of Eros (13,49)
- Shrine of Deimos (1,65)
- Shrine of Morheliss (8,67)
- Other Points of Interest
This article was originally written under Erannorth Renaissance Version 1.1.60 but has now been updated for Version 1.1.63.
I am happy to make any corrections if more accurate information is discovered. If you have any comments, you can either post here or e-mail me at: byzantinekitty@gmail.com
All of the screenshots in this post were taken by me.
1. INTRODUCTION

This is a guide for the various locations on the world map which can be explored or interacted with, including the 11 shrines that provide permanent bonuses.
In sandbox mode, these are the primary points of interest on the world map other than completing random contracts and finding hostile bands. In story mode, these are additional things to do while you are working on completing the main storyline or after you have finished it.
Many of these locations are newly introduced in Version 1.1.60. According to the developer, data on explored tiles is stored in your save file. If you have not previously been to these tiles prior to Version 1.1.60, the locations will appear. However, if you have an old saved game where you have previously been to those specific tiles, the locations might not show up. In that case you can:
Start a new game (which I think is a non-ideal option).
Go the appropriate tile and then use the console to trigger the conversation with the appropriate tile. It will be like you clicked the location though the place will not physically be there on the map.
Edit your WorldData.json file by adding the appropriate location to the correct tilemap entry. Any typo, including an extra comma or space, can corrupt your save file so you should make a backup first.
Hope that the developer eventually creates a mechanism that will safely and automatically update save files when new content and locations are released.
If you find this detailed Erannorth Renaissance helpful then you should also take a look at:
2. LLANFORD LAKE (32,53)
In Version 1.1.19 you simply could fish and explore at Llanford Lake. In Version 1.1.60, a crocodile encounter was added before you can interact at the lake.
Marsh Crocodile
Capped at Level 5
Drops Crocodile Hide as loot. If you succeed on an Easy Survival skill check you receive a second Crocodile Hide.
Although you can defeat Llanford's Crocodile at Llanford Lake early on and get a major early game boost (+1 skill point for the party), it's actually better to wait until you have a full party (at least 6 characters in your active party) before you do this. A true min/maxer may want 6 active characters and 12 characters in the reserve before triggering the reward.


At Llanford Lake, there are two different encounters you can get but once you gain certain rewards, you won't be able to trigger any more encounters.
The first encounter involves anglers. If you choose the first option "Ahoy there!" you will help judge the competition, receive 35 XP, and get +2 Reputation (Llanford) but this will prevent you from getting any of the better rewards. As a result, I recommend NOT choosing this.
The second & third options only provide flavor text and ends the ability to explore the lake further.
Instead, you should choose "without giving them another glance, you continue your journey." You will just get some flavor text but you can try interacting with the lake again to trigger the other encounter.

This next encounter is the good one with valuable rewards.
Your first impulse might be to fish because you happened to have fishing gear! This gives you 3 chances to use Fishing Bait and you have a chance to get a random fish each time. But this also ends the encounter and you aren't able to interact at the lake again. So I do not recommend this option.
If you explore, you have three options (note that any skill checks are only for your main character - your other party members cannot contribute their expertise):
- Go to the old cabin, optionally circle around, then step inside, you gain 35 XP, and receive a Fishing Rod and 3 x Fishing Bait
- Follow the tracks, continue to see where they lead, and get a +1 to Survival rolls for one of your characters
- Go to the clearing. Look for signs of who last used this space. If you leave the herbs alone then your main character gets a permanent Luck +1 bonus. If you try the Herbalism route then passing a Moderate skill check nets you 25 XP (that's all) but failing it gives your main character a permanent Luck -1 penalty.
Exploring any of these three options ends the ability to interact at the lake.


You can also go for a swim. This will trigger a romance opportunity with one of your companions (the developer implies that it is with your highest relation romantic interest). This makes that companion a Lover (if they aren't already) and you get a steamy romance scene, which is slightly different if your companion is male or female.
Whether you trigger the romance scene or ask for privacy, the key thing is that going for a swim the first time does NOT end the ability to interact at the lake. So you can do that and still get a nice reward.


The second time you try to swim at the lake, you have the option to go diving. If you pass a Medium difficulty individual Stalwart skill check you can get 35 XP and the Eternal Promise ring (Requires Level 6, 2000 gold value, Hit Points +8, Regenerate +2 magnitude, provides the Guardian's Resolve action (Requires Authority 3, Grant caster defense and swap positions with a target 2 hexes away) and the Eternal Bond action (Requires Connections 3, Heal and swap positions with a target 4 hexes away)). Or if you want you can choose one of the explore options.

Technically you can also sit and enjoy the quiet but it doesn't provide any rewards. At least some of the options allow you to continue interacting at the lake but since this lake event provides much better rewards than the angler event, I would not suggest this option.
So really the optimal thing is to NOT interact with the anglers and NOT go fishing. You can go for a swim and gain a lover and then either explore (getting +1 to Survival rolls or Luck +1) or go for the Eternal Promise ring.
3. LLANFORD'S WINDMILL (31,46)
Interacting with Llanford's Windmill, just north of the city, results in a combat with Eunice and 4 bandits. They are capped at Levels 4-6.
Defeating them will net you 250 gold and +5 reputation in Llanford.
However, what is more valuable is the loot that you can find on their bodies.
Eunice always has a Stormkissed Cleaver, Swift Strike action (the same as from the Finesse perk), and 125 gold. If you pass an Easy Warfare skill check you also get a Reckless Sweep action (it's not a very good action but it seems unique. It may be good for Sacrifice actions that let you skip the HP cost if you are bleeding).
The Bandit Archer has Duskwalker Pants but passing an Easy Survival skill check nets you an Ironbark Longbow and Steelguard Buckle.
The Bandit Spearman always has Adventurer's Belted Trousers, a Steelguard Buckle, and 50 gold. Passing an Easy Stalwart check will reward you with a Drill Sergeant's Guisarme.
The other 2 bandits have random loot.
Some of the equipment is good for the early game though you will eventually get much stronger equipment. However, the actions you get from Eunice are probably the best part of the encounter!


4. TAYMOOR HUT (33,45)
This abandoned hut is simply labeled as a Marsh tile though you can see the hut image on the world map.
Coming here gets you some free loot!
- Alchemica Mysteria grimoire trinket
- 2-3 random Herbalism ingredients, Potion ingredients, and/or Potion consumables
- Skull
- Random amount of Bones
- Random amount of Dewstone
- Random amount of Zephyrite
- Liber Sepulchri Vivens book
Reading the Liber Sepulchri Vivens gives you the recipe for the Lesser Ghoul action (Requires Rituals 2, 450 gold, ingredient is a Blood Thrall) and the Swamp Fen Brew (Requires Rituals 3 and the Liber Sepulchri Vivens, 180 gold value, ingredients are Bog Water, 2 Nightcaps, 2 Snails, 2 Caterpillars, and a Rat).
During camp, the Liber Sepulchri Vivens can be used to increase the Corruption of a companion (i.e. if you want them to select Corruption perks) or, when used with Swamp Fen Brew can turn one of your companions into a Ghoul!


5. NARLOCH'S CHASM (35,44)
Exploring Narloch's Chasm results in a combat with Narloch the troll (enemy capped at Level 7). In order to enter the cave you need to expend either a Torch or an Oil Lantern. This nets you XP (25 XP with a Torch or 35 XP with an Oil Lantern).
As an earth troll, Narloch has a ranged attack dealing Earth damage that can reach someone 4 hexes away.
If you defeat him, succeeding on an Easy Enchanting skill check gets you around 2-3 pieces of Terracite.
Furthermore you can search the cave for additional loot which includes:
- Random weapon (around Rank 3)
- Random shield (can range from Level 1-11)
- Random adventuring gear
- Random adventuring gear
- Random amount of Silver Ore
- Random amount of Terracite
- Random amount of Wyrdflint
- Random amount of gold (around 200-300)


6. SHRINE OF DRIEDALON (33,41)
This secret shrine is found within the Heygrove Outskirts.
Interacting with the shrine gives all members of your party 35 XP, Skill Points +1, and HP +2. As a result, I would recommend waiting until you have a full party (at least 6 characters in your active party) before you trigger this. A true min/maxer may want 6 active characters and 12 characters in the reserves before exploring the shrine.
In addition, you get 4 options which slightly influences your personality and gives influence bonuses or penalties with different personality types:
- Offer the fruits of my labor: Beacon +3, Guardian +1, Empath & Trailblazer 0, Visionary -1, Enigma -2
- Appreciate the sense of community and hope: Empath +3, Beacon +1, Guardian & Trailblazer 0, Enigma -1, Visionary -2
- Interesting cultural narrative: Visionary +3, Trailblazer +1, Beacon & Empath 0, Guardian -1, Enigma -2
- Why bestow credit where it is not due: Trailblazer +3, Visionary +1, Empath & Enigma 0, Beacon -1, Guardian -2


7. GLOOMREACH (28,44)
Gloomreach is a multi-part dungeon in Aronthag's Descent. First you need to get inside, then you need a source of light, and then finally you will get an exploration choice which may lead to an optional combat.

To get into the dungeon you need to pass a skill check:
- Subterfuge (Lockpicks): Pass a Moderate difficulty skill check, lose Lockpicks, and gain 25 XP
- Subterfuge: Pass a Hard difficulty skill check and gain 35 XP
- Warfare: Pass a Hard difficulty skill check and gain 35 XP
- Perception: Pass a Hard difficulty skill check. No XP is gained. You get some flavor text about needing a key and can then choose again among the remaining options
If you think you can't pass the Subterfuge or Warfare skill checks, you can leave, come back and try a different approach when you are more experienced.

Once you have managed your way in, you need to expend either a Torch (25 XP) or an Oil Lantern (35 XP) to proceed.
Eventually you will find several containers with human bodies inside. Your options are:
- What is this thing in the middle?: You will then have the option to either touch it (results in combat) or seal the path behind us (ends the exploration with flavor text but no rewards)
- Seal the path behind us: Ends the exploration with flavor text but no rewards
- Strike one of the glass coffins: After smashing one of the coffins you can either lower the implement and step back (gain 45 XP) or raise the implement again (gain 45 XP, one party member gets Corruption +10 and Blunt +1)
- Examine a detailed diagram: Pass a Moderate difficulty Perception skill check to give one of your characters Improved Vulnerable +15%. Combat happens afterwards.

If you chose to touch the thing in the middle or examine the detailed diagram, you will have a battle with 6 ghouls.
If you sealed the path behind or struck one of the glass coffins, you skip the battle.
During the combat your characters will suffer a -15% Dodge penalty.
Ravenous Ghoul, 2 x Feral Ghoul, 3 x Lesser Ghoul
Capped at Levels 5-6
There's no special or unique loot. Each of the ghouls just has some random loot, which is usually a small amount of gold.

After the battle, you have the option to collect some of the glass. Doing so gives you 4-12 glass but your main character takes 2-6 HP of damage.
If you struck one or all of the coffins, you skip the battle but can still pick up some of the glass.

Generally, the optimal thing to do is get the Improved Vulnerable +15% bonus or give Corruption +10 and Blunt +1 to one of your party members.
Unfortunately, none of the story companions are especially good at Blunt. When I explored Gloomreach, I was over-leveled (Level 16) and my characters already had 10-12 proficiency levels in everything except Blunt. So Blunt was useless to me and I opted for the Improved Vulnerable bonus instead. If some of my characters did specialize in Blunt it would be a tempting choice but I'd have to consider the long-term consequences of Corruption. Your main character can make compassionate story choices to lose some Corruption but I'm not sure if your companions can lose Corruption. Then again, if you are actively trying to accumulate Corruption then it's an obvious choice.
8. SHRINE OF DIANA (24,40)
This secret shrine can be found in Keywick Village.
Exploring the shrine gives all members of your party 35 XP, Perk Points +1, and Accuracy +3%. Like other shrines, I would recommend having a full active party (6 members) or a complete roster of companions (6 active + 12 reserve) before activating this shrine. That is because future companions you recruit will not gain these one-time bonuses.
As with other shrines, you get 4 options which slightly influences your personality and gives influence bonuses or penalties with different personality types:
- Seek her blessing: Trailblazer +3, Visionary +1, Empath & Enigma 0, Beacon -1, Guardian -2
- I find the old stories more interesting: Visionary +3, Trailblazer +1, Beacon & Empath 0, Guardian -1, Enigma -2
- I respect her role in keeping the balance: Guardian +3, Beacon +1, Empath & Visionary 0, Trailblazer -1, Enigma -3
- A true goddess of nature would not discriminate: Enigma +3, Visionary +1, Trailblazer 0, Beacon & Empath -2, Guardian -3


9. SHRINE OF AION (19,31)
This hidden shrine is found in the middle of Valetport.
Interacting with the shrine gives all members of your party 50 XP, Skill Points +1, and Initiative +1. Like other shrines, I would recommend having a full active party (6 members) or a complete roster of companions (6 active + 12 reserve) before activating this shrine. That is because future companions you recruit will not gain these one-time bonuses.
As with other shrines, you get 4 options which slightly influences your personality and gives influence bonuses or penalties with different personality types:
- Humble tribute to the boundless wisdom that charts our fates: Visionary +3, Trailblazer +1, Beacon & Empath 0, Guardian -1, Enigma -2
- I respect the order he represents: Guardian +3, Beacon +1, Empath & Visionary 0, Trailblazer -1, Enigma -3
- I'm more concerned with the here and now: Empath +3, Beacon +1, Guardian & Trailblazer 0, Enigma -1, Visionary -2
- Breaking free from his hourglass: Enigma +3, Visionary +1, Trailblazer 0, Empath & Beacon -2, Guardian -3


10. SHRINE OF SERAPHINE (12,31)
This special shrine can be located in Ponthill.
Visiting the shrine gives all members of your party 50 XP, Skill Points +1, and HP +3. Like other shrines, I would recommend having a full active party (6 members) or a complete roster of companions (6 active + 12 reserve) before activating this shrine. That is because future companions you recruit will not gain these one-time bonuses.
As with other shrines, you get 4 options which slightly influences your personality and gives influence bonuses or penalties with different personality types:
- In your light, we find the purity that cleanses us from within: Empath +3, Beacon +1, Guardian & Trailblazer 0, Enigma -1, Visionary -2
- Thinking there's someone out there dedicated to our wellbeing: Empath +3, Guardian +1, Beacon & Trailblazer 0, Visionary -1, Enigma -2
- But if it gives others comfort: Guardian +3, Beacon +1, Empath & Visionary 0, Trailblazer -1, Enigma -3
- True healing is wrought by human hands and knowledge: Enigma +3, Visionary +1, Trailblazer 0, Beacon & Empath -2, Guardian -3


11. SHRINE OF NERIENE (4,32)
You can find the Shrine of Neriene in Ashwick.
Visiting the shrine gives all members of your party 50 XP, Skill Points +1, and Armor +2. Like other shrines, I would recommend having a full active party (6 members) or a complete roster of companions (6 active + 12 reserve) before activating this shrine. That is because future companions you recruit will not gain these one-time bonuses.
As with other shrines, you get 4 options which slightly influences your personality and gives influence bonuses or penalties with different personality types:
- Pledge to uphold the virtues of courage: Guardian +3, Beacon +1, Empath & Visionary 0, Trailblazer -1, Enigma -3
- It's good to have symbols of strength and protection: Beacon +3, Guardian +1, Empath & Trailblazer 0, Visionary -1, Enigma -2
- It stirs something brave within me: Trailblazer +3, Visionary +1, Empath & Enigma 0, Beacon -1, Guardian -2
- Bearing truths others fear to acknowledge: Enigma +3, Visionary +1, Trailblazer 0, Beacon & Empath -2, Guardian -3


12. BEDALE RUINS & SHRINE OF NOCTIS (5,36)
The Bedale Ruins are south of Ashwick. Exploring the Bedale Ruins reveals the hidden Shrine of Noctis. Once you begin this process you won't be able to change any of your party members. As a result, I would recommend having a full active party (6 members) or a complete roster of companions (6 active + 12 reserve) before entering the ruins and activating the shrine. That is because future companions you recruit will not gain these one-time bonuses.

To enter the ruins, you first need a light source which uses up either a Torch (25 XP) or an Oil Lantern (35 XP).
Then you have to fight a group of spiders. During this combat your characters will suffer a -10% Accuracy penalty:
Spider Broodmother, 4 x Giant Spider
Capped at Levels 14-15
The spiders just have the same standard spider loot that spiders have from monster lairs. The Spider Broodmother has a small amount of gold and with a successful Alchemy skill check you get Spider Venom. The four Giant Spiders have a small amount of gold and each successful Survival skill check nets you 2 Spider Silk.

Once you defeat the spiders you immediately enter Noctis' Shrine. All members of your party gain 75 XP, Perk Points +1, and Haggling +3.
As with other shrines, you get 4 options which slightly influences your personality and gives influence bonuses or penalties with different personality types:
- Your secrets are safe: Enigma +3, Visionary +1, Trailblazer 0, Beacon & Empath -2, Guardian -3
- Comfort in knowing some things can stay hidden: Visionary +3, Trailblazer +1, Beacon & Empath 0, Guardian -1, Enigma -2
- Life goes on: Trailblazer +3, Visionary +1, Empath & Enigma 0, Beacon -1, Guardian -2
- True courage is found in the light: Guardian +3, Beacon +1, Empath & Visionary 0, Trailblazer -1, Enigma -3

13. SHRINE OF VENILIA (5,47)
When visiting Denham, you should consider stopping by the Shrine of Venilia.
Interacting with the shrine gives all members of your party 65 XP, Skill Points +1, and Charm +2. Like other shrines, I would recommend having a full active party (6 members) or a complete roster of companions (6 active + 12 reserve) before activating this shrine. That is because future companions you recruit will not gain these one-time bonuses. Right now, Charm really only benefits your main character but everyone can use additional skill points!
As with other shrines, you get 4 options which slightly influences your personality and gives influence bonuses or penalties with different personality types. Note that since the shrine gives you Charm +2, all of the following positive influence bonuses will be increased by an additional +2:
- Hoping your grace illuminates my path to allure and admiration: Trailblazer +3, Visionary +1, Empath & Enigma 0, Beacon -1, Guardian -2
- Sometimes that's all it takes to feel ready for whatever the day brings: Empath +3, Beacon +1, Guardian & Trailblazer 0, Enigma -1, Visionary -2
- My interests lie in deeper truths, beyond mere appearances: Visionary +3, Trailblazer +1, Beacon & Empath 0, Guardian -1, Enigma -2
- Venilia's allure is but a shallow promise: Guardian +3, Beacon +1, Empath & Visionary 0, Trailblazer -1, Enigma -3


14. SHRINE OF HYPERION (14,44)
Doven contains two shrines, of which the Shrine of Hyperion is the most important.
Visiting the shrine gives all members of your party 75 XP, Perk Points +1, and Action Points +1. You read that right. This shrine permanently increases the AP's of every character in your active party or reserves. This is a unique bonus that can only trigger once. As a result, even more so than the other shrines, I strongly urge you to have your final party composition before triggering this shrine (i.e. you have no plans to recruit any other companions for the rest of the game!). That is because any future companions you recruit will only have 4 AP's instead of the 5 AP's that those who visit the shrine will have.
As with other shrines, you get 4 options which slightly influences your personality and gives influence bonuses or penalties with different personality types:
- His radiance dissolves the shadows of doubt: Beacon +3, Guardian +1, Empath & Trailblazer 0, Visionary -1, Enigma -2
- You've got to appreciate a god who's got your back: Trailblazer +3, Visionary +1, Empath & Enigma 0, Beacon -1, Guardian -2
- It's just another part of the scenery: Empath +3, Beacon +1, Guardian & Trailblazer 0, Enigma -1, Visionary -2
- True insight comes from looking into the darkness: Enigma +3, Visionary +1, Trailblazer 0, Beacon & Empath -2, Guardian -3


15. SHRINE OF EROS (13,49)
The Shrine of Eros is the second shrine that can be found in the capital city of Doven.
Stopping by this shrine gives all members of your party 75 XP, Skill Points +2 (not just +1), and Luck +2 (which will increase Dodge, Critical Chance, Initiative, and Accuracy by +2). Like other shrines, I would recommend having a full active party (6 members) or a complete roster of companions (6 active + 12 reserve) before activating this shrine. That is because future companions you recruit will not gain these one-time bonuses.
As with other shrines, you get 4 options which slightly influences your personality and gives influence bonuses or penalties with different personality types:
- In your playful smile, I find the courage to seek love boldly: Empath +3, Beacon +1, Guardian & Trailblazer 0, Enigma -1, Visionary -2
- It's a bit of fun, a nod to the romances we all cherish: Enigma +3, Visionary +1, Trailblazer 0, Beacon & Empath -2, Guardian -3
- While I respect it, my focus is on more tangible matters: Guardian +3, Beacon +1, Empath & Visionary 0, Trailblazer -1, Enigma -3
- True love is built on more than the whims of a capricious god: Trailblazer +3, Visionary +1, Empath & Enigma 0, Beacon -1, Guardian -2


16. SHRINE OF DEIMOS (1,65)
In order to reach the Shrine of Deimos, you need to sail across the ocean (likely departing from the harbor in Doven or Denham) and travel to the island where Lacris is located. The shrine can be found on the southern end of the island.
Exploring the shrine gives all members of your party 65 XP, Perk Points +1, and Physical Damage +2. Like other shrines, I would recommend having a full active party (6 members) or a complete roster of companions (6 active + 12 reserve) before activating this shrine. That is because future companions you recruit will not gain these one-time bonuses.
As with other shrines, you get 4 options which slightly influences your personality and gives influence bonuses or penalties with different personality types:
- I invoke your dread power: Guardian +3, Beacon +1, Empath & Visionary 0, Trailblazer -1, Enigma -3
- It's about tapping into that fierce energy: Trailblazer +3, Visionary +1, Empath & Enigma 0, Beacon -1, Guardian -2
- There's already enough real suffering in the world: Empath +3, Beacon +1, Guardian & Trailblazer 0, Enigma -1, Visionary -2
- True bravery involves promoting peace: Beacon +3, Guardian +1, Empath & Trailblazer 0, Visionary -1 Enigma -2


17. SHRINE OF MORHELISS (8,67)
The final shrine, dedicated appropriately enough to Morheliss, can be found in the western Wastelands. You will need to manually sail from Doven or Denham, past Lacris, and land near Hamor. Then you travel westwards through the desert and ascend to the desert ruins.
Trekking all the way to this shrine gives all members of your party 100 XP, Skill Points +1, and Perk Points +1. Like other shrines, I would recommend having a full active party (6 members) or a complete roster of companions (6 active + 12 reserve) before activating this shrine. That is because future companions you recruit will not gain these one-time bonuses.
As with other shrines, you get several options which slightly influences your personality and gives influence bonuses or penalties with different personality types. However, instead of the standard 4 options, the Shrine of Morheliss actually has 5 to choose from:
- Decay is not the end: Beacon +3, Guardian +1, Empath & Trailblazer 0, Visionary -1, Enigma -2
- If I walk her path: Trailblazer +3, Visionary +1, Empath & Enigma 0, Beacon -1, Guardian -2
- That makes her more honest than most gods: Enigma +3, Visionary +1, Trailblazer 0, Beacon & Empath -2, Guardian -3
- Sometimes decay is the only thing that understands grief: Empath +3, Beacon +1, Guardian & Trailblazer 0, Enigma -1, Visionary -2
- Let decay be my instrument: Enigma +3, Visionary +1, Trailblazer 0, Beacon & Empath -2, Guardian -3


18. OTHER POINTS OF INTEREST
The world map shows two other potential sites of interest:
- Abandoned Campsite (35,48)
- (22,48)
However, I haven't been able to find anything there.
The developer implied that the Abandoned Campsite has specific requirements before it can be interacted with.
I suspect the spot at (22,48) is either reserved for future content or is storyline specific for one of the longer story paths.


