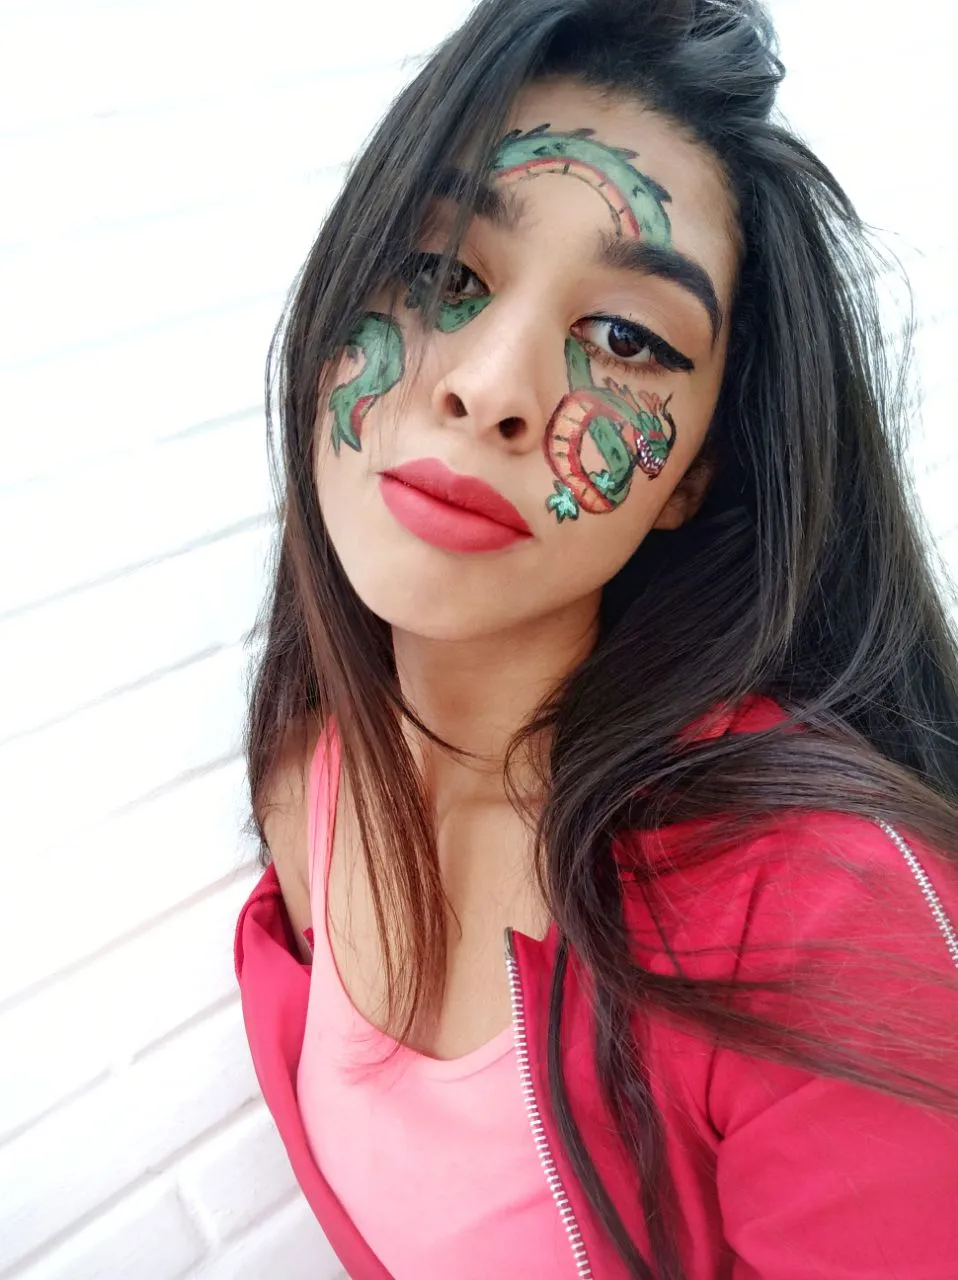
Shenron
Hello people, today we will be making a very famous dragon around here, that's right, our little friend arrives directly from dragon ball Z, I know that many of you will remember this series with great affection and nostalgia for those childhood moments.
Let's start my makeup, this time I did something very basic with my face, I only did my eyebrows, I put eyeliner on my eyelids and last I applied mascara and lipstick. Do not take this step into account because what we are interested in is seeing our dragon.
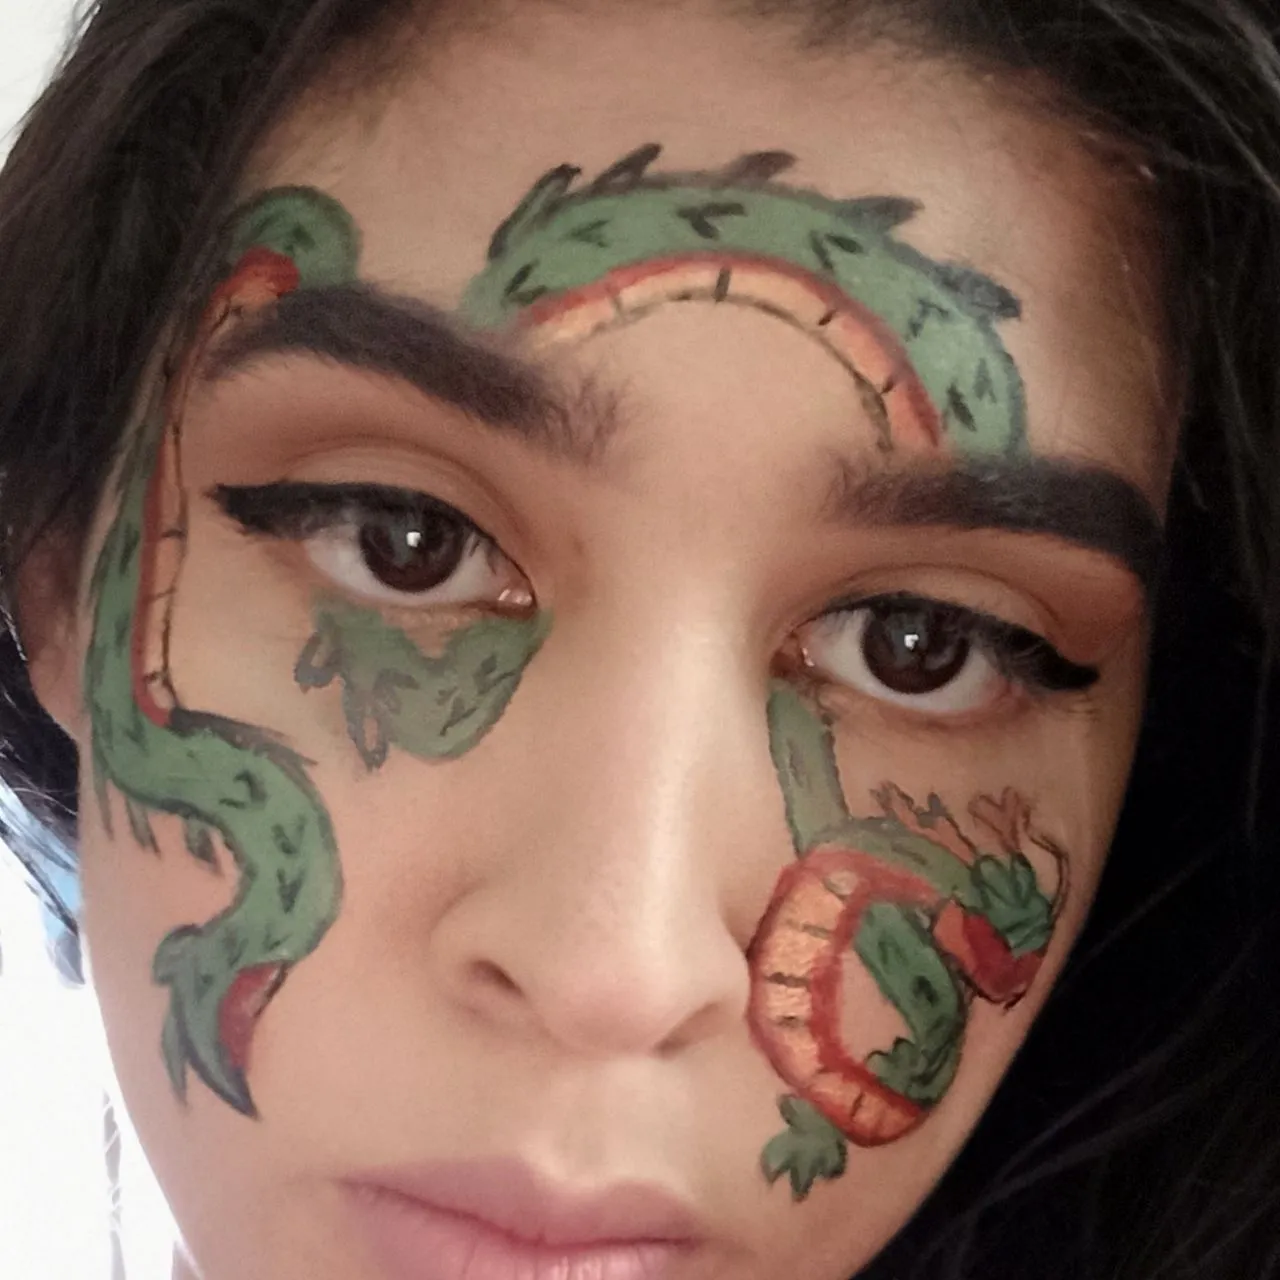
You know that I do not know how to draw and sometimes I made mistakes drawing the shape of the dragon, I will leave you the images of my step by step how I was creating my dragon, first I did it with black eyeliner to be able to have a good guide because otherwise I was going to be well lost, hahaha.


Then it only remains to paint over the stroke that I made, while I was adding color some lines were erasing but as I was completing the filling with color I retouched the lines again.


Finally I started adding details, scales, nails, teeth and we are ready for the photos.
Shenlong
Hola gente, hoy estaremos haciendo un dragón bastante famoso por aquí, así es, directamente desde dragón ball Z llega nuestro pequeño amigo, sé que muchos de ustedes recordarán esta serie con mucho cariño y nostalgia por aquellos momentos de la infancia.
Vamos a comenzar para mí maquillaje, esta vez hice algo muy básico, arreglé mi rostro, solamente me hice las cejas, me puse delineador en los párpados y de último me apliqué máscara de pestañas y un labial. Este paso no lo tome en cuenta porque lo que nos interesa es ver a nuestro dragón.
Ustedes saben que yo no sé dibujar y en algunas ocasiones me equivoqué trazando la forma del dragón, les dejaré las imágenes de mi paso a paso cómo fui creando mi dragón, primero lo hice con delineador negro para poder tener una buena guía porque sino iba a estar bien perdida, jajaja.


Luego ya sólo queda pintar por encima del trazo que hice, mientras iba agregando color algunas líneas se iban borrando pero a medida que iba completando de rellenar con color volvía a retocar las líneas.


De último le empecé agregar detalles, escamas, uñas, dientes y ya estamos listos para las fotos.