
Saludos amigos de #hive y #diy, feliz inicio de semana para todos, el día de hoy les traigo este paso a paso de cómo elaborar el vestido para el día de la conservación ambiental, el cual usaría mi primita para representar la flor de su salon. Al salón de 4to B le tocó la Ginger flor de piña, una flor con hojas de hasta 80 centímetros de longitud, y una flor que llega a medir hasta 30 centímetros, con pequeños pétalos que siguen un patrón hacia arriba, dándole una forma peculiar. Por eso realice los pétalos en el vestido de forma escalonada, la parte del frente que hiciera referencia al tallo, y las largas hojas que completarán la parte inferior, tomando en cuenta de esta manera cada uno de los elementos de la flor para la elaboración del vestido.
Greetings friends of #hive and #diy, happy start of the week for everyone, today I bring you this step by step on how to make the dress for the day of environmental conservation, which my little cousin would use to represent the flower of her classroom. The 4th B class got the Ginger pineapple flower, a flower with leaves up to 80 centimeters long, and a flower that measures up to 30 centimeters, with small petals that follow a pattern upwards, giving it a peculiar shape. That is why I made the petals on the dress in a staggered way, the front part referring to the stem, and the long leaves that will complete the lower part, taking into account in this way each one of the elements of the flower for the elaboration of the dress.


✂️Materiales utilizados ✂️
✂️Materials used✂️
2 sheets of bond paper. 9 green double foamies. 4 red frosted double foamies. 6 white foamies letter size. 10 frosted red foamies letter size. Yellow frosted foamies. 5 hot silicone sticks. 1 cold silicone. White, spring green and apple green cold paint. Scissors. Brushes. 2 meters of magic clasp. Plastic comb. White sheets. Squares. Pencil.
Elaboración de la base del vestido.
Making the base of the dress.
- Utilizando la escuadra realice un rectángulo de 66 cm de longitud y 28 cm de alto, con 8 cm extra del lado derecho para después doblarlo y pegarlo por la parte interna. Una vez recortados realice las divisiones dónde pegaría el cierre mágico.
Using the square, make a rectangle 66 cm long and 28 cm high, with 8 cm extra on the right side and then fold it and glue it on the inside. Once cut out, make the divisions where the magic zipper will be glued.

- Con el silicón frío pegue ambas partes de las dos tiras de Cierre mágico cuidadosamente en el papel bond.
With the cold silicone glue both parts of the two magic zipper strips carefully on the bond paper.

- En la segunda lámina de papel bond realice las divisiones, las cuales corresponden a la parte de 16 cm que se doblará y pegara a la parte interna y en donde irán los cierre mágicos.
On the second sheet of bond paper make the divisions, which correspond to the 16 cm part that will be folded and glued to the inner part and where the magic zipper will go.

- Luego de doblar y pegar la parte interna del papel bond procedí a pegar los cierre magico, completando así la base de la falda.
After folding and gluing the inner part of the bond paper I proceeded to glue the magic zippers, thus completing the base of the skirt.

- Luego procedí a cortar la lámina para darle apertura a la falda, pegando tiras de papel bond por la parte interna, para que la falda conserve la forma redonda al ser colocada.
Then I proceeded to cut the sheet to open the skirt, gluing strips of bond paper on the inside, so that the skirt retains the round shape when placed.


Proceso de recorte
Cutting process
- Realicé un patrón para los 4 grandes pétalos que realizaría con el foami rojo escarchado, trazando la forma en 1 para después proceder a recortar.
I made a pattern for the 4 large petals that I would make with the frosted red foami, tracing the shape in 1 and then proceeding to cut them out.

- Usando el primer pétalo realice la base de los otros 3 pétalos luego procedí a recortarlos.
Using the first petal I made the base for the other 3 petals and then proceeded to cut them out.

- De igual forma realice la base en uno de los foamies rojo escarchado de tamaño carta, usando el lápiz y el lapicero.
In the same way I made the base on one of the frosted red foamies of letter size, using the pencil and the pen.

- Después procedí a recortar el primer pétalo para sacar la base y recortar los otros 3, y así completar los cuatro pequeños pétalos.
Then I proceeded to cut out the first petal to remove the base and cut out the other 3, and thus complete the four small petals.

- Después con el foami verde, realice la base de la hoja en un foamie, usando la escuadra y el lápiz, para después delinear la forma con el lapicero.
Then with the green foamie, I made the base of the leaf on a foamie, using the square and the pencil, and then outlined the shape with the pencil.

- Luego de recortar la primera hoja procedí a sacar la forma de las otras 8, para después recortarlas.
After cutting out the first leaf, I proceeded to draw the shape of the other 8 leaves, and then cut them out.


- Realicé un patrón en la base del torso, de la forma y la cantidad de mini pétalos que llevaría, para sacar el patrón en el foami.
I made a pattern on the base of the torso, of the shape and the amount of mini petals that it would have, to draw the pattern on the foami.

- En dos foamis verdes realicé los patrones de hojas que irían en ambos costados de la parte superior del vestido.
On two green foamis I made the leaf patterns that would go on both sides of the upper part of the dress.

- Luego recorte los patrones de pétalos y mini hojas que irían en el torso, finalizando el proceso de recorte.
Then I cut out the patterns of petals and mini leaves that would go on the torso, finishing the cutting process.

- Realicé dos tiras de 18 cm de largo, a las cuales le pegue una mini flor escarchada, con un cuadrito de cierre mágico, siendo pegados en la base de papel bond de la parte superior del vestido.
I made two 18 cm long strips, to which I glued a mini frosted flower, with a magic closing square, being glued on the bond paper base of the upper part of the dress.

Proceso de pintado
Painting process
- Realice un degradado de verde a blanco con mini patrones en los foamies blancos, dejando áreas blancas más notorias en cada foamie. (acá serán dos imagenes)
Make a gradient from green to white with mini patterns on the white foamies, leaving more noticeable white areas on each foamie.


- Pinte la parte inferior de las hojas con verde, dando un aspecto básico de hojas, por si está parte llegaba a ser visual una vez armado el vestido.
I painted the lower part of the leaves with green, giving a basic look of leaves, in case this part became visual once the dress was assembled.

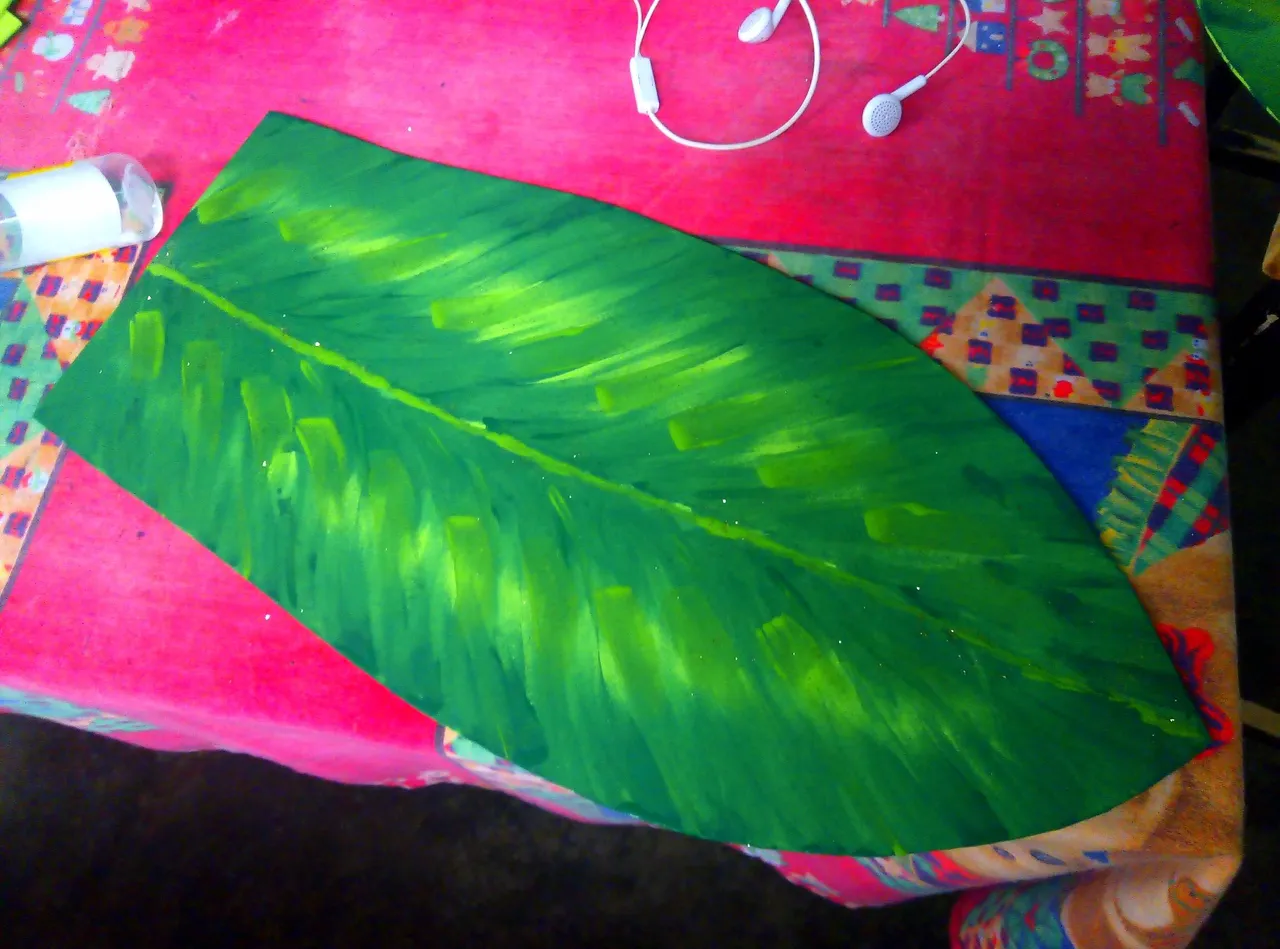
- Luego detalle la parte superior con una base de verde primavera, y retoques de verde manzana, dejando zonas del color del foami para que se apreciará como brillo. También agregue toques de escarcha. (Dos imagenes)
Then detail the upper part with a base of spring green, and touches of apple green, leaving areas of the color of the foami so that it will look like glitter. I also added touches of glitter.

- Pinte las mini hojas, además de realizar un patrón en la que irá en la parte superior. En las demás realice un borde escarchado.
Paint the mini leaves, and make a pattern on the one that will go on top. On the others make a frosted border.

Fase de moldeado
Molding phase
- Con la plancha caliente, comencé a dar forma a los pétalos de la falda, empezando por los 4 grandes y terminando con los 4 pequeños. Puedo también dí forma a los pequeños pétalos que irán en la parte superior y las hojitas de los laterales.
With the hot iron, I began to shape the petals of the skirt, starting with the 4 large ones and finishing with the 4 small ones. I can also shape the small petals that will go on the top and the little leaves on the sides.

- Después procedí a dar forma a los foamies blancos , que serán la parte frontal del vestido.
Then I proceeded to shape the white foamies, which will be the front of the dress.

- Siendo las hojas lo último a lo que le di forma, haciendo las con una leve curvatura en las puntas.
Being the leaves the last thing I shaped, making them with a slight curvature at the ends.

Fase de pegado
Gluing phase
- Comencé a pegar la parte de la falda empezando por los foamies blancos, y luego por las hojas, siguiendo de los pétalos.
I began to glue the skirt part starting with the white foamies, and then the leaves, following the petals.

- Una vez culminado el primer lado, procedí con el segundo para culminar con la parte trasera.
Once the first side was finished, I proceeded with the second side to finish with the back.

- Para la parte superior pegue primero las hojitas de ambos costados, y después procedí a pegar cada uno los pétalos.
For the upper part I first glued the leaves on both sides, and then proceeded to glue each of the petals.

- Después realice unas mini flores con foamie amarillo y rojo escarchado, los cuales pegue a la peineta.
Then I made some mini flowers with yellow and red frosted foamie, which I glued to the comb.


Las personas quedaron encantados con este vestido, todos se sorprendieron al verla, además buscaban las partes por donde el vestido abriera y cerrara, pero me encargué de dejarlas ocultas con los propios pétalos y hojas, mi primita quedó encantada con el vestido y de cómo se veía con el. Los niños realizaron un hermoso desfile y ciclo de exposición, muy colorido por la cantidad de flores y árboles que representaban, siendo este el último acto de este año escolar.
People were delighted with this dress, everyone was surprised to see it. They were also looking for the parts where the dress opened and closed, but I took care to leave them hidden with the petals and leaves themselves. My little cousin was delighted with the dress and how she looked with it. The children made a beautiful parade and exhibition cycle, very colorful for the amount of flowers and trees they represented, this being the last act of this school year.
Quisiera invitarlos a visitar mi perfil 👉🏼
I would like to invite you to visit my profile 👉🏼


✨🌟✨

✨🌟✨
 @rafahb03 @rafahb03 |
 @rafahb.art @rafahb.art |
 @rafahb.03 @rafahb.03 |
✨🌟✨

