
Saludos a todos ❤️❤️ En fecha pasada, les enseñé a hacer un Portarretrato Dorado con Bordes realizado con una sola pieza de cartulina para su frente. Hoy les traigo el Diy Portarretrato con Esquinas en Ángulo, que se trata de que cada lado termina en ángulo y se une perfectamente con la siguiente pieza, tal como si se tratase de un verdadero portarretratos, podrán ver mi Técnica para esas esquinas en ángulo perfectas que son un verdadero Plus en este diseño que ya es hermoso.
Me complace mucho presentar otro proyecto en esta bella Comunidad de Hive Diy, soy Yennys Fernández y te invito a ver esta Publicación, donde te muestro a elevar la Calidad de este tipo de proyecto utilizando pocos pero buenos materiales, y una Técnica sencilla pero efectiva.
Deseo sinceramente que disfrutes este Tutorial y te agradezco altamente por visitar mi Blog.
Greetings to all ❤️❤️ In the past, I taught you how to make a Golden Frame with Borders made with a single cardboard piece for your forehead. Today I bring you the Diy Picture Frame with Angled Corners, which is that each side ends at an angle and joins perfectly with the next piece, just as if it were a real picture frame, you can see my Technique for those perfect angled corners that are a real plus in this already beautiful design.
I am very pleased to present another project in this beautiful Community of Hive Diy, I am Yennys Fernández and I invite you to see this Publication, where I show you how to raise the Quality of this type of project using few but good materials, and a simple but effective technique.
I sincerely hope you enjoy this Tutorial and I highly appreciate you visiting my Blog.


- Cartón
- Cartulina Dorada
- Silicón Caliente
- Regla
- Una Tablita de corte
- Tijera, Cuter y Bolígrafo
- Paperboard
- Gold Cardstock
- Hot Silicone
- Rule
- A cutting board
- Scissors, Cuter and Pen

Primero comencé utilizando el cartón, la regla y el bolígrafo, para hacer el marco del portarretrato. Hice unas tiras de 1,5cms de ancho, y las corté con el cuter.
First I started using the cardboard, the ruler and the pen, to make the frame of the portrait. I made some 1.5cm wide strips, and cut them with the cutter.

Luego, las medidas de largo que usé para éste portarretrato fueron las necesarias para que lo que se exhibiera midiera lo que mide una hoja de papel tipo carta, doblada por la mitad. De manera que, corté dos tiras de 16,5 cms y dos tiras de 23,5 cms. Quedando de la siguiente forma:
Then, the measurements of length that I used for this portrait were those necessary so that what was exhibited measured the length of a sheet of letter-type paper, folded in half. So, I cut two 16.5 cm strips and two 23.5 cm strips. Staying as follows:

Lo siguiente fue hacer lo mismo pero con la cartulina dorada. Adicionalmente, hice otras tiras en este material con 0,50 cms de ancho, para darle un bello acabado o remate a los bordes, ya lo verán más adelante. Estas tiras de largo tendrías las mismas medidas de las tiras principales, es decir dos de 16,50 cms y dos de 23,5 cms.
The next thing was to do the same but with the gold cardboard. Additionally, I made other strips in this material with 0.50 cm width, to give a beautiful finish or finish to the edges, you will see it later. These long strips would have the same measurements as the main strips, that is, two of 16.50 cm and two of 23.5 cm.

Mi Técnica para esquinas en ángulo En las puntas de las tiras principales, marco 1,5 cms y trazo una línea. Esta medida obedece a que es el ancho de las mismas tiras. Luego, marco una línea diagonal y corto por ella.
My Angled Corner Technique At the tips of the main strips, I mark off 1.5cm and draw a line. This measurement is due to the fact that it is the width of the same strips. Then I mark a diagonal line and cut along it.

Al cortar todas las esquinas, y hacerlas coincidir, pueden ver que se forma nuevamente el dibujo del cuadrado, y que la forma de ángulo se presenta perfectamente frente a la siguiente.
By cutting off all the corners, and matching them, you can see that the drawing of the square is formed again, and that the angle shape presents itself perfectly against the next.

De esta forma debe quedar y cuadrar perfecto el diseño del portarretrato. Como les dije es muy sencillo y efectivo, no tendrás problemas con ángulo porque estos se forman espontáneamente haciéndolo de este modo.
Aquí puedes ver el reverso del cartón, que aunque es más bonito, liso y además plastificado, no nos conviene trabajar por este lado, ya que eventualmente se despegan las cosas de este tipo de material, así que para garantizar que esto no pase, lo mejor es trabajar por la parte seca y aspera del cartón.
In this way, the design of the portrait should fit perfectly. As I told you, it is very simple and effective, you will not have problems with angles because they form spontaneously doing it this way.
Here you can see the back of the cardboard, which although it is more beautiful, smooth and also laminated, it is not convenient for us to work on this side, since things of this type of material eventually come unstuck, so to guarantee that this does not happen, we it is better to work on the dry and rough side of the cardboard.

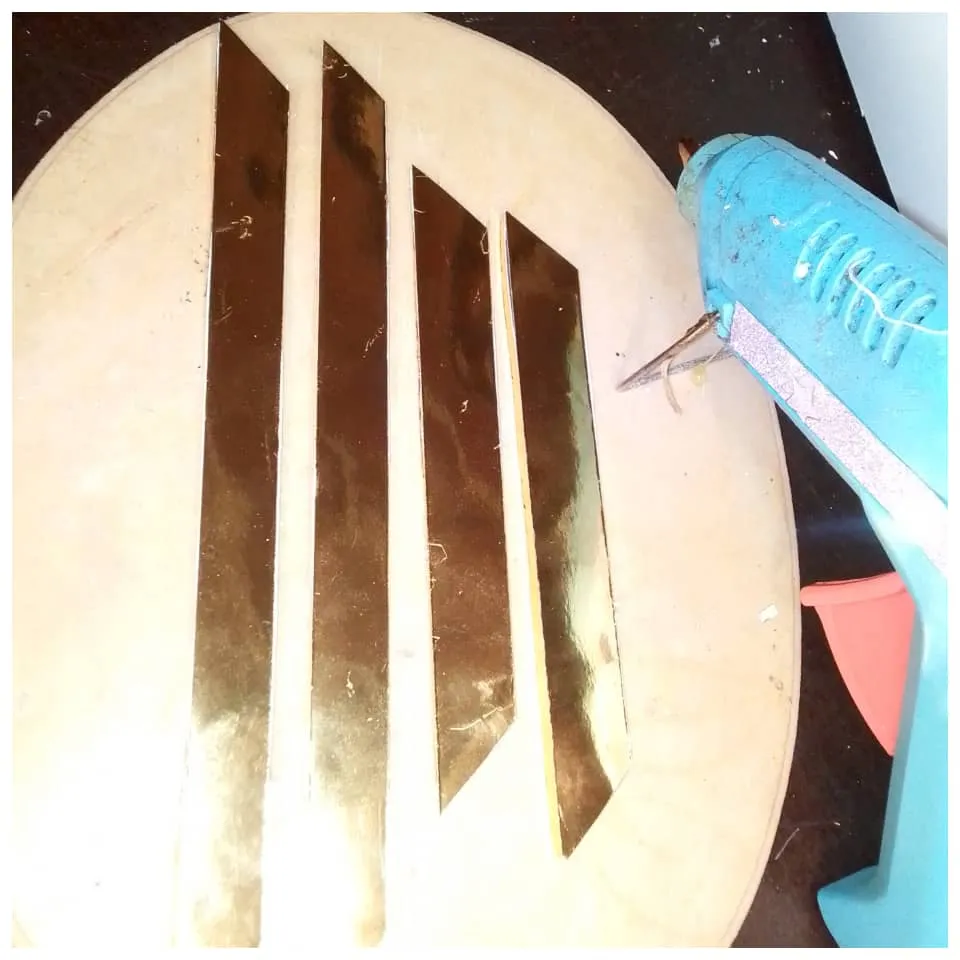
Ahora, forro mi parte gruesa o frontal de las tiras principales con su cartulina dorada, utilizando el silicón caliente. Corto con la tijera la esquina de la cartulina dorada, fijándome de la pieza de cartón que estoy utilizando.
Now, I line my thick or front part of the main strips with their gold cardstock, using the hot glue. I cut with the scissors the corner of the gold cardstock, paying attention to the piece of cardboard that I am using.

Para elevar la calidad de mi trabajo, no descuidé los bordes, y si los forré igualmente con cartulina dorada, con las tiras de 0,50 cms que había preparado para tal fin.
To raise the quality of my work, I did not neglect the edges, and I also lined them with gold cardboard, with the 0.50 cm strips that I had prepared for this purpose.

Así quedan las piezas de la estructura principal del portarretrato, se ve hermosa y espejada, bien rematada y luminosa.
This is how the pieces of the main structure of the portrait remain, it looks beautiful and mirrored, well finished and bright.
Aquí pueden ver que compruebo que mis esquinas en ángulos, van quedando bien prolijas y exactas.
Here you can see that I check that my angled corners are looking neat and exact.

Como base recorté un cartón que midió igualmente 16,5 cms por 23,5 cms. y empiezo a pegar mis tiras forradas en cartulina dorada, colocando silicón caliente solo en el borde extremadamente externo y además uno de los bordes no lo pegué, sino que ya estando el resto de la estructura bien fijo, éste va a quedar por defecto igual estable. Necesito no pegar ésta únicamente pieza, ya que por ahí voy a introducir mi foto o impresión, y podré cambiarla a mi gusto.
Así que pendientes, no pegar un lado al cartón. Ya escoges tu si quieres que el Portarretrato sea vertical u horizontal para determinar cual tira no vas a pegar de la base.
As a base I cut out a cardboard that also measured 16.5 cm by 23.5 cm. and I start to glue my strips covered in gold cardboard, placing hot silicone only on the extreme outer edge and also I did not glue one of the edges, but since the rest of the structure is well fixed, it will be by default same stable. I need not to paste this only piece, since that is where I am going to introduce my photo or print, and I can change it to my liking.
So earrings, do not glue one side to the cardboard. You already choose if you want the Portrait to be vertical or horizontal to determine which strip you are not going to paste from the base.

Corté otra tira de cartón, de 23 cms por 6 cms, y le doble una parte de un extremo, para pegarla por el reverso del portarretrato, y ésta piezas permitirá que el Portarretrato se pueda quedar estable en una mesa, repisa o donde quieras.
De la siguiente forma:
I cut another strip of cardboard, 23 cm by 6 cm, and I folded a part of one end, to stick it on the back of the picture frame, and these pieces will allow the picture frame to remain stable on a table, shelf or wherever you want.
In the following way:

Ya está listo mi Portarretrato Dorados con esquinas en ángulo ves que se ve más bonito y realista.
My Golden Frame with angled corners is ready, you see that it looks more beautiful and realistic.

Le coloqué una imagen que saqué de una revista para poder apreciar como se ve. Puedes ver que de diferentes perspectivas se ve muy bien, parece un Portarretrato comprado, brilla mucho con las luces del ambiente que rebotan en este material dorado que utilicé.
I put an image that I took from a magazine to appreciate how it looks. You can see that from different perspectives it looks very good, it looks like a purchased Portrait, it shines a lot with the ambient lights that bounce off this gold material that I used.

Deseo que te haya gusta, y que te animes a hacerlo, te ahorrarás un montón de dinero, y puedes hacer varios para darle un toque de lujo y brillo a tu hogar sin gastar mucho.
Mil gracias por leer mi Blog, y te invito cordialmente a mi próxima Publicación.
I hope you like it, and that you are encouraged to do it, you will save a lot of money, and you can make several to give a touch of luxury and shine to your home without spending much.
Thank you very much for reading my Blog, and I cordially invite you to my next Publication.
---------- ❤️❤️❤️❤️ ----------
Las fotos las tomé con mi teléfono SSmoth 6.5 y las edité en la App InShot y son de mi propiedad 
También edité con https://www.canva.com/
Utilicé el Traductor Google


I took the photos with my SSmoth 6.5 phone and edited them in the InShot App and they are my property
I also edited with https://www.canva.com/
I used Google Translate
My social networks:
Discord: YennysYaneth#0189
Twitter:
Instagram: