
Si algo tenemos en común las modistas es que siempre tenemos un proyecto pendiente, hoy les traigo el mío, el gorro multiuso, esta pieza es usada por el personal médico y el de cocina, desde hace mucho tiempo tenía ganas de hacerlo, demoré porque me gusta hacer los patrones por mi cuenta y es un paso que suele costarme, pero finalmente lo hice y aquí les cuento cómo.
Dressmakers have in common a project pending all the time, today I bring you mine, the multipurpose hat, this piece is used by the medical and kitchen staff. I delayed to do it because I like to make my own patterns and usually it is a hard step for me, but I did it and I tell you how.
Antes de empezar tengamos limpia la superficie a trabajar y vamos por los materiale y: tijeras, lápiz, papel, alfileres, tela a gusto personal procurando sea ligera y fresca, paciencia y buena música.
First, clean surface to work on and let's get the materials: scissors, pencil, paper, pins, fabric as you like, trying to be light and fresh, patience and good music.

Este patrón es para un gorro multiuso ajustable, igual pruebatelo en papel antes de cortar la tela para tener las medidas exactas.
This pattern is for an adjustable multipurpose cap, so try it on paper before cutting the fabric to get the exact measurements.
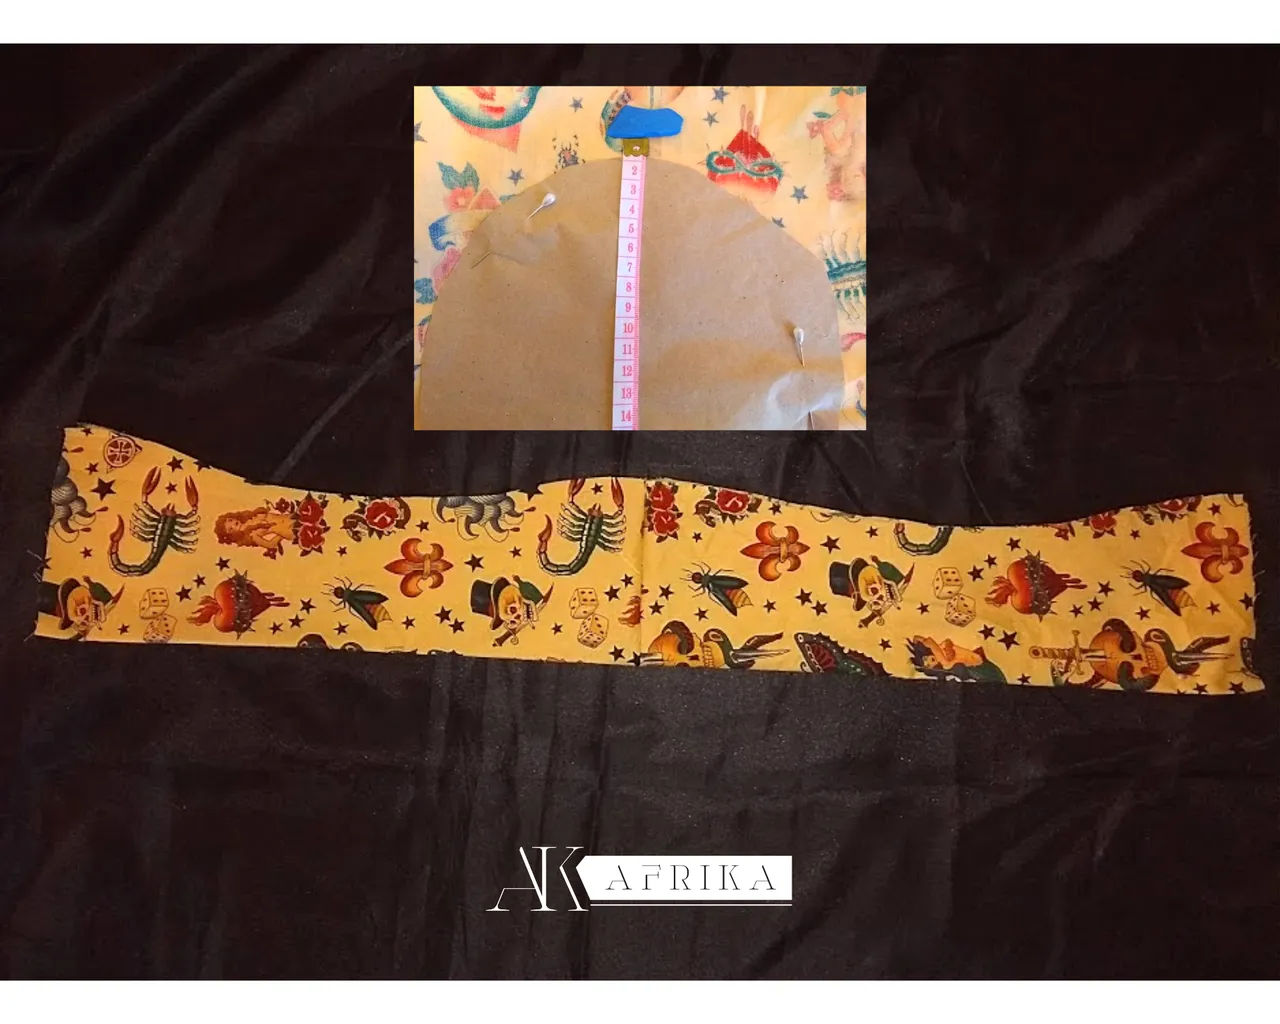
Ahora sí, nos vamos a la tela, lo hice con costura escondida por eso corte 2 piezas de cada parte, pero si quieres hacerlo normal, menos complicado pica una pieza de cada una y manos a la tela.
Fabric time, I did it with hidden sewing so I cut 2 pieces of each part, but if you want to make it normal, less complicated, cut a piece of each and hands to the fabric.

Este es el paso donde unimos las piezas con alfileres, si lo haces con costura escondida coloca las piezas como formando un sandwich, si es de manera simple solo une con el revés de la tela por encima. Cosemos dejando el extremo inferior abierto y volteamos.
Now join the pieces with pins, if you do it with hidden sewing, place the pieces as a sandwich, if it is simple just join with the back of the fabric above. Sew leaving the bottom end open and lip over.
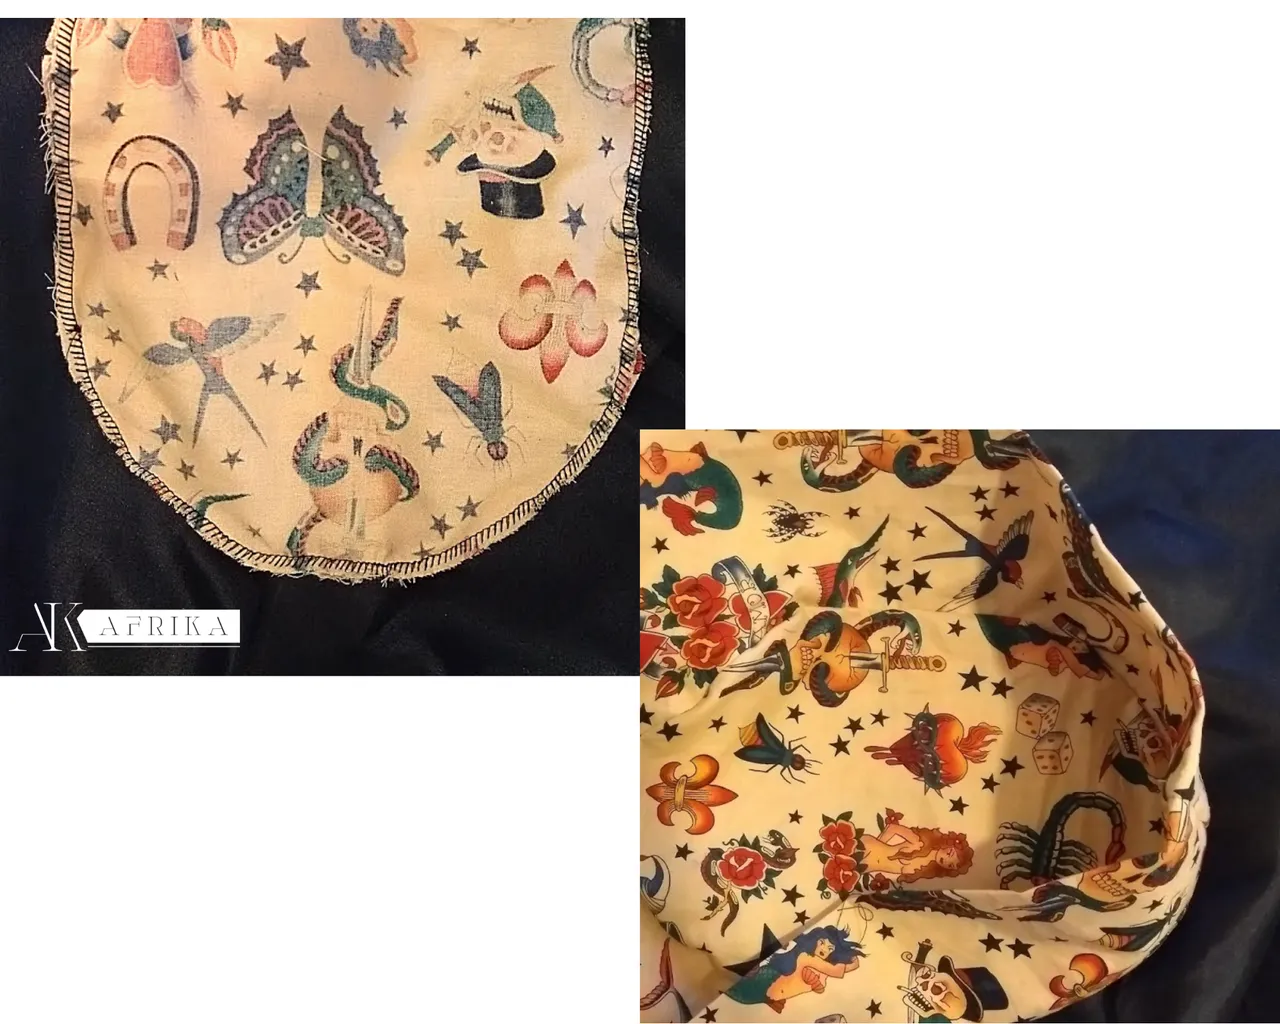
Ahora cerramos el extremo tal como aparece en la foto para tener una costura prolija, también cosemos la cinta para ajustar y pasamos por dentro del extremo inferior con ayuda de un alfiler. Así tenemos el gorro multiuso listo.
Now we close the side as shown in the photo to have a neat seam, also sew the band to adjust it and we pass inside the lower end with the help of a pin. And the multipurpose hat is ready.


Gracias gente Hive por leerme. Las fotos son del teléfono moto g 5 y editadas con canva. Espero sea de tu utilidad, si lo haces me etiquetas para verlo. Acá te dejo el tutorial de otro accesorio para que sigas en casa creativo.
Thanks Hive people for reading me. Pictures are from the moto g 5 phone and edited with canva. I hope it's useful for you, if you do it tag me to see it. Here you have more accessories tutorials keep you at home creative.
Hazla Tú Mismo - Do it Yourself

Bordando el Sol - Embroider the Sun
