✨¡Hola amigos amantes de la comida!✨ Espero estén pasando un buen día.
Espero todos hayan pasado una excelente semana y pasen un fin de semana bastante descansado. En esta ocasión les comparto una deliciosa receta de palmeritas. No saben lo feliz que estuve por hacer está receta, pues desde hace un montón que quería hacer mis propias palmeritas, pero tenía en mente que era algo mucho más complicado de elaborar, pero la verdad es que el proceso es mucho más corto, aunque preparar la masa de hojaldre tiene su proceso para hacer una preparación rápida y darnos un gusto, no tuve que esperar mucho tiempo.
Hace unos días me encontraba con ganas de comprarlas en la panadería, pero al final me decidí a hacerlas y quedé fascinada con este bonito y delicioso resultado.
🔸A continuación, los dejo con el paso a paso:
✨Hello food-loving friends!✨ I hope you are having a great day.
I hope everyone had a great week and a restful weekend. This time I'm sharing a delicious recipe for palmeritas. You don't know how happy I was to make this recipe, because I've wanted to make my own palmeritas for ages, but I had in mind that it was something much more complicated to make, but the truth is that the process is much shorter, although preparing the puff pastry has its process to make a quick preparation and give us a treat, I didn't have to wait long.
A few days ago I was wanting to buy them at the bakery, but in the end I decided to make them and I was fascinated with this beautiful and delicious result.
🔸Next, I leave you with the step by step:

♥️Espero les guste. ¡Comencemos!
♥️I hope you like it. Let's get started!

🍶 INGREDIENTES | 🍶 INGREDIENTS
Masa:
250 gr Harina de trigo.
150 ml de agua.
15 gr de mantequilla.
7 gr de azúcar.
5 gr de sal.
Para rebozar:
100 gr de azúcar.
Para untar:
3 cucharadas de mantequilla.
Dough:
250 gr Wheat flour.
150 ml water.
15 gr butter.
7 gr sugar.
5 gr salt.
For coating:
100 gr sugar.
For spreading:
3 tablespoons of butter.

✨ PREPARACIÓN | ✨ PREPARATION
- PASO 1:
Lo primero que debemos hacer es agregar a un recipiente hondo los 250 gr Harina de trigo, preferiblemente, previamente tamizada para evitar que se formen grumos o residuos. Luego, abrimos un agujero en medio para que sea más sencillo a la hora de incorporar los ingredientes y agregamos en medio los 15 gr de mantequilla, 7 gr de azúcar y 5 gr de sal.
- 1 STEP:
The first thing we must do is add the 250 gr of wheat flour to a deep container, preferably previously sifted to avoid lumps or residues forming. Then, we open a hole in the middle to make it easier when incorporating the ingredients and add the 15 gr of butter, 7 gr of sugar and 5 gr of salt in the middle.

- PASO 2:
Continuamos agregando 150 ml de agua, comenzamos a incorporar poco a poco todos los ingredientes con ayuda de una paleta o con las manos bien limpias. Al estar más o menos integrado, espolvoreamos harina sobre la mesa, colocamos la masa encima y comenzamos a amasar por 5 minutos o hasta que esté bien integrada.
- 2 STEP:
We continue adding 150 ml of water, we begin to slowly incorporate all the ingredients with the help of a spatula or with clean hands. When it is more or less integrated, we sprinkle flour on the table, place the dough on top and begin to knead for 5 minutes or until it is well integrated.

- PASO 3:
Al estar integrada, nuevamente espolvoreamos un poco de harina y estiramos hasta dejarla a un grosor de 0.5 cm. Seguidamente, pincelamos con la mitad de las 3 cucharadas de mantequilla y doblamos los extremos hacia adentro como se muestra en las imágenes y llevamos al congelador por 10 minutos. Al pasar el tiempo, volvemos a estirar la masa una segunda vez, untamos el resto de mantequilla, doblamos y al congelador por 10 min.
- 3 STEP:
Once it is integrated, we sprinkle a little flour again and stretch it until it is 0.5 cm thick. Next, we brush with half of the 3 tablespoons of butter and fold the ends inwards as shown in the pictures and put it in the freezer for 10 minutes. After the time has passed, we stretch the dough a second time, spread the rest of the butter, fold it and put it in the freezer for 10 minutes.


- PASO 4:
Al retirar la masa del congelador, esparcimos 100 gr de azúcar sobre la mesa, colocamos la masa encima y estiramos, dando vuelta a la masa para que ambos lados se llenen de azúcar. Apartamos el excedente de azúcar, doblamos ambos extremos de la masa a la mitad y estas mitades nuevamente a la mitad.
- 4 STEP:
After removing the dough from the freezer, sprinkle 100 g of sugar on the table, place the dough on top and stretch it, turning the dough so that both sides are covered with sugar. Remove the excess sugar, fold both ends of the dough in half and then fold these halves in half again.


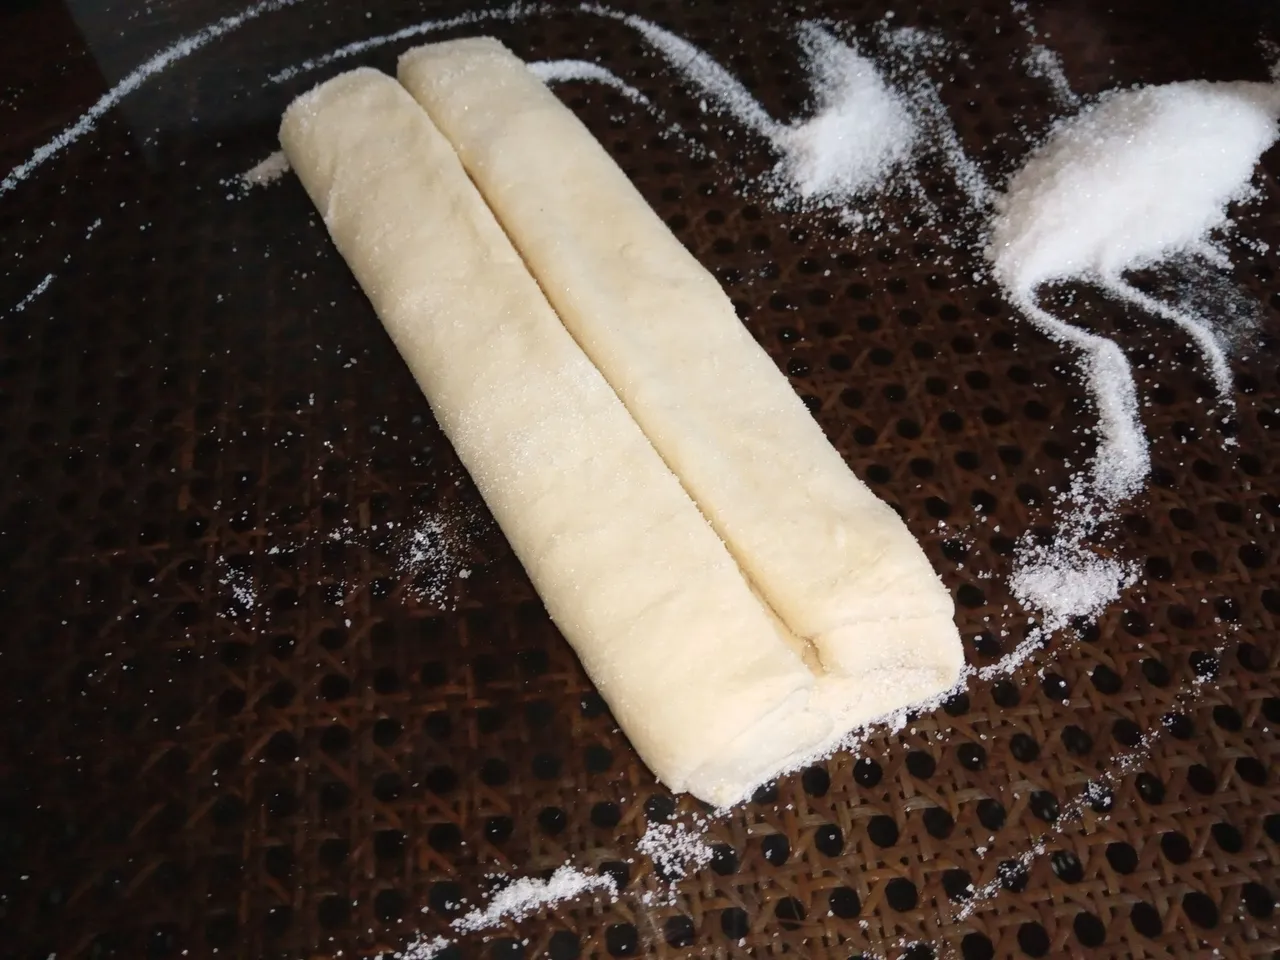
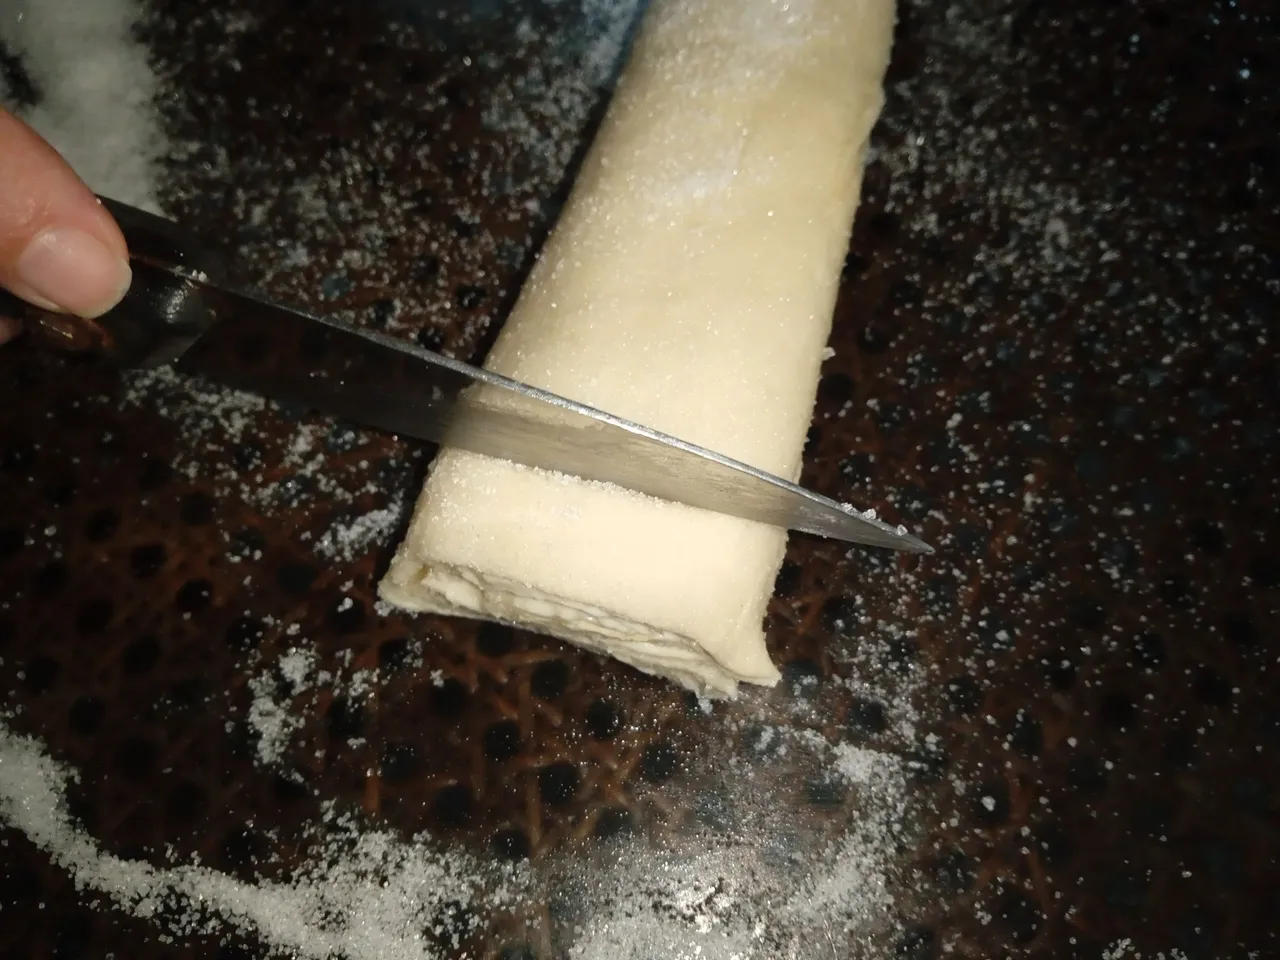
- PASO 5:
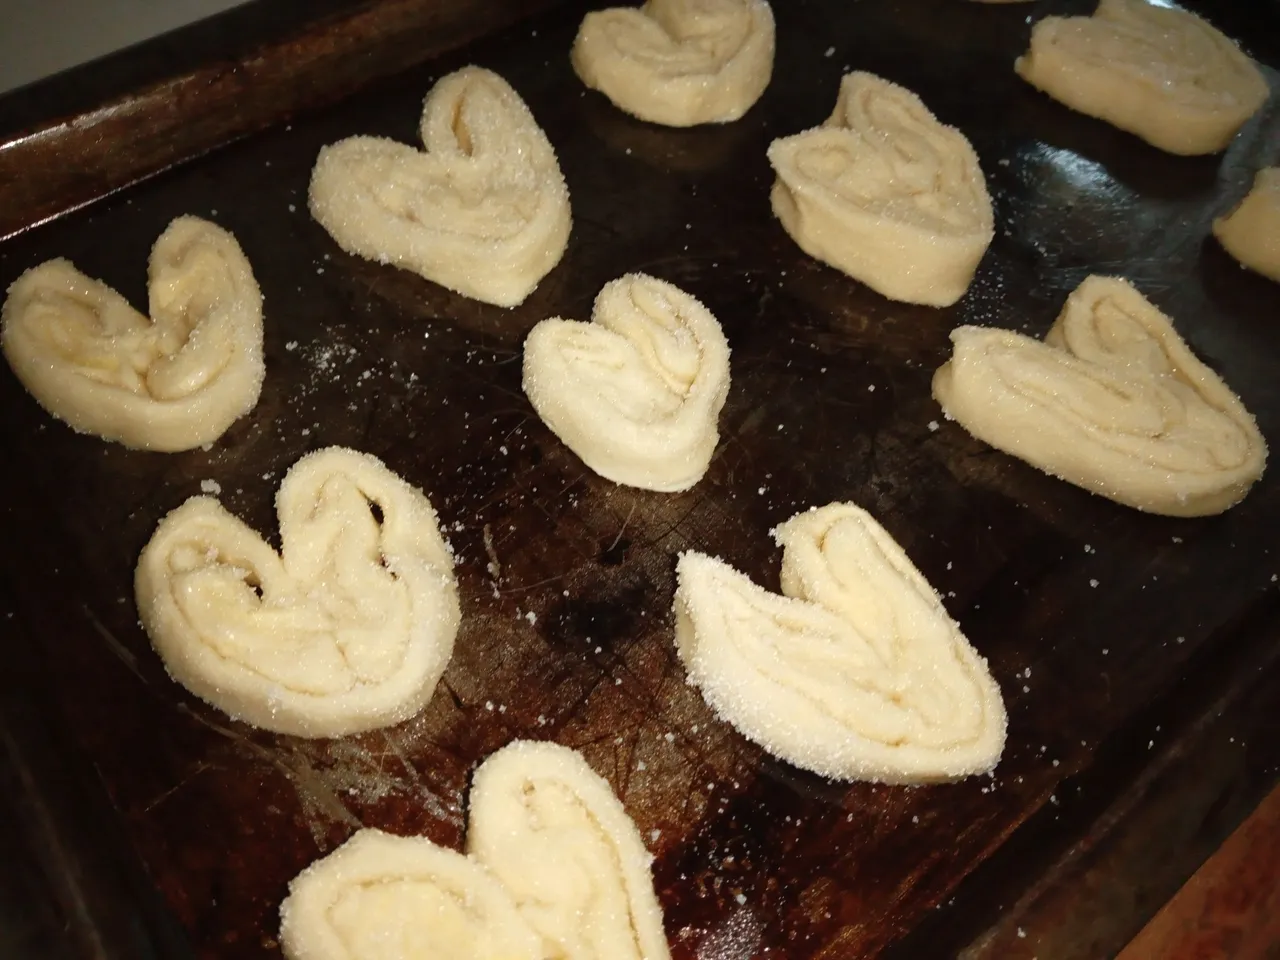
Seguidamente, unimos ambos extremos uno sobre al otro y comenzamos a cortar con ayuda de un cuchillo nuestras palmeritas con un grosor de 1 cm o 0.5 cm. Podemos pasar las galletas ya cortadas sobre el azúcar que queda o directamente llevarlas a una bandeja previamente engrasada, dejando una distancia entre cada una y llevar a horno precalentado a 190° de 25 a 30 minutos.
- 5 STEP:
Next, we join both ends one on top of the other and begin to cut our palmeritas with the help of a knife, with a thickness of 1 cm or 0.5 cm. We can spread the already cut cookies on the remaining sugar or directly take them to a previously greased tray, leaving a distance between each one and place them in a preheated oven at 190° for 25 to 30 minutes.
✨¡Y listo! De esta manera es como podemos preparar nuestras propias galletas palmerita en casa. No saben lo contenta que me hizo hacer esta masa porque si se ven las capitas del hojaldre y el azúcar quedo dorada, sin dejar a un lado que es sabor es idéntico al de las palmeritas. Espero les haya gustado el paso a paso y se animen a elaborarlo.
❤️Hasta la próxima publicación.
✨✨¡And ready!✨ This is how we can prepare our own palmerita cookies at home. You don't know how happy I was to make this dough because you can see the layers of the puff pastry and the sugar turned golden, not to mention that the flavor is identical to that of the palmeritas. I hope you liked the step by step and are encouraged to make it.
❤️Until the next post.
✨RESULTADO: | ✨RESULT:


!TE DESEO UN GRAN DÏA¡
Todas las fotografías son de mi propiedad.
Separador y Fotos editadas en Canva
!I WISH YOU A GOOD DAY
All photographs are my property.
Photos edited in Canva